Apache httpd : Web メール : RoundCube2022/06/17 |
|
RoundCube をインストールして Web メールシステムを構築します。
当例では以下のような環境を例にします。
メールサーバーはローカルネットワーク内の別ホストのメールサーバーを利用するよう設定します。 またバックエンドでデータベースを使用するため、MySQL, SQLite, PostgreSQL のいずれかがインストール済みである必要があります。 当例では MariaDB を利用するよう設定します。 +----------------------+ | +----------------------+ | [ www.srv.world ] |10.0.0.31 | 10.0.0.32| [ mail.srv.world ] | | Apache httpd +----------+----------+ Postfix | | (Roundcube) | | Dovecot | | MariaDB | | | +----------------------+ +----------------------+ |
| [1] | |
| [2] | |
| [3] |
こちらを参考に SMTP/IMAP サーバー共に SSL/TLS の設定を実施しておきます。(必須ではないが推奨)
|
| [4] | |
| [5] |
こちらを参考に httpd 稼働サーバーに SSL/TLS の設定を実施しておきます。(必須ではないが推奨)
|
| [6] | |
| [7] | RoundCube 用のデータベースを作成しておきます。 |
|
[root@www ~]# mysql Welcome to the MariaDB monitor. Commands end with ; or \g. Your MariaDB connection id is 56 Server version: 10.5.13-MariaDB MariaDB Server Copyright (c) 2000, 2018, Oracle, MariaDB Corporation Ab and others. Type 'help;' or '\h' for help. Type '\c' to clear the current input statement. # [roundcubemail] データベース作成 # [password] の箇所は設定したいパスワードに置き換え MariaDB [(none)]> create database roundcubemail; Query OK, 1 row affected (0.000 sec) MariaDB [(none)]> grant all privileges on roundcubemail.* to roundcube@'localhost' identified by 'password'; Query OK, 0 rows affected (0.083 sec) MariaDB [(none)]> exit Bye |
| [8] | RoundCube のインストールと設定です。 |
|
[root@www ~]# cd /usr/share/roundcubemail/SQL [root@www SQL]# mysql -u roundcube -D roundcubemail -p < mysql.initial.sql Enter password: # MariaDB roundcube パスワード [root@www SQL]#
[root@www ~]#
cp -p /etc/roundcubemail/config.inc.php.sample /etc/roundcubemail/config.inc.php [root@www ~]# vi /etc/roundcubemail/config.inc.php // 28行目 : DB 接続情報を変更 // [password] の箇所は MariaDB の [roundcube] ユーザーに設定したパスワード $config['db_dsnw'] = 'mysql://roundcube:password@localhost/roundcubemail'; // 41行目 : IMAP サーバーを指定 // 下例は STARTTLS 接続 $config['default_host'] = 'tls://mail.srv.world'; // 55行目 : SMTP サーバーを指定 // 下例は STARTTLS 接続 $config['smtp_server'] = 'tls://mail.srv.world'; // 58行目 : SMTP ポートを指定 // 下例は STARTTLS ポート $config['smtp_port'] = 587; // 62行目 : 確認 // SMTP 認証に IMAP 認証と同じユーザー名を使用する $config['smtp_user'] = '%u'; // 66行目 : 確認 // SMTP 認証に IMAP 認証と同じパスワードを使用する $config['smtp_pass'] = '%p'; // 73行目 : 表示画面のタイトルを変更 $config['product_name'] = 'Server World Webmail'; // 最終行に追記 // IMAP ポート指定 (STARTTLS 接続) $config['default_port'] = 143; // SMTP 認証タイプを指定 $config['smtp_auth_type'] = 'LOGIN'; // SMTP HELO host を指定 $config['smtp_helo_host'] = 'mail.srv.world'; // ドメイン名を指定 $config['mail_domain'] = 'srv.world'; // UserAgent を指定 $config['useragent'] = 'Server World Webmail'; // SMTP と IMAP の接続オプションを指定 $config['imap_conn_options'] = array( 'ssl' => array( 'verify_peer' => true, 'CN_match' => 'srv.world', 'allow_self_signed' => true, 'ciphers' => 'HIGH:!SSLv2:!SSLv3', ), ); $config['smtp_conn_options'] = array( 'ssl' => array( 'verify_peer' => true, 'CN_match' => 'srv.world', 'allow_self_signed' => true, 'ciphers' => 'HIGH:!SSLv2:!SSLv3', ), );
[root@www ~]#
vi /etc/httpd/conf.d/roundcubemail.conf # 14行目 : 必要に応じてアクセス許可 IP を追記 # * デフォルトはローカルホストのみ許可 Require ip 10.0.0.0/24
systemctl restart httpd |
| [9] | SELinux を有効にしている場合は、ポリシーの許可設定が必要です。 |
|
[root@www ~]# setsebool -P httpd_can_network_connect on |
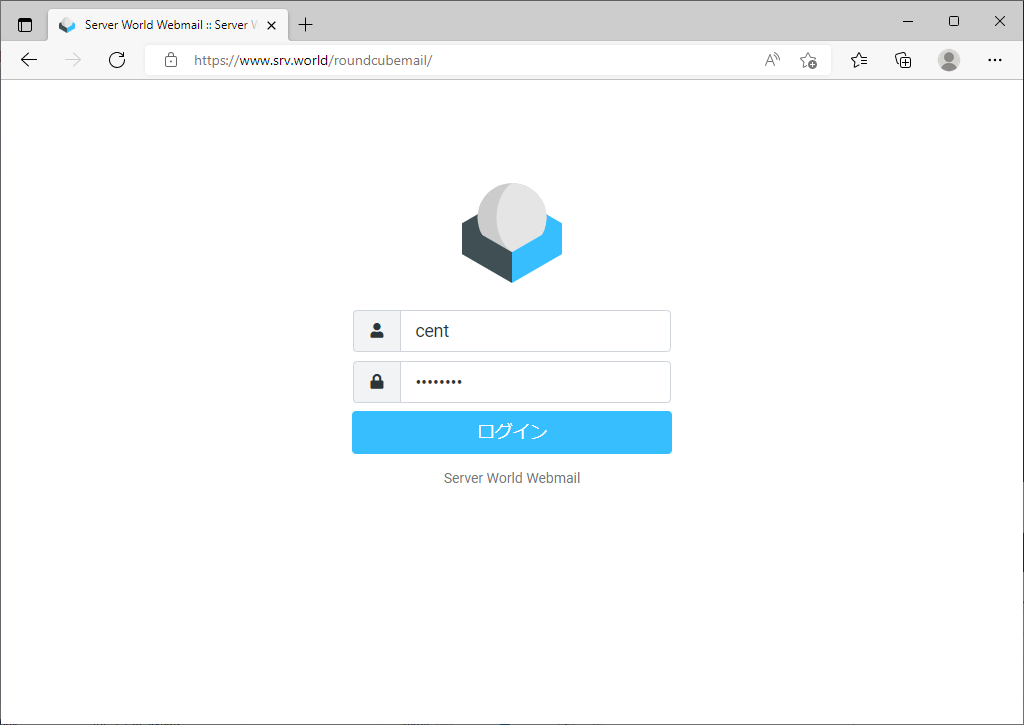
| [10] | アクセス許可したネットワーク内の任意のクライアントコンピューターで Web ブラウザーを起動し、[https://(サーバーのホスト名 または IP アドレス)/roundcubemail/] にアクセスします。すると RoundCube のログイン画面が表示されるので、メールサーバー側に登録済みの任意のユーザーでログインします。 |
|
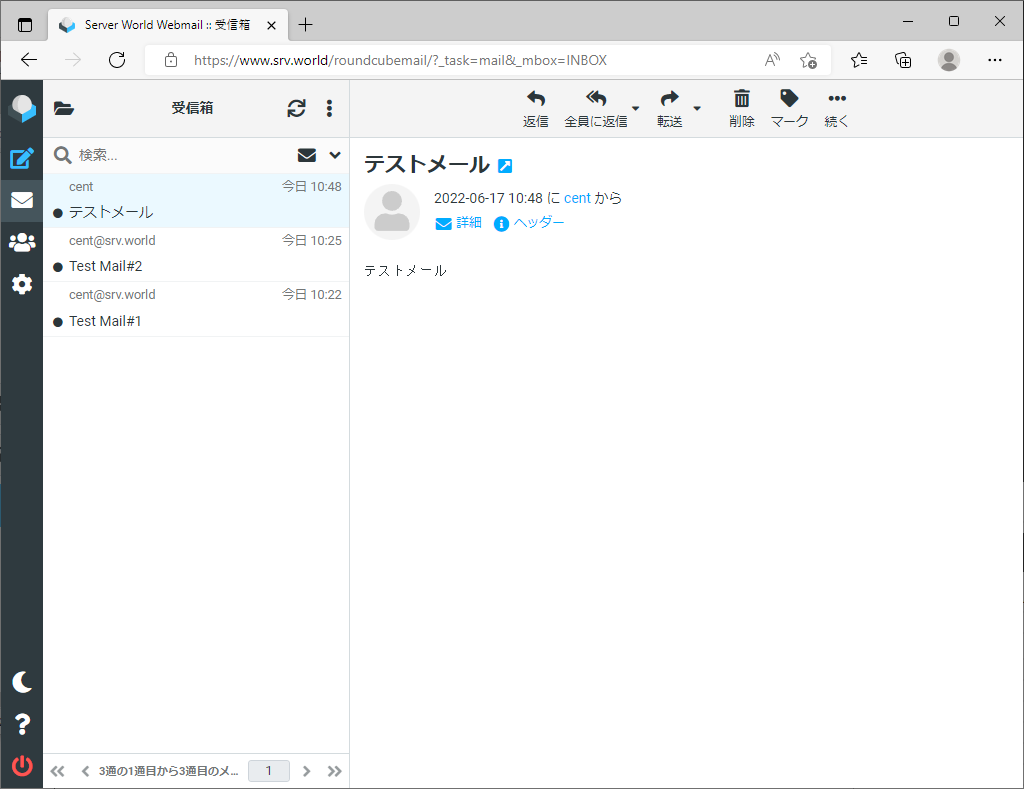
| [11] | ログインできました。メールを送受信テストを実施して問題ないか確認しておくとよいでしょう。 |
|
関連コンテンツ