Webメールシステム - RoundCube2011/06/26 |
|
RoundCube をインストールして、Yahoo メールや Hotmail のようなWebメールシステムを構築します。
ここの例ではメールサーバーにはローカルではなく、下記の通り、同一LAN内の別ホストのものを利用するように設定します。
よって、対象ホストにSMTP/IMAPサーバー導入済みが前提です。
またバックエンドでデータベースを使うため、MySQL, SQLite, PostgreSQL のいずれかを導入済みである必要があります。
ここではMySQL 導入済みを前提として進めます。
www.srv.world - RoundCube 導入サーバー
mail.srv.world - SMTP/IMAPサーバー |
|
| [1] | RoundCube のインストールと設定 |
|
[root@www ~]#
[root@www ~]# yum --enablerepo=epel -y install roundcubemail php-pear-MDB2-Driver-mysql # EPELからインストール mysql -u root -p # MySQLに接続 Enter password: Welcome to the MySQL monitor. Commands end with ; or \g. Your MySQL connection id is 2 Server version: 5.0.77 Source distribution Type 'help;' or '\h' for help. Type '\c' to clear the buffer. # 「roundcube」データベース作成 ( 'password'の箇所は設定するパスワードを入力 )
mysql>
create database roundcube character set utf8 collate utf8_bin; Query OK, 1 row affected (0.00 sec)
mysql>
grant all privileges on roundcube.* to roundcube@'localhost' identified by 'password'; Query OK, 0 rows affected (0.00 sec)
mysql>
mysql> flush privileges; Query OK, 0 rows affected (0.00 sec) exit Bye [root@www ~]# cd /usr/share/doc/roundcubemail-*/SQL [root@www SQL]# mysql -u roundcube -p roundcube < mysql.initial.sql Enter password: [root@www SQL]#
[root@www ~]#
vi /etc/roundcubemail/db.inc.php # 20行目:以下のように変更 ('password'の箇所はroundcubeに設定したパスワード) $rcmail_config['db_dsnw'] = 'mysql://roundcube: password @localhost/roundcube ';
[root@www ~]#
vi /etc/roundcubemail/main.inc.php # 38行目:IMAPサーバーを指定 (SSL経由) $rcmail_config['default_host'] = ' ssl://mail.srv.world ';
# 41行目:IMAPポート変更 (SSL経由) $rcmail_config['default_port'] = 993 ;
# 50行目:ドメインを指定 $rcmail_config['mail_domain'] = ' srv.world ';
# 63行目:SMTPサーバーを指定 (SSL経由) $rcmail_config['smtp_server'] = ' ssl://mail.srv.world ';
# 66行目:SMTPポート変更 (SSL経由) $rcmail_config['smtp_port'] = 465 ;
# 70行目:変更 ( SMTP認証にIMAP認証と同じユーザー名を使う ) $rcmail_config['smtp_user'] = ' %u ';
# 74行目:変更 ( SMTP認証にIMAP認証と同じパスワードを使う ) $rcmail_config['smtp_pass'] = ' %p ';
# 78行目:変更 ( SMTP認証タイプ ) $rcmail_config['smtp_auth_type'] = ' LOGIN ';
# 84行目:SMTP HELO host を指定 $rcmail_config['smtp_helo_host'] = ' mail.srv.world ';
# 121行目:日本語に変更 $rcmail_config['locale_string'] = ' ja ';
# 127行目:表示画面の日付形式を「年.月.日 時:分」に変更 $rcmail_config['date_long'] = ' Y.m.d H:i ';
# 133行目:UserAgent変更 $rcmail_config['useragent'] = ' Server World Webmail ';
# 136行目:表示画面のタイトルを変更 $rcmail_config['product_name'] = ' Server World Webmail ';
# 184行目:デフォルト文字セット変更 $rcmail_config['default_charset'] = ' iso-2022-jp ';
[root@www ~]#
vi /etc/httpd/conf.d/roundcubemail.conf # 5行目:変更 Alias /roundcube /usr/share/roundcubemail
<Directory /usr/share/roundcubemail/>
[root@www ~]# Order Deny,Allow Deny from all Allow from 127.0.0.1 10.0.0.0/24 # アクセス許可IP追記 </Directory> /etc/rc.d/init.d/httpd restart Stopping httpd: [ OK ] Starting httpd: [ OK ] |
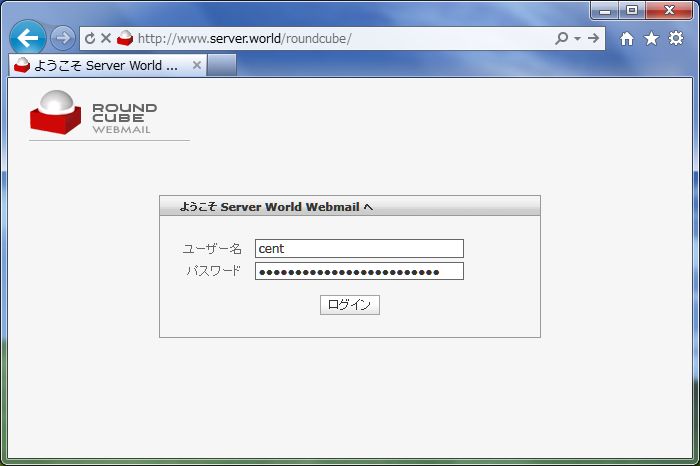
| [2] | ブラウザから「http://(サーバーのホスト名またはIPアドレス)/roundcube/」にアクセスします。すると 以下のようにログイン画面になるのでユーザー名とパスワードを入力してログインします。 |
|
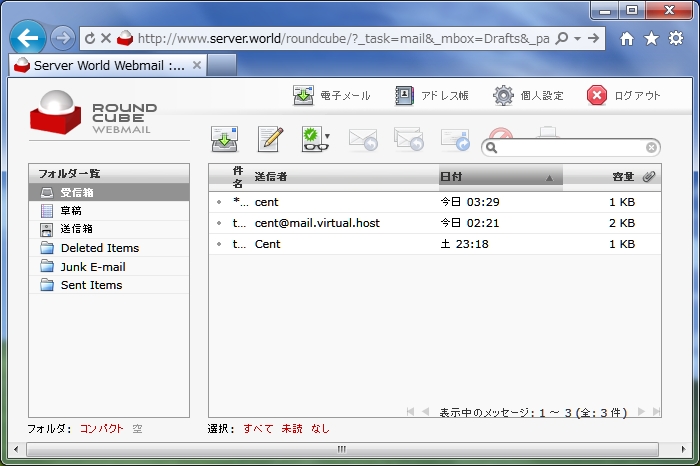
| [3] | ログインできました。 |
|
関連コンテンツ