ProFTPD Over SSL/TLS2015/05/20 |
|
ProFTPD を SSL/TLS で利用できるように設定します。
|
|
| [1] | 証明書を作成しておきます。 |
|
root@www:~# cd /etc/ssl/private root@www:/etc/ssl/private# openssl req -x509 -nodes -newkey rsa:1024 -keyout proftpd.pem -out proftpd.pem -days 365 Generating a 1024 bit RSA private key ......++++++ .......++++++ writing new private key to '/etc/pki/tls/certs/proftpd.pem' ----- You are about to be asked to enter information that will be incorporated into your certificate request. What you are about to enter is what is called a Distinguished Name or a DN. There are quite a few fields but you can leave some blank For some fields there will be a default value, If you enter '.', the field will be left blank. ----- Country Name (2 letter code) [AU]: JP # 国 State or Province Name (full name) [Some-State]: Hiroshima # 地域(県) Locality Name (eg, city) []: Hiroshima # 都市 Organization Name (eg, company) [Internet Widgits Pty Ltd]: GTS # 組織名 Organizational Unit Name (eg, section) []: Server World # 組織の部門名 Common Name (eg, YOUR name) []: www.srv.world # サーバーのFQDN
Email Address []:
root@www:/etc/ssl/private# root@srv.world # 管理者アドレス chmod 600 proftpd.pem |
| [2] | ProFTPD の設定です。 |
|
root@www:~#
vi /etc/proftpd/proftpd.conf # 138行目:コメント解除 Include /etc/proftpd/tls.conf
root@www:~#
vi /etc/proftpd/tls.conf # 10-12行目:コメント解除 TLSEngine on TLSLog /var/log/proftpd/tls.log TLSProtocol SSLv23 # 27-28行目:コメント解除して変更
TLSRSACertificateFile
root@www:~# /etc/ssl/private/proftpd.pem TLSRSACertificateKeyFile /etc/ssl/private/proftpd.pem
systemctl restart proftpd |
|
FTPクライアント : Ubuntu
|
|
FTPクライアントの設定です。
|
|
| [3] | FTP クライアントインストール済みとして、Ubuntu クライアントの場合、以下のように設定して FTPS に接続します。 接続後は通常通りの操作でファイル転送可能です。 |
|
ubuntu@client:~$
vi ~/.lftprc
# 新規作成 set ftp:ssl-auth TLS set ftp:ssl-force true set ftp:ssl-protect-list yes set ftp:ssl-protect-data yes set ftp:ssl-protect-fxp yes set ssl:verify-certificate no lftp -u vervet www.srv.world Password: lftp vervet@www.srv.world:~> |
|
FTPクライアント : Windows
|
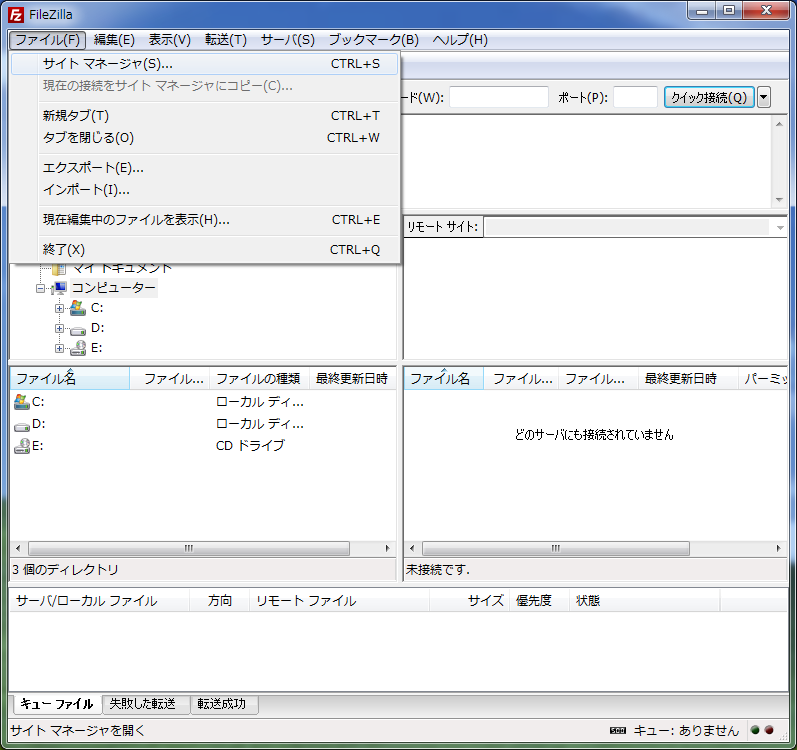
| [4] | Windows にインストールした FileZilla での FTPS 接続の設定です。 「ファイル」-「サイトマネージャ」を開きます。 |
|
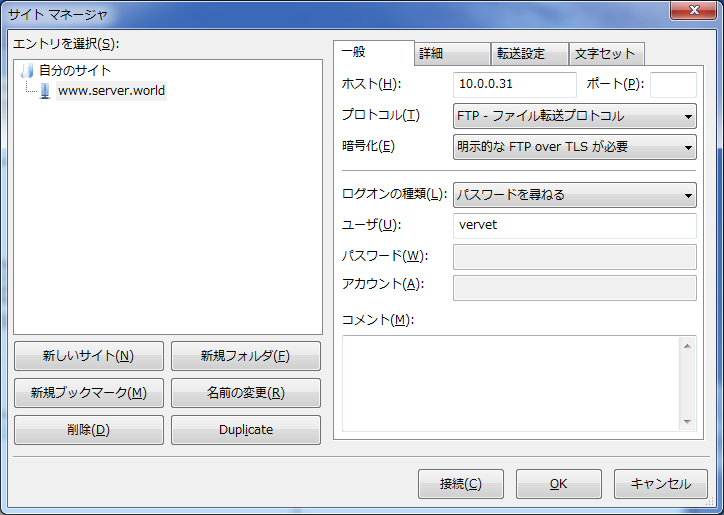
| [5] | 以下のようにサーバーに接続する情報を入力して接続します。「暗号化」には「明示的な FTP over TLS が必要」を選択します。 |
|
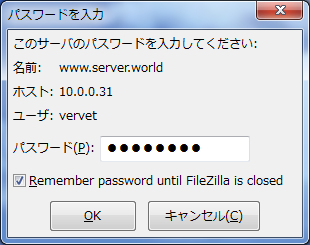
| [6] | 接続ユーザーのパスワードを入力します。 |
|
| [7] | 自身で作成した独自証明書の場合、以下のような警告が表示されます。自身で作成したものであればもちろん問題ないので、「OK」ボタンをクリックして先へ進みます。 |

|
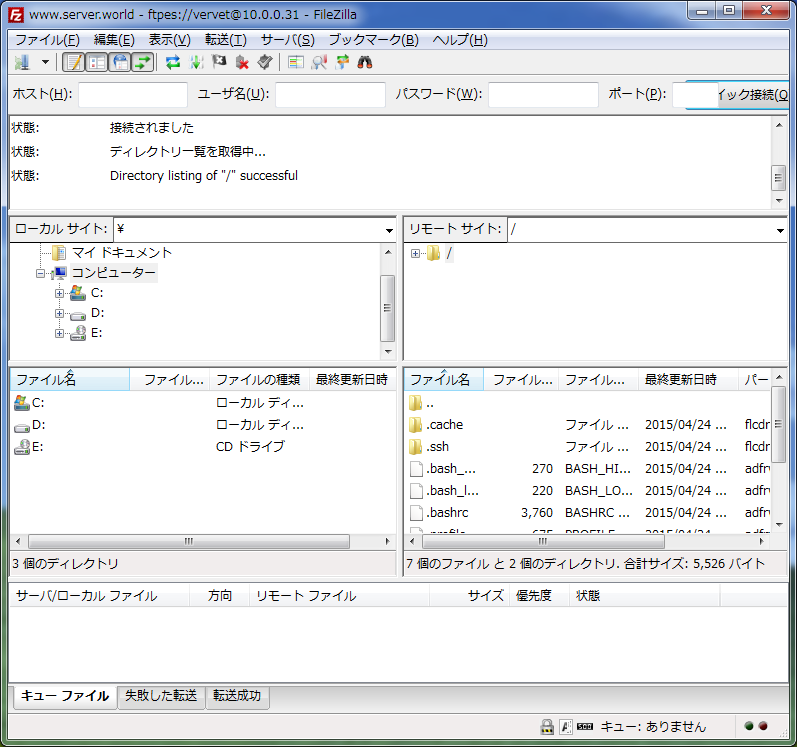
| [8] | 接続できました。 |
|
関連コンテンツ