デスクトップ環境 : VNC サーバーの設定2022/01/18 |
|
VNC サーバーをインストールして、クライアント PC からグラフィカルにリモート接続できるようにします。
|
|
| [1] | VNC サーバーをインストールします。 |
|
[root@dlp ~]# dnf -y install tigervnc-server
|
| [2] | Firewalld を有効にしている場合は、VNC サービスの許可が必要です。 |
|
[root@dlp ~]# firewall-cmd --add-service=vnc-server success [root@dlp ~]# firewall-cmd --runtime-to-permanent success |
| [3] | SELinux を有効にしている場合は、ポリシーの変更が必要です。 |
|
[root@dlp ~]#
vi vncsession.te # 以下の内容で新規作成
module vncsession 1.0;

require {
        type default_t;
        type xdm_home_t;
        type vnc_session_t;
        class dir { add_name create write };
        class file { create open write };
}

#============= vnc_session_t ==============
allow vnc_session_t default_t:dir { add_name write };
allow vnc_session_t default_t:file { create open write };
allow vnc_session_t xdm_home_t:dir create;
checkmodule -m -M -o vncsession.mod vncsession.te [root@dlp ~]# semodule_package --outfile vncsession.pp --module vncsession.mod [root@dlp ~]# semodule -i vncsession.pp |
| [4] | Tigervnc を Systemd Unit で起動する場合は以下のように設定します。 事前に、各ユーザー自身で VNC 環境の設定をして、Systemd サービス自体は root 権限で起動します。 |
|
# VNC パスワード設定 [cent@dlp ~]$ vncpasswd Password: Verify: Would you like to enter a view-only password (y/n)? n
[cent@dlp ~]$
vi ~/.vnc/config # 新規作成 # session=(使用するディスプレイマネージャー) # securitytypes=(セキュリティオプション) # geometry=(画面のサイズ) session=gnome securitytypes=vncauth,tlsvnc geometry=800x600 |
| [5] | root 権限で VNC を利用する (ディスプレイ番号)=(ユーザー名) を定義して、Systemd Unit を起動します。 |
|
[root@dlp ~]#
vi /etc/tigervnc/vncserver.users # 最終行に追記 # 説明にある通り [:(ディスプレイ番号)=(ユーザー名)] と指定する # ディスプレイ番号 1 は 5901 番ポートをリスンする # ディスプレイ番号 n + 5900 = リスンするポート # ex : ディスプレイ番号 7 + 5900 = 5907 番ポートをリスン
#
# This file assigns users to specific VNC display numbers.
# The syntax is <display>=<username>. E.g.:
#
# :2=andrew
# :3=lisa
:1=cent
:2=redhat
# 設定したディスプレイ番号分起動する [root@dlp ~]# systemctl enable --now vncserver@:1 vncserver@:2
|
| [6] |
クライアント PC に VNC クライアントをインストールして VNC サーバーに接続します。
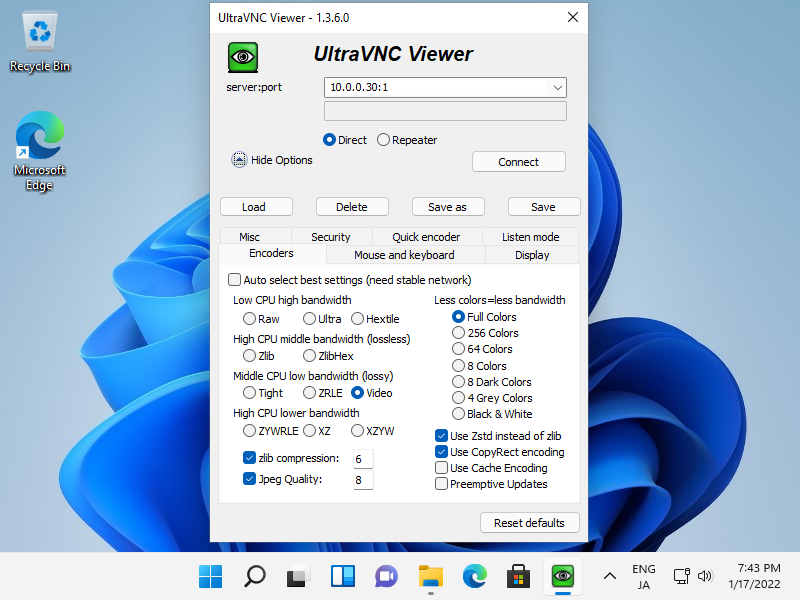
Windows 11 と UltraVNC を例にします。 下記サイトより、最新版の UltraVNC をダウンロードします。
⇒ https://www.uvnc.com/downloads/ultravnc.html
ダウンロード後、インストールして [UltraVNC Viewer] を起動します。以下の画面が起動したら [VNC Server] の欄に [(サーバーのホスト名 または IP アドレス):([1]で指定したディスプレイ番号)] と指定し、[Connect] ボタンをクリックします。 |
|
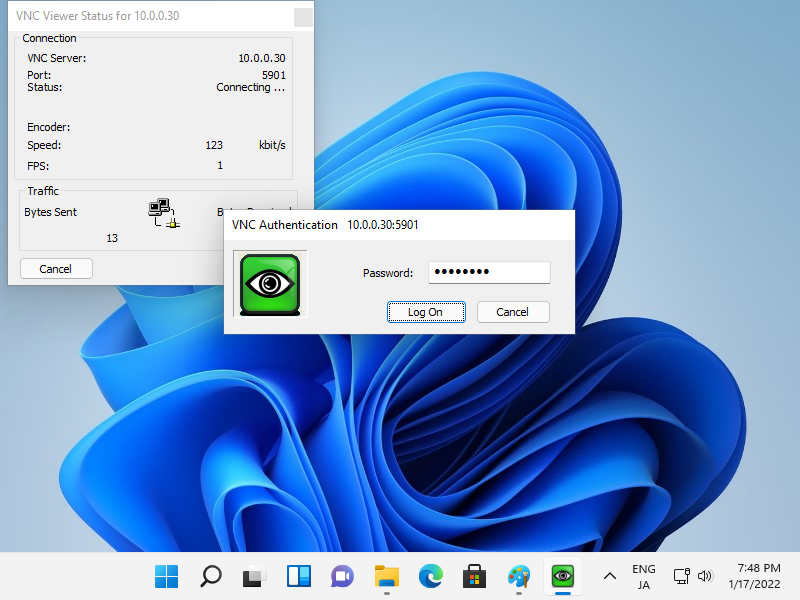
| [7] | VNC パスワードの入力を求められるので、[1] で設定したパスワードを入力します。 |
|
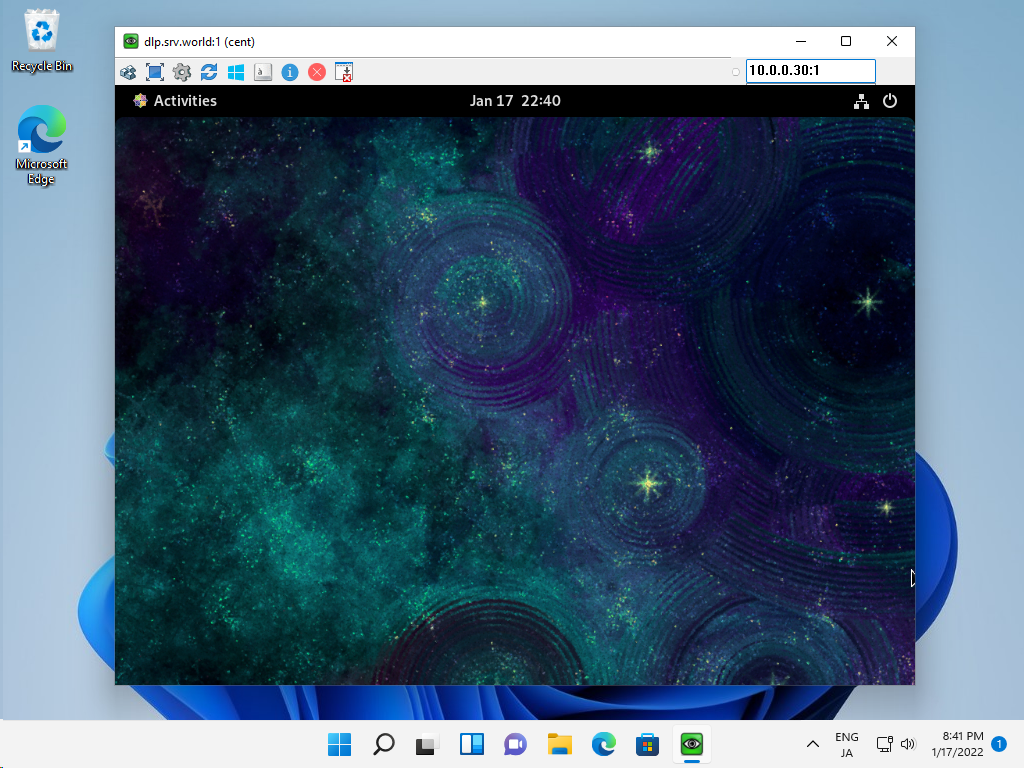
| [8] | VNC で接続できました。 |
|
関連コンテンツ