デスクトップ環境 : noVNC クライアント2018/04/27 |
|
ローカルホストで起動している VNC サーバーをプロキシして、クライアントコンピューターから Web ブラウザ経由で接続できるようにします。
|
|
| [1] | 必要なパッケージのインストール、および SSL 証明書の作成をしておきます。 |
|
root@dlp:~#
root@dlp:~# apt -y install novnc websockify python-numpy cd /etc/ssl root@dlp:/etc/ssl# openssl req -x509 -nodes -newkey rsa:2048 -keyout novnc.pem -out novnc.pem -days 365 Generating a 2048 bit RSA private key ....+++ ........................................................+++ writing new private key to 'novnc.pem' ----- You are about to be asked to enter information that will be incorporated into your certificate request. What you are about to enter is what is called a Distinguished Name or a DN. There are quite a few fields but you can leave some blank For some fields there will be a default value, If you enter '.', the field will be left blank. ----- Country Name (2 letter code) [AU]:JP # 国 State or Province Name (full name) [Some-State]:Hiroshima # 地域(県) Locality Name (eg, city) []:Hiroshima # 都市 Organization Name (eg, company) [Internet Widgits Pty Ltd]:GTS # 組織名 Organizational Unit Name (eg, section) []:Server World # 組織の部門名 Common Name (e.g. server FQDN or YOUR name) []:www.srv.world # サーバーのFQDN Email Address []:root@srv.world # 管理者アドレスroot@dlp:/etc/ssl# chmod 644 novnc.pem |
| [2] |
こちらの [1] を参考に、VNC サーバーを起動しておきます。
当例では [bionic] ユーザーがディスプレイ番号 [1] (=ポート 5901) で VNC サーバーを起動しているとします。 |
| [3] | VNC 起動ユーザーで Websockify を起動し、localhost:5901 をポート 6080 でプロキシします。 |
|
bionic@dlp:~$ websockify -D --web=/usr/share/novnc/ --cert=/etc/ssl/novnc.pem 6080 localhost:5901 WebSocket server settings: - Listen on :6080 - Flash security policy server - Web server. Web root: /usr/share/novnc - SSL/TLS support - Backgrounding (daemon) |
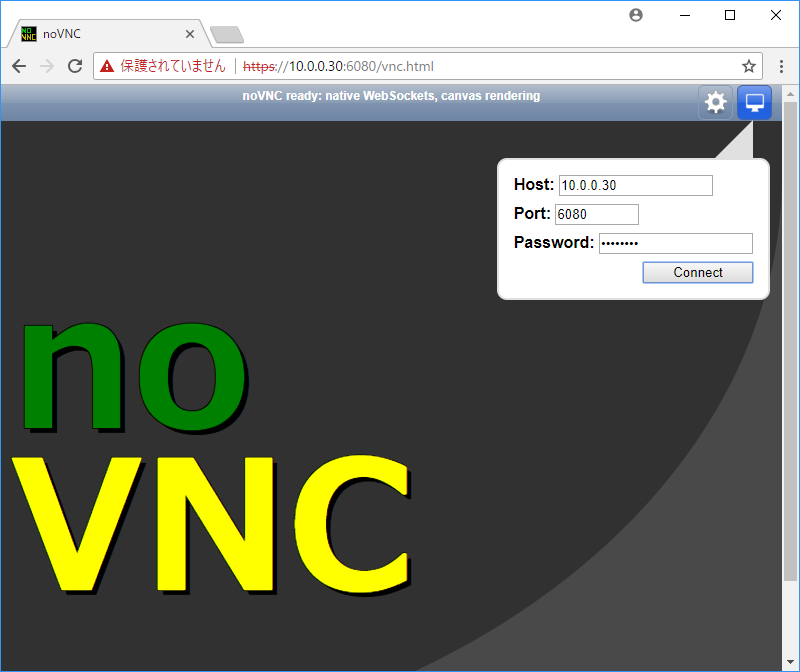
| [4] | 任意のクライアントコンピューターで Web ブラウザを起動し、[https://(サーバーのホスト名またはIPアドレス):6080/vnc.html] にアクセスします。すると、以下のように noVNC の画面が表示されます。 VNC パスワードでログイン可能です。 |
|
| [5] | 接続できました。Web ブラウザ上で Ubuntu の操作ができます。 |

|
関連コンテンツ