Webメールシステム - RoundCube2011/03/20 |
|
RoundCube をインストールして、Yahoo メールや Hotmail のようなWebメールシステムを構築します。
ここの例ではメールサーバーにはローカルではなく、下記の通り、同一LAN内の別ホストのものを利用するように設定します。
よって、対象ホストにSMTP/IMAPサーバー導入済みが前提です。
またバックエンドでデータベースを使うため、MySQL, SQLite, PostgreSQL のいずれかを導入済みである必要があります。
ここではMySQL 導入済みを前提として進めます。
www.srv.world - RoundCube 導入サーバー mail.srv.world - SMTP/IMAPサーバー
|
|
| [1] | RoundCube のインストールと設定 |
|
[root@www ~]# mysql -u root -p # MySQLに接続 Enter password: Welcome to the MySQL monitor. Commands end with ; or \g. Your MySQL connection id is 4 Server version: 5.1.52 Source distribution Copyright (c) 2000, 2010, Oracle and/or its affiliates. All rights reserved. This software comes with ABSOLUTELY NO WARRANTY. This is free software, and you are welcome to modify and redistribute it under the GPL v2 license Type 'help;' or '\h' for help. Type '\c' to clear the current input statement. # 「roundcube」データベース作成 ( 'password'の箇所は設定するパスワードを入力 )
mysql>
create database roundcube character set utf8 collate utf8_bin; Query OK, 1 row affected (0.00 sec)
mysql>
grant all privileges on roundcube.* to roundcube@'localhost' identified by 'password'; Query OK, 0 rows affected (0.00 sec)
mysql>
mysql> flush privileges; Query OK, 0 rows affected (0.00 sec) exit Bye [root@www ~]# cd /usr/share/doc/roundcubemail-*/SQL [root@www SQL]# mysql -u roundcube -p roundcube < mysql.initial.sql Enter password: [root@www SQL]#
[root@www ~]#
vi /etc/roundcubemail/db.inc.php # 21行目:以下のように変更 ('password'の箇所はroundcubeに設定したパスワード) $rcmail_config['db_dsnw'] = 'mysql://roundcube: password @localhost/roundcube ';
[root@www ~]#
vi /etc/roundcubemail/main.inc.php # 25行目:ログの日付形式を「年-月-日 時:分:秒」に変更 $rcmail_config['log_date_format'] = ' Y-M-d H:i:s O ';
# 66行目:IMAPサーバーを指定 (SSL経由) $rcmail_config['default_host'] = ' ssl://mail.srv.world ';
# 69行目:IMAPポート変更 (SSL経由) $rcmail_config['default_port'] = 993 ;
# 87行目:ドメインを指定 $rcmail_config['mail_domain'] = ' srv.world ';
# 102行目:SMTPサーバーを指定 (SSL経由) $rcmail_config['smtp_server'] = ' ssl://mail.srv.world ';
# 105行目:SMTPポート変更 (SSL経由) $rcmail_config['smtp_port'] = 465 ;
# 109行目:変更 ( SMTP認証にIMAP認証と同じユーザー名を使う ) $rcmail_config['smtp_user'] = ' %u ';
# 113行目:変更 ( SMTP認証にIMAP認証と同じパスワードを使う ) $rcmail_config['smtp_pass'] = ' %p ';
# 117行目:変更 ( SMTP認証タイプ ) $rcmail_config['smtp_auth_type'] = ' LOGIN ';
# 123行目:SMTP HELO host を指定 $rcmail_config['smtp_helo_host'] = ' mail.srv.world ';
# 168行目:日本語に変更 $rcmail_config['language'] = ja_JP ;
# 174行目:表示画面の日付形式を「年.月.日 時:分」に変更 $rcmail_config['date_long'] = ' Y.m.d H:i ';
# 180行目:UserAgent変更 $rcmail_config['useragent'] = ' Server World Webmail ';
# 183行目:表示画面のタイトルを変更 $rcmail_config['product_name'] = ' Server World Webmail ';
# 218行目:デフォルト文字セット変更 $rcmail_config['default_charset'] = ' iso-2022-jp ';
[root@www ~]#
vi /etc/httpd/conf.d/roundcubemail.conf # 5行目:変更 Alias /roundcube /usr/share/roundcubemail
<Directory /usr/share/roundcubemail/>
[root@www ~]# Order Deny,Allow Deny from all Allow from 127.0.0.1 10.0.0.0/24 # アクセス許可IP追記 </Directory> /etc/rc.d/init.d/httpd restart Stopping httpd: [ OK ] Starting httpd: [ OK ] |
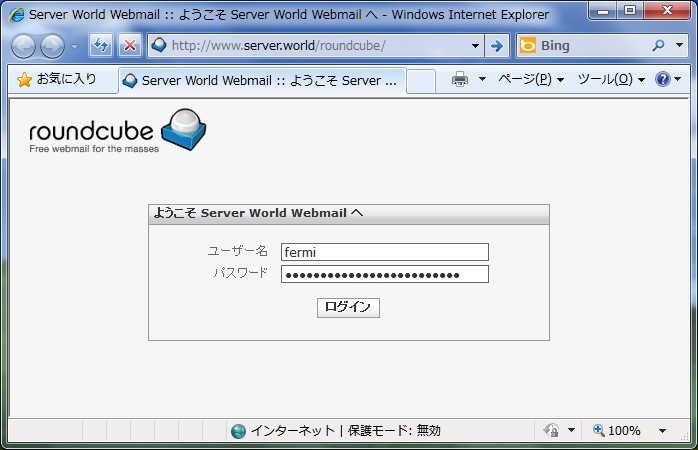
| [2] | ブラウザから「http://(サーバーのホスト名またはIPアドレス)/roundcube/」にアクセスします。すると 以下のようにログイン画面になるのでユーザー名とパスワードを入力してログインします。 |
|
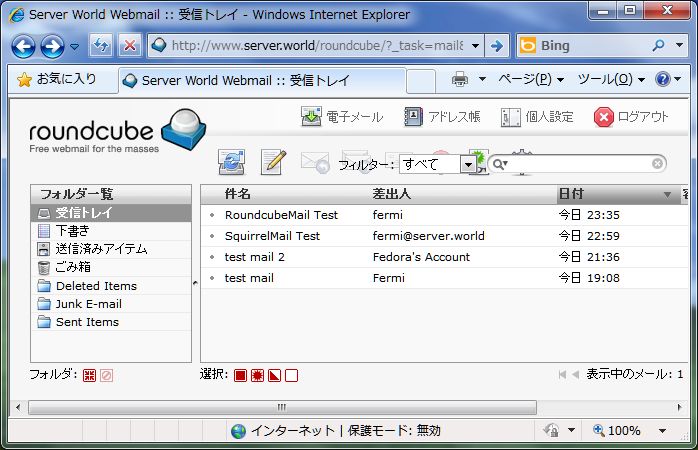
| [3] | ログインできました。 |
|
関連コンテンツ