Active Directory ドメインに参加する2023/02/23 |
|
Windows の Active Directory ドメインに参加します。
ローカルネットワーク内に Active Directory Domain Service が稼働していることが前提です。
当例では、以下のような Active Directory ドメイン環境で設定します。
|
|||||||||||
| [1] |
ESXi と Active Directory で時刻同期しておきます。
* ESXi は UTC のため表示時刻は同じとはなりません |
||||||||||
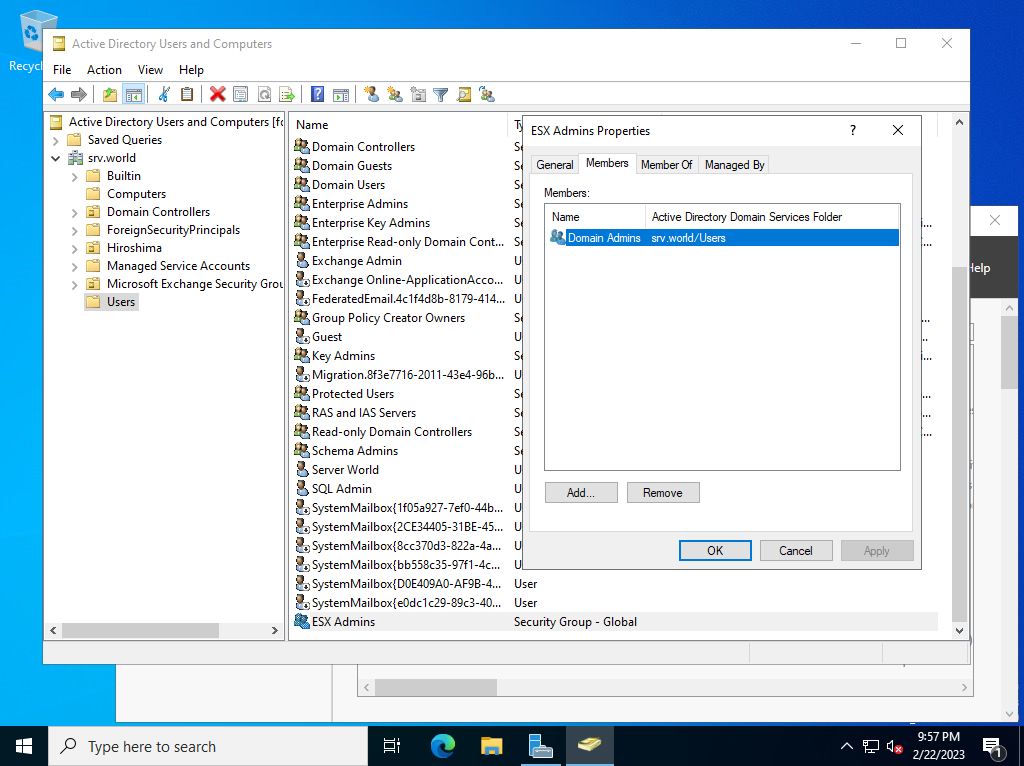
| [2] | Active Directory 側で、ESXi 用のグループを [ESX Admins] という名称で作成しておきます。 所属メンバーは任意です。当例では [Domain Admins] をメンバーに加えて進めます。 |
|
| [3] | ESXi にシェルアクセスして、Active Directory ドメインに参加します。 |
|
# 参照する DNS を AD に変更しておく [root@ctrl:~] esxcli network ip dns server list DNSServers: 10.0.0.10[root@ctrl:~] esxcli network ip dns server add --server=10.0.0.100 [root@ctrl:~] esxcli network ip dns server remove --server=10.0.0.10 [root@ctrl:~] esxcli network ip dns server list DNSServers: 10.0.0.100 # 必要なサービス起動 [root@ctrl:~] /etc/init.d/lwsmd start Starting Likewise Service Manager [memory reservation set] SUCCESS [starting lsass service] Starting service dependency: netlogon Starting service dependency: lwio Starting service dependency: rdr Starting service: lsass ...ok
[root@ctrl:~]
chkconfig lwsmd on
# AD 用のファイアウォールルール許可 (事前定義が存在) # * ESXi のファイアウォールルールはアウトバウンドもデフォルト拒否 [root@ctrl:~] esxcli network firewall ruleset set -r activeDirectoryAll --enabled 1 [root@ctrl:~] esxcli network firewall ruleset list | grep -i active activeDirectoryAll true[root@ctrl:~] esxcli network firewall ruleset rule list | grep -i active activeDirectoryAll Outbound UDP Dst 88 88 activeDirectoryAll Outbound TCP Dst 88 88 activeDirectoryAll Outbound UDP Dst 123 123 activeDirectoryAll Outbound UDP Dst 137 137 activeDirectoryAll Outbound TCP Dst 139 139 activeDirectoryAll Outbound TCP Dst 389 389 activeDirectoryAll Outbound UDP Dst 389 389 activeDirectoryAll Outbound TCP Dst 445 445 activeDirectoryAll Outbound UDP Dst 464 464 activeDirectoryAll Outbound TCP Dst 464 464 activeDirectoryAll Outbound TCP Dst 3268 3268 activeDirectoryAll Outbound TCP Dst 7476 7476 activeDirectoryAll Inbound TCP Dst 2020 2020 # Active Directory ドメインに join する # /usr/lib/vmware/likewise/bin/domainjoin-cli join (AD ドメイン名) (AD ユーザー名) [root@ctrl:~] /usr/lib/vmware/likewise/bin/domainjoin-cli join srv.world Serverworld Joining to AD Domain: srv.world With Computer DNS Name: ctrl.srv.world Serverworld@SRV.WORLD's password: SUCCESS # Active Directory ドメインに join 後は # [ESX Admins] グループに管理者権限が付与される [root@ctrl:~] esxcli system permission list Principal Is Group Role Role Description ----------------- -------- ----- ---------------- FD3S01\esx^admins true Admin Full access rights dcui false Admin Full access rights root false Admin Full access rights vpxuser false Admin Full access rights |
| [4] | 任意のクライアントコンピューターから、[ESX Admins] グループ所属の任意の AD ユーザーで、ESXi にログイン可能か確認しておきます。 |
|
[root@localhost ~]# ssh serverworld@srv.world@ctrl.srv.world (serverworld@srv.world@ctrl.srv.world) Password: The time and date of this login have been sent to the system logs. WARNING: All commands run on the ESXi shell are logged and may be included in support bundles. Do not provide passwords directly on the command line. Most tools can prompt for secrets or accept them from standard input. VMware offers supported, powerful system administration tools. Please see www.vmware.com/go/sysadmintools for details. The ESXi Shell can be disabled by an administrative user. See the vSphere Security documentation for more information. Could not chdir to home directory /home/local/FD3S01/serverworld: No such file or directory [FD3S01\serverworld@ctrl:~] |
|
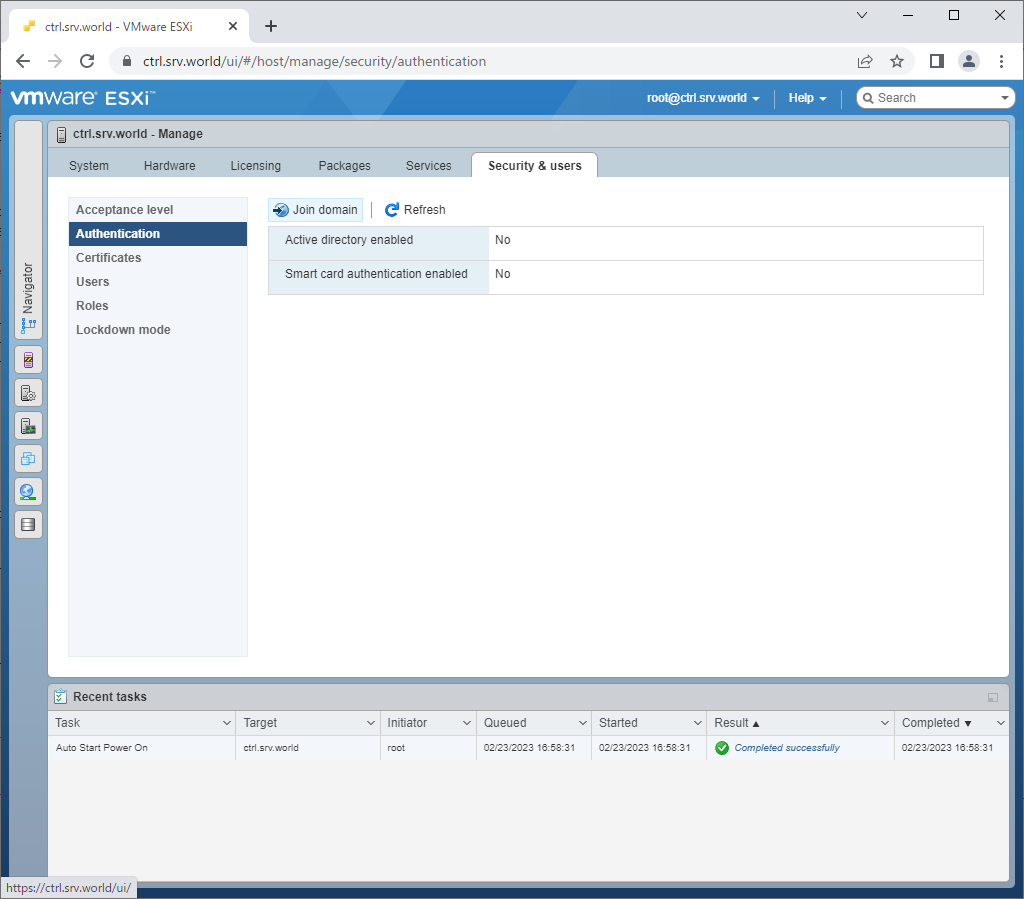
VMware Host Client で設定する場合は以下のように実行します。
|
|
| [5] | VMware Host Client に root ユーザーアカウントでログインし、左側の [Navigator] から [Manage] アイコンをクリックし、右ペイン上部の [Security & users] タブに移動して、[Join domain] ボタンをクリックします。 |
|
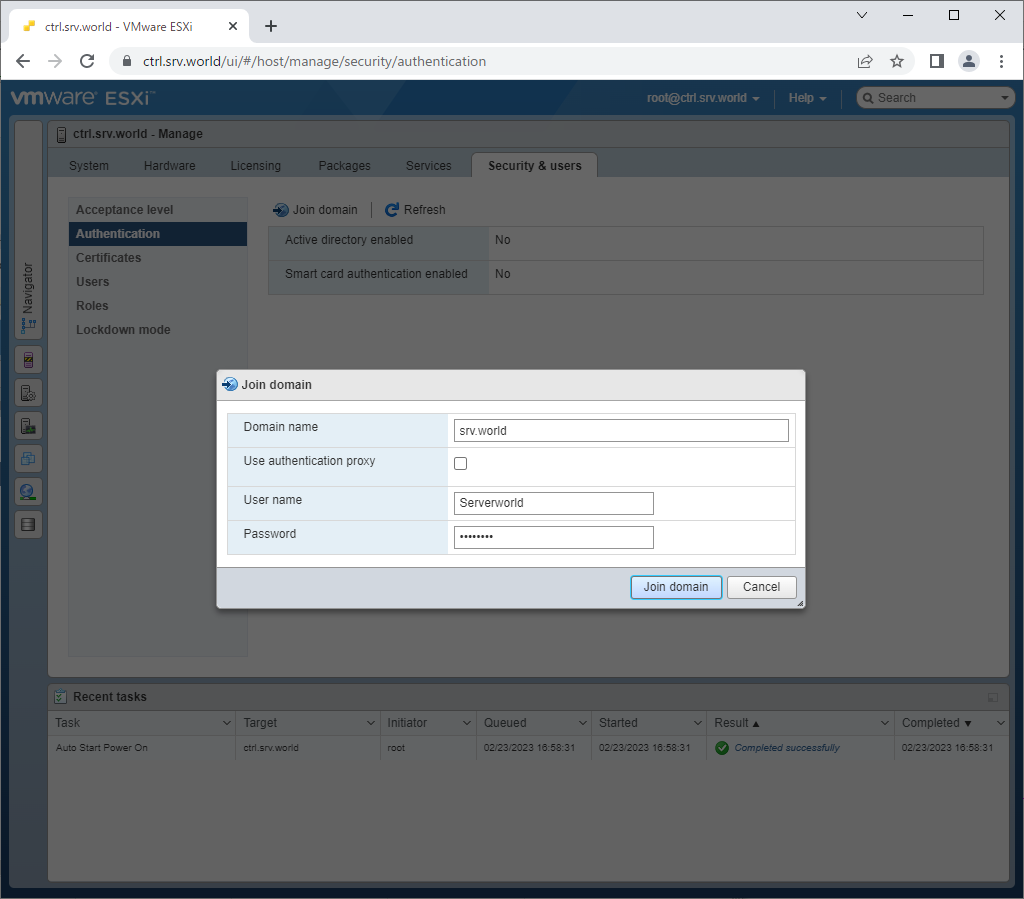
| [6] | 必要な情報を入力して [Join domain] ボタンをクリックします。 コマンド操作とは異なり、必要なサービスやファイアウォールルールは自動設定されます。 |
|
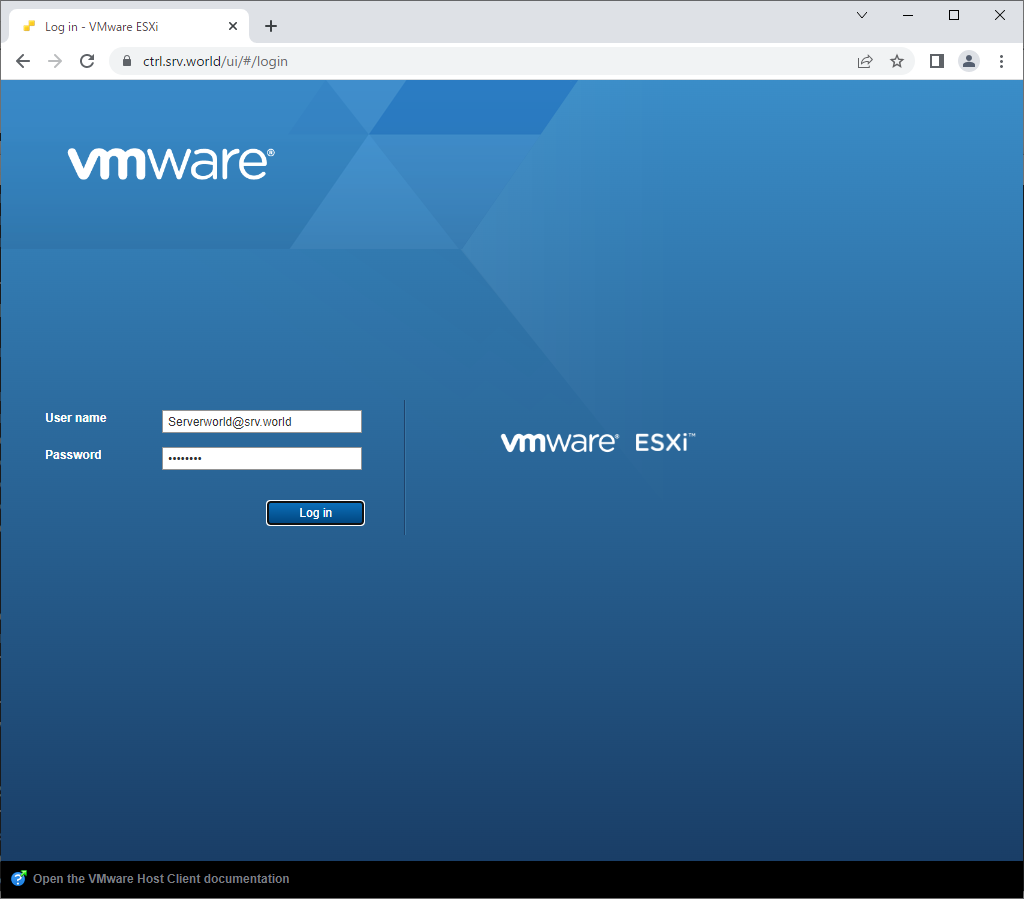
| [7] | ドメイン参加後は、[ESX Admins] グループ所属の任意の AD ユーザーで、VMware Host Client にログイン可能か確認しておくとよいでしょう。 |
|
|
関連コンテンツ