アップリンクを追加する2023/03/17 |
|
標準的な仮想スイッチにアップリンクを追加する場合は、以下のように設定します。
ESXi 稼働コンピューターに、複数の物理ネットワークインターフェースが搭載されていることが前提です。
|
|
| [1] | シェルアクセスして追加する場合は、以下のように実行します。 |
|
# 物理 NIC 表示 [root@ctrl:~] esxcli network nic list Name PCI Device Driver Admin Status Link Status Speed Duplex MAC Address MTU Description ------ ------------ ------ ------------ ----------- ----- ------ ----------------- ---- ----------- vmnic0 0000:01:00.0 ne1000 Up Up 1000 Full 52:54:00:94:d8:17 1500 Intel Corporation 82574L Gigabit Network Connection vmnic1 0000:07:00.0 ne1000 Up Up 1000 Full 52:54:00:76:e9:9c 1500 Intel Corporation 82574L Gigabit Network Connection vmnic2 0000:08:00.0 ne1000 Up Up 1000 Full 52:54:00:2a:ec:f4 1500 Intel Corporation 82574L Gigabit Network Connection[root@ctrl:~] esxcli network vswitch standard list vSwitch0 Name: vSwitch0 Class: cswitch Num Ports: 2990 Used Ports: 4 Configured Ports: 128 MTU: 1500 CDP Status: listen Beacon Enabled: false Beacon Interval: 1 Beacon Threshold: 3 Beacon Required By: Uplinks: vmnic0 Portgroups: VM Network, Management Network vSwitch1 Name: vSwitch1 Class: cswitch Num Ports: 2990 Used Ports: 3 Configured Ports: 128 MTU: 1500 CDP Status: listen Beacon Enabled: false Beacon Interval: 1 Beacon Threshold: 3 Beacon Required By: Uplinks: vmnic1 Portgroups: Management Network Internal # [vmnic2] を [vSwitch0] に追加する [root@ctrl:~] esxcli network vswitch standard uplink add --uplink-name=vmnic2 --vswitch-name=vSwitch0 esxcli network vswitch standard list --vswitch-name=vSwitch0 vSwitch0 Name: vSwitch0 Class: cswitch Num Ports: 2990 Used Ports: 6 Configured Ports: 128 MTU: 1500 CDP Status: listen Beacon Enabled: false Beacon Interval: 1 Beacon Threshold: 3 Beacon Required By: Uplinks: vmnic2, vmnic0 Portgroups: VM Network, Management Network # ロードバランシングのポリシーを設定する
# 指定可能なポリシーは以下 # - explicit : 明示的なフェイルオーバー順序を使用 # - iphash : IP ハッシュに基づいたルート # - mac : 発信元 MAC ハッシュに基づいたルート # - portid : 発信元の仮想ポートに基づいたルート
[root@ctrl:~]
[root@ctrl:~] esxcli network vswitch standard policy failover set --active-uplinks=vmnic0,vmnic2 --load-balancing=portid --vswitch-name=vSwitch0
esxcli network vswitch standard policy failover get --vswitch-name=vSwitch0 Load Balancing: srcport Network Failure Detection: link Notify Switches: true Failback: true Active Adapters: vmnic0, vmnic2 Standby Adapters: Unused Adapters: # スタンバイ系のアップリンクとする場合は以下 [root@ctrl:~] esxcli network vswitch standard policy failover set --standby-uplinks=vmnic2 --vswitch-name=vSwitch0
# フェイルバックを無効にする場合は以下 [root@ctrl:~] esxcli network vswitch standard policy failover set --failback=no --vswitch-name=vSwitch0 |
|
VMware Host Client で設定する場合は以下のように実行します。
|
|
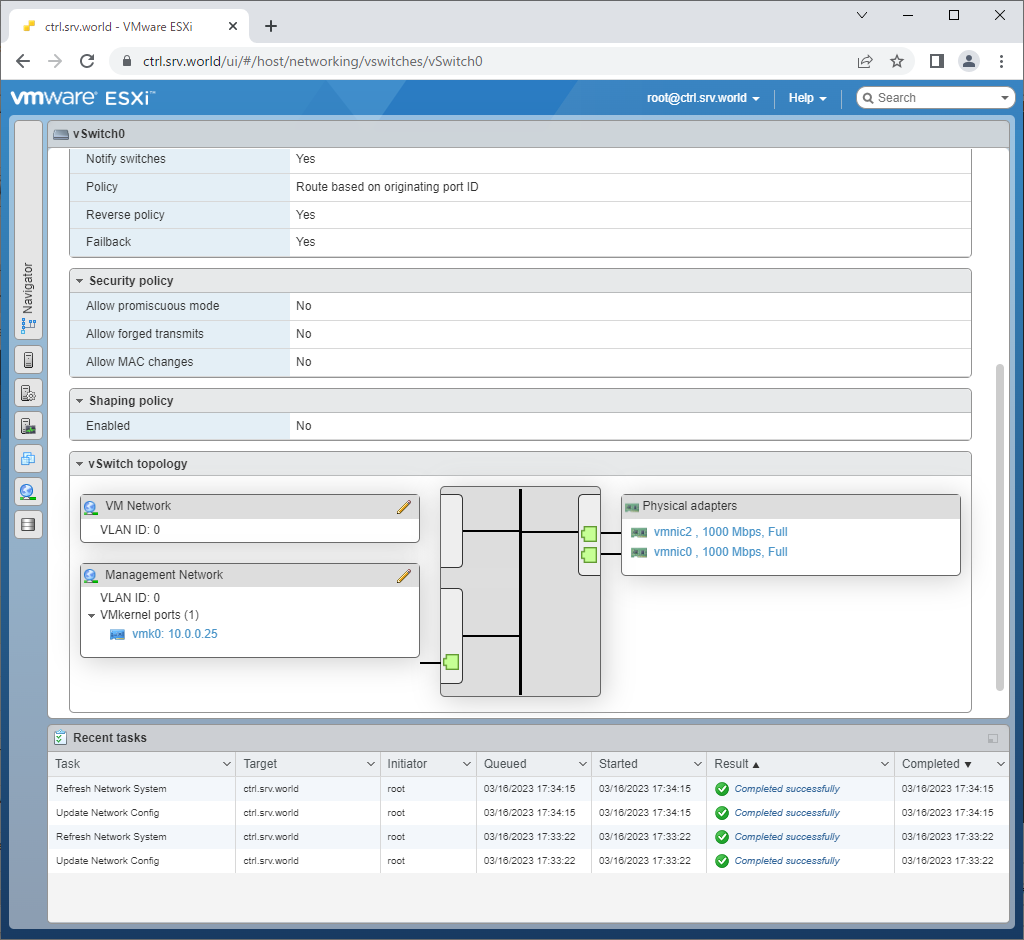
| [2] | [管理] - [ネットワーク] - [仮想スイッチ] の画面で、アップリンクを追加したい仮想スイッチの詳細画面に移動し、[アップリンクの追加] ボタンをクリックして、以下のように、追加するアップリンクを選択します。 |

|
| [3] | アップリンクが追加されました。 |
|
関連コンテンツ