SSLの設定2013/05/11 |
|
SSLでの暗号化通信ができるように設定します。
|
|
| [1] |
まずはこちらを参照してSSL証明書を作成します。
|
| [2] | SSLの設定 |
|
root@www:~#
vi /etc/apache2/sites-available/default-ssl # 3行目:管理者アドレス変更 ServerAdmin webmaster@srv.world
# 11,12行目:変更 Options FollowSymLinks ExecCGI AllowOverride All
# 42,43行目:[1]で作成したものに変更 SSLCertificateFile /etc/ssl/private/server.crt SSLCertificateKeyFile /etc/ssl/private/server.key
a2ensite default-ssl Enabling site default-ssl. Run '/etc/init.d/apache2 reload' to activate new configuration! root@www:~# a2enmod ssl Enabling module ssl. See /usr/share/doc/apache2.2-common/README.Debian.gz on how to configure SSL and create self-signed certificates. To activate the new configuration, you need to run: service apache2 restart root@www:~# /etc/init.d/apache2 restart Restarting web server: apache2 ... waiting . |
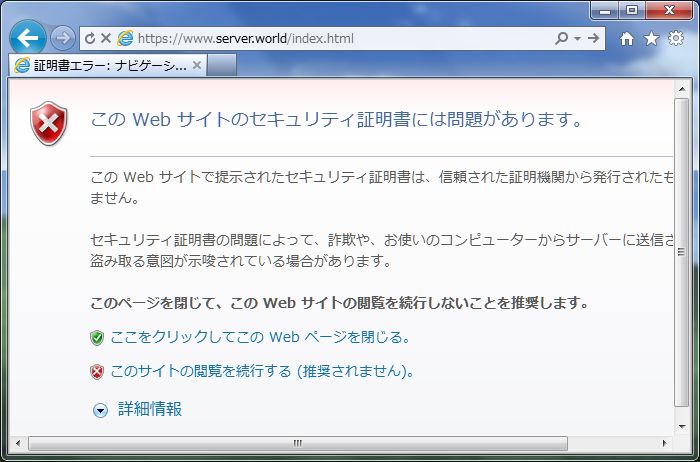
| Webブラウザでテストページに https でアクセスしてみます。すると独自証明書なので以下のような警告が出ます。 独自証明書であって、PCにインストールされていないからという理由で以下のような警告がでますが、 特に問題ないので「このサイトの閲覧を続行する (推奨されません)」をクリックして続行します。 |
|
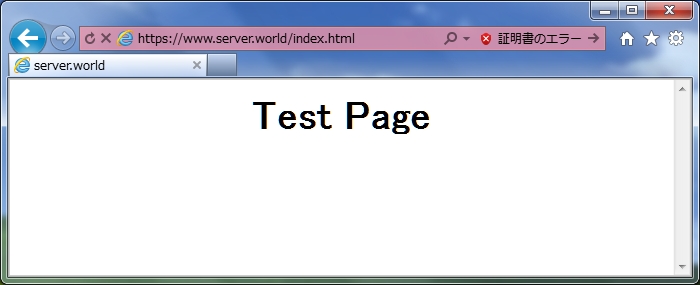
| アクセスできました。 |
|
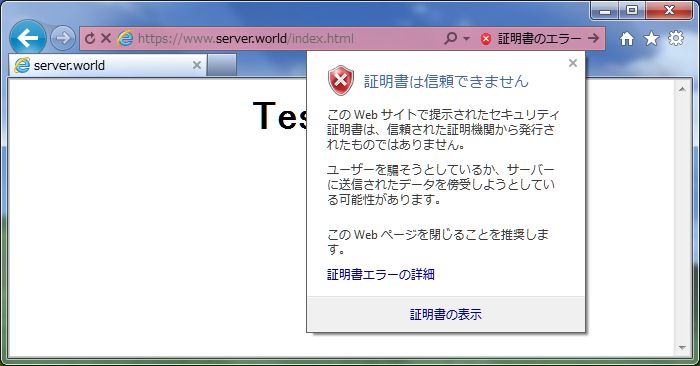
| 証明書をインストールしておけばエラーなしでアクセスできます。 以下のように証明書のエラーの箇所をクリックして、さらに「証明書の表示」をクリックします。 |
|
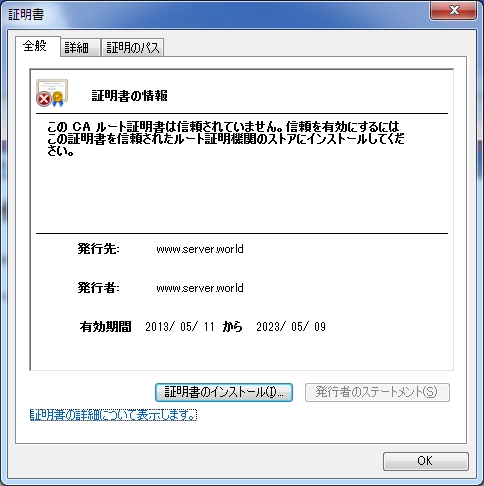
| 証明書が表示されるので、「証明書のインストール」をクリックしてインストールします。 |
|
関連コンテンツ