OpenSSH : SSH 鍵ペア認証2023/06/14 |
|
クライアント用に SSH 秘密鍵、サーバー用に SSH 公開鍵を作成し、鍵ペアによる認証でログインできるようにします。
|
|
| [1] | 鍵ペアはユーザー各々で作成します。よって、鍵ペアを作成するユーザーでサーバー側にログインして作業します。 |
|
# 鍵ペア作成 debian@dlp:~$ ssh-keygen Generating public/private rsa key pair. Enter file in which to save the key (/home/debian/.ssh/id_rsa): # 変更の必要がなければそのまま Enter Created directory '/home/debian/.ssh'. Enter passphrase (empty for no passphrase): # パスフレーズ設定 (空 Enter でノーパス設定) Enter same passphrase again: Your identification has been saved in /home/debian/.ssh/id_rsa Your public key has been saved in /home/debian/.ssh/id_rsa.pub The key fingerprint is: SHA256:0906O21b6CZoQseEYDbM3QYKa2kkqfmRYTnIOFZmBTI debian@dlp.srv.world The key's randomart image is: ..... .....debian@dlp:~$ ll ~/.ssh total 8 -rw------- 1 debian debian 2655 Jun 14 03:28 id_rsa -rw-r--r-- 1 debian debian 574 Jun 14 03:28 id_rsa.pubdebian@dlp:~$ mv ~/.ssh/id_rsa.pub ~/.ssh/authorized_keys |
| [2] | サーバー側で作成した秘密鍵をクライアント側にファイル転送すると、そのクライアントから対象サーバーに、鍵認証でログイン出来るようになります。 |
|
# サーバーで作成した秘密鍵を SCP で持ってくる debian@node01:~$ scp debian@10.0.0.30:/home/debian/.ssh/id_rsa ~/.ssh/ debian@10.0.0.30's password: id_rsa 100% 2655 2.6MB/s 00:00debian@node01:~$ ssh debian@10.0.0.30 Enter passphrase for key '/home/debian/.ssh/id_rsa': # 設定したパスフレーズ Linux dlp.srv.world 6.1.0-9-amd64 #1 SMP PREEMPT_DYNAMIC Debian 6.1.27-1 (2023-05-08) x86_64 The programs included with the Debian GNU/Linux system are free software; the exact distribution terms for each program are described in the individual files in /usr/share/doc/*/copyright. Debian GNU/Linux comes with ABSOLUTELY NO WARRANTY, to the extent permitted by applicable law. debian@dlp:~$ # ログインできた |
| [3] | なお、鍵認証にした場合、以下のように SSH サーバーへのパスワード認証を禁止すると、よりセキュアな環境とすることができます。 |
|
root@dlp:~#
vi /etc/ssh/sshd_config # 57行目 : コメント解除し、パスワード認証不可に変更 PasswordAuthentication no
# 62行目 : [no] になっているか確認 KbdInteractiveAuthentication no systemctl restart ssh |
|
Windows クライアントからの SSH 鍵認証 #1
|
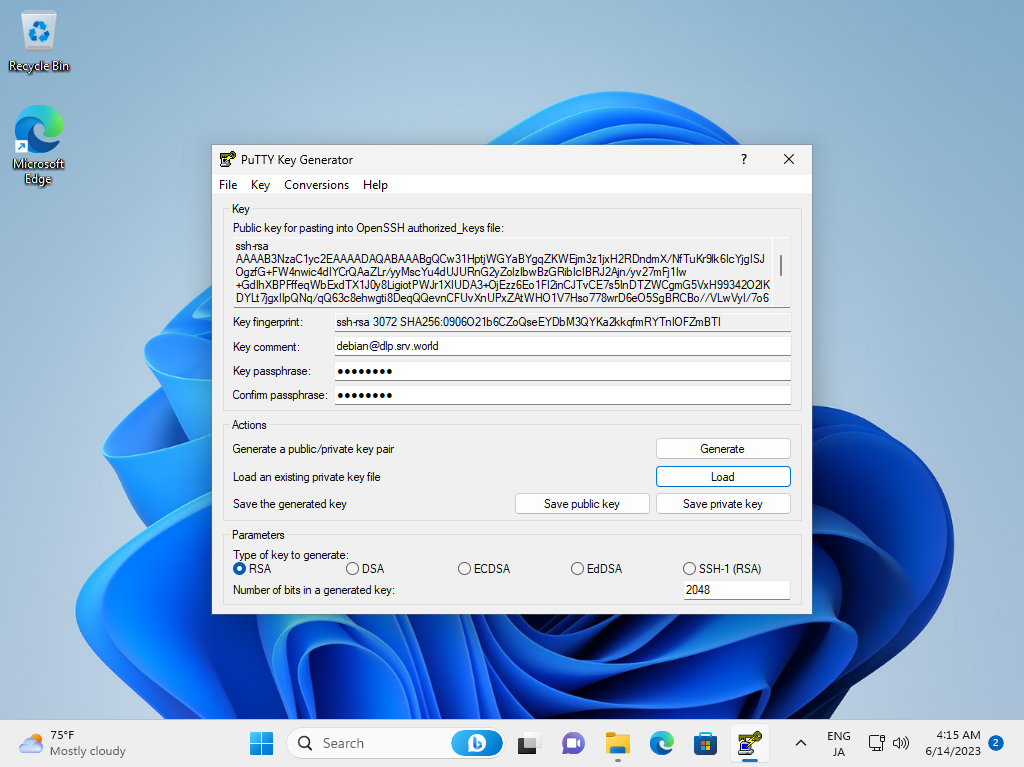
| [4] | Puttyの公式サイト より [Puttygen.exe] をダウンロードして [Putty.exe] と同じフォルダに保管して実行します。以下の画面が表示されたら [Load] ボタンをクリックします。 |

|
| [5] | 事前に SSH サーバーから転送しておいた秘密鍵を指定すると、パスフレーズを求められるので入力して応答します。(ノーパス設定の場合は不要) |

|
| [6] | パスフレーズでの応答が完了すると以下の画面になります。ここで [Save private key] をクリックして、任意のフォルダに任意の名前で保存します。 当例では [privkey] というファイル名で [Putty.exe] と同じフォルダに保存しています。 |
|
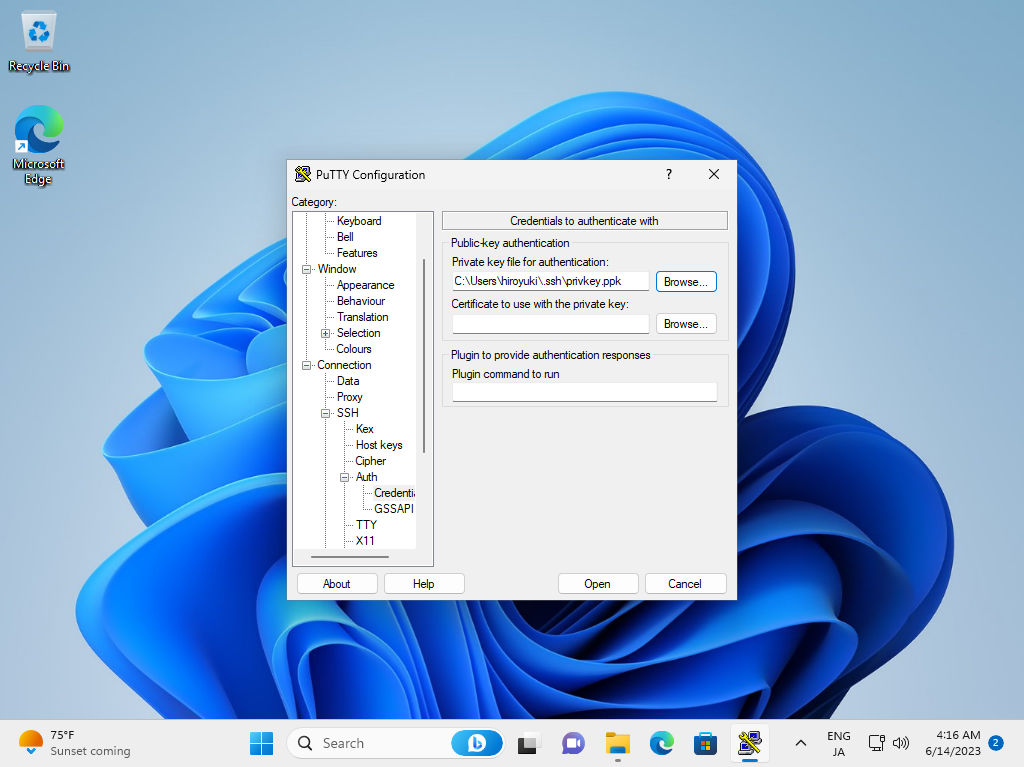
| [7] | Putty 本体を起動し、左メニュー [Connection] - [SSH] - [Auth] - [Credencial] で、作成した Private Key ファイルを選択します。 |
|
| [8] | 左メニュー [Session] に戻り、接続するホストの名前または IP アドレスを入力して、接続します。 |

|
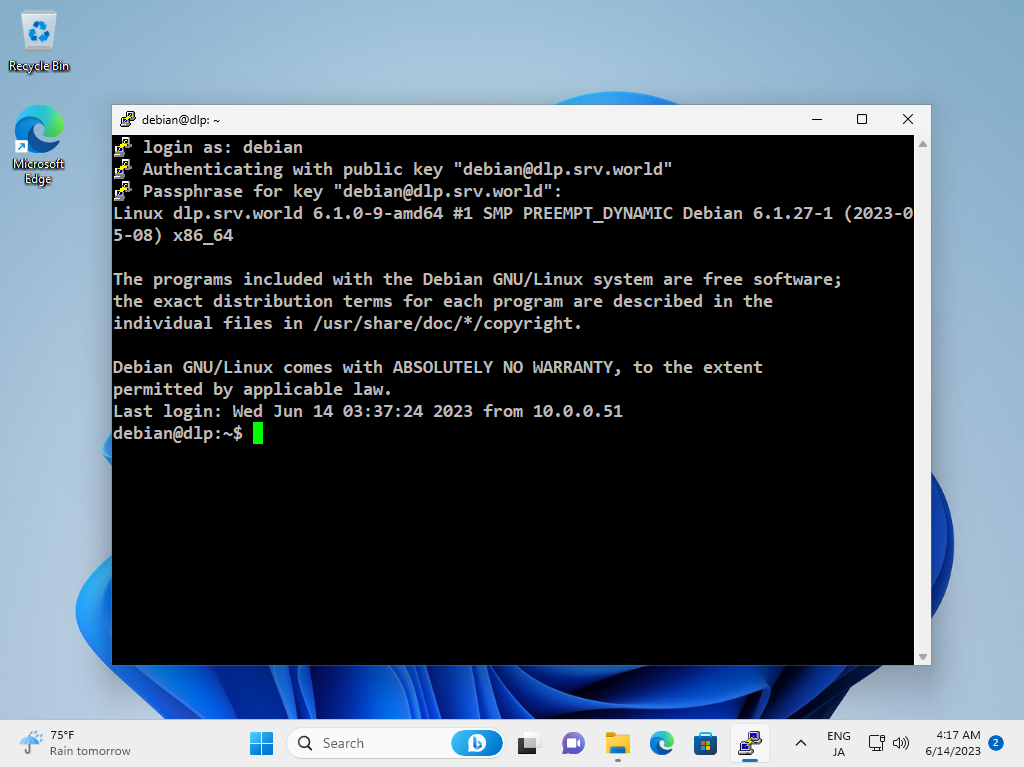
| [9] | 鍵を作成したユーザーでログインしようとすると、以下のようにパスフレーズを求められ、設定したパスフレーズを入力するとログインできます。 |
|
|
Windows クライアントからの SSH 鍵認証 #2
|
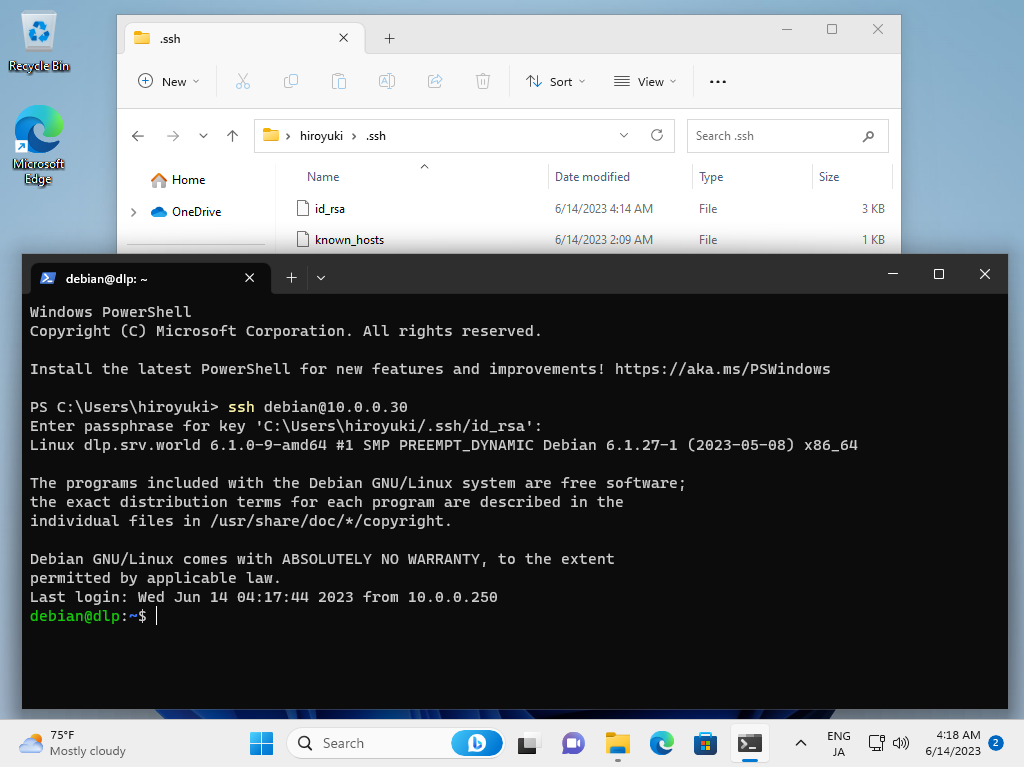
| [10] | こちらのリンク先に記載の通り、Windows には OpenSSH クライアントが標準搭載されているため、Putty 等のクライアントソフトウェアを用意しなくとも、サーバー側で生成した鍵ペアの秘密鍵の方を Windows クライアントへ転送し、Windows 側でログオン中のユーザーディレクトリ配下の [.ssh] フォルダ内に秘密鍵を格納するのみで、鍵ペアでの認証が可能です。 |
|
関連コンテンツ