Samba : アクセス権付の共有フォルダ作成2014/07/16 |
|
Samba によるファイルサーバーの構築です。
例として、ユーザー認証が必要なアクセス権付の共有フォルダを設定します。
「security」というグループを作成し、共有フォルダへはそのグループに属するユーザーのみが認証してアクセス可能なように設定します。 |
|
| [1] | Samba の設定です。 |
|
[root@smb ~]#
[root@smb ~]# yum -y install samba samba-client groupadd security [root@smb ~]# mkdir /home/security [root@smb ~]# chgrp security /home/security [root@smb ~]# chmod 770 /home/security
[root@smb ~]#
vi /etc/samba/smb.conf # 66行目あたり:以下2行追記 unix charset = UTF-8
dos charset = CP932 # 90行目:変更 ( Windowsに合わせる ) workgroup = WORKGROUP
# 96行目:コメント解除してアクセスを許可するIPアドレスを指定 hosts allow = 127. 10.0.0.
# 最終行に追記 [Security]
# 任意の名前を指定 path = /home/security writable = yes create mode = 0770 directory mode = 0770 guest ok = no # ゲストは不許可 valid users = @security # security グループのみアクセス許可 # Samba ユーザー登録 [root@smb ~]# smbpasswd -a cent New SMB password: # パスワード設定 Retype new SMB password: # 確認再入力 Added user cent. [root@smb ~]# usermod -aG security cent |
| [2] | Firewalld を有効にしている場合は、Samba サービスの許可が必要です。 |
|
[root@smb ~]# firewall-cmd --add-service=samba --permanent success [root@smb ~]# firewall-cmd --reload success |
| [3] | SELinux を有効にしている場合は、SELinux コンテキストの変更が必要です。 |
|
[root@smb ~]# setsebool -P samba_enable_home_dirs on [root@smb ~]# restorecon -R /home/security |
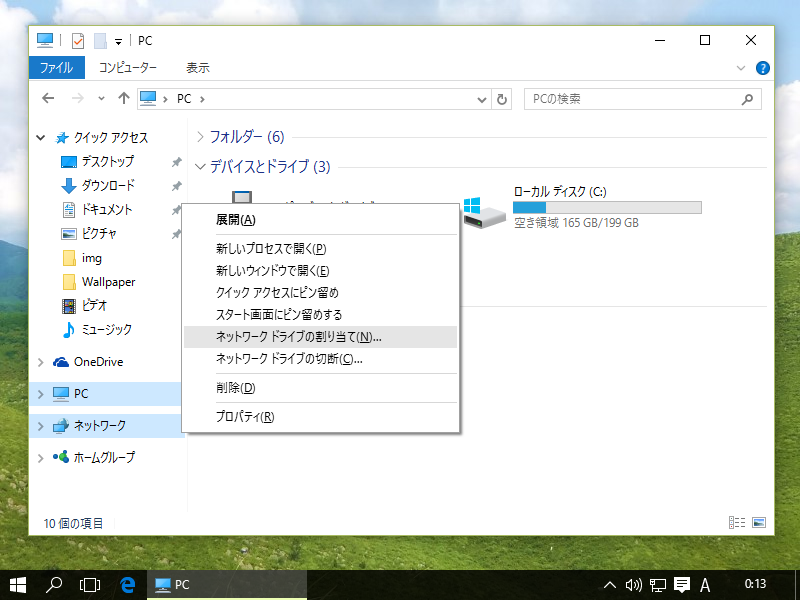
| [4] | クライアント側の設定です。Windows 10 を例にします。 以下のように「コンピュータ」-「ネットワークドライブの割り当て」をクリックします。 |
|
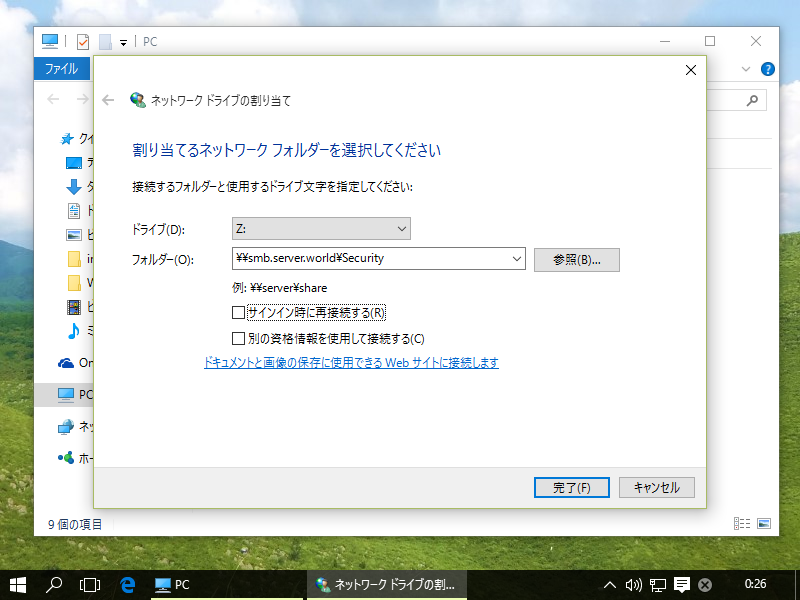
| [5] | 画面の例にも書いてありますが、フォルダの欄に「\\サーバー名\共有フォルダ名」と指定します。 |
|
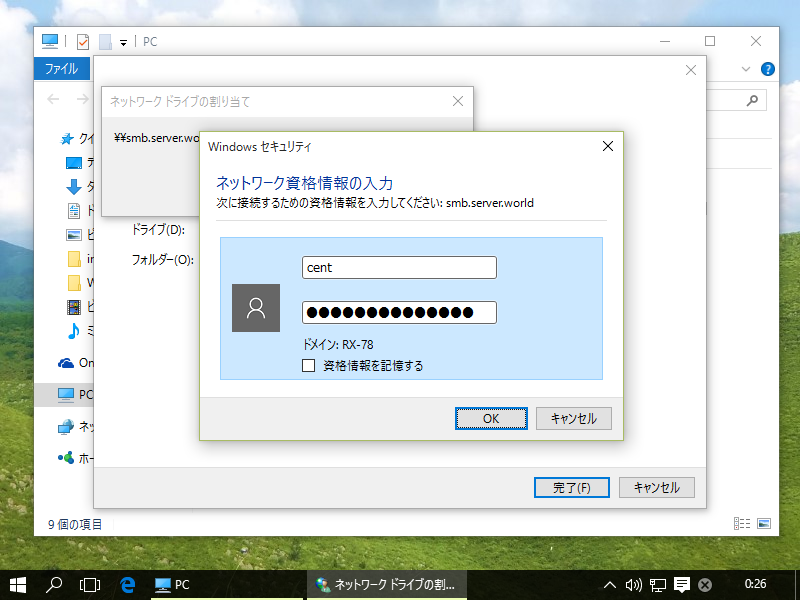
| [6] | 認証を求められます。[1] で登録した Samba ユーザー/パスワードを入力して認証します。 |
|
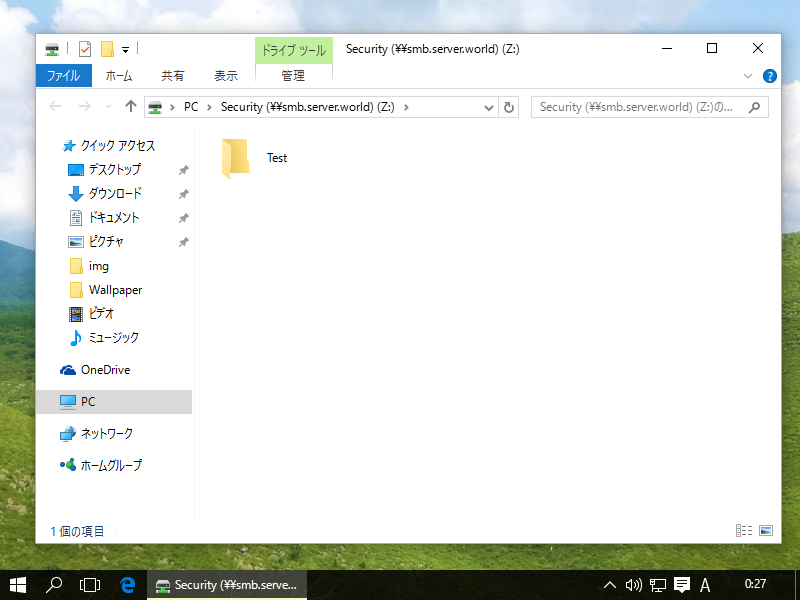
| [7] | アクセスできました。 |
|
関連コンテンツ