# add firewall rule for Stable Video Diffusion
PS C:\Users\Administrator> New-NetFirewallRule `
-Name "Stable Video Diffusion Server Port" `
-DisplayName "Stable Video Diffusion Server Port" `
-Description 'Allow Stable Video Diffusion Server Port' `
-Profile Any `
-Direction Inbound `
-Action Allow `
-Protocol TCP `
-Program Any `
-LocalAddress Any `
-LocalPort 8501
PS C:\Users\Administrator> git clone https://github.com/Stability-AI/generative-models.git
PS C:\Users\Administrator> cd generative-models
PS C:\Users\Administrator\generative-models> pip3 install https://huggingface.co/r4ziel/xformers_pre_built/resolve/main/triton-2.0.0-cp310-cp310-win_amd64.whl
.....
.....
Successfully installed cmake-3.28.3 triton-2.0.0
PS C:\Users\Administrator\generative-models> pip3 install -r ./requirements/pt2.txt
.....
.....
Successfully installed appdirs-1.4.4 black-23.7.0 blinker-1.7.0 braceexpand-0.1.7 cachetools-5.3.3 chardet-5.1.0 docker-pycreds-0.4.0 einops-0.7.0 fairscale-0.4.13 fire-0.5.0 invisible-watermark-0.2.0 jedi-0.19.1 kornia-0.6.9 markdown-it-py-3.0.0 mdurl-0.1.2 mypy-extensions-1.0.0 natsort-8.4.0 ninja-1.11.1.1 numpy-1.26.4 omegaconf-2.3.0 opencv-python-4.6.0.66 parso-0.8.3 pathspec-0.12.1 pudb-2024.1 pyarrow-15.0.0 pydeck-0.8.1b0 pygments-2.17.2 pyre-extensions-0.0.29 pytorch-lightning-2.0.1 rich-13.7.0 sentry-sdk-1.40.5 setproctitle-1.3.3 streamlit-1.31.1 streamlit-keyup-0.2.0 tenacity-8.2.3 tensorboardx-2.6 termcolor-2.4.0 tokenizers-0.12.1 toml-0.10.2 torchaudio-2.0.2 torchdata-0.6.1 tornado-6.4 transformers-4.19.1 typing-inspect-0.9.0 tzlocal-5.2 urllib3-1.26.18 urwid-2.6.5 urwid-readline-0.14 validators-0.22.0 wandb-0.16.3 watchdog-4.0.0 webdataset-0.2.86 wheel-0.42.0
PS C:\Users\Administrator\generative-models> pip3 install ./
.....
.....
Successfully built sgm
Installing collected packages: sgm
Successfully installed sgm-0.1.0
# lowvram_mode ⇒ change the value to true if your Graphic Card has few amount of memory
# * value of [False] did not work on an RTX 3060 with 12G RAM
PS C:\Users\Administrator\generative-models> Get-Content ./scripts/demo/streamlit_helpers.py | Select-String "^lowvram_mode"
lowvram_mode = False
PS C:\Users\Administrator\generative-models> (Get-Content ./scripts/demo/streamlit_helpers.py) | foreach { $_ -replace "lowvram_mode = False","lowvram_mode = True" } | Set-Content ./scripts/demo/streamlit_helpers.py
PS C:\Users\Administrator\generative-models> Get-Content ./scripts/demo/streamlit_helpers.py | Select-String "^lowvram_mode"
lowvram_mode = True
# download a model, models are here
# https://huggingface.co/stabilityai/stable-video-diffusion-img2vid/tree/main
# https://huggingface.co/stabilityai/stable-video-diffusion-img2vid-xt/tree/main
PS C:\Users\Administrator\generative-models> mkdir ./checkpoints
PS C:\Users\Administrator\generative-models> Invoke-WebRequest -Uri "https://huggingface.co/stabilityai/stable-video-diffusion-img2vid/resolve/main/svd.safetensors?download=true" -OutFile "./checkpoints/svd.safetensors"
# run as a server
PS C:\Users\Administrator\generative-models> Copy-Item ./scripts/demo/video_sampling.py ./
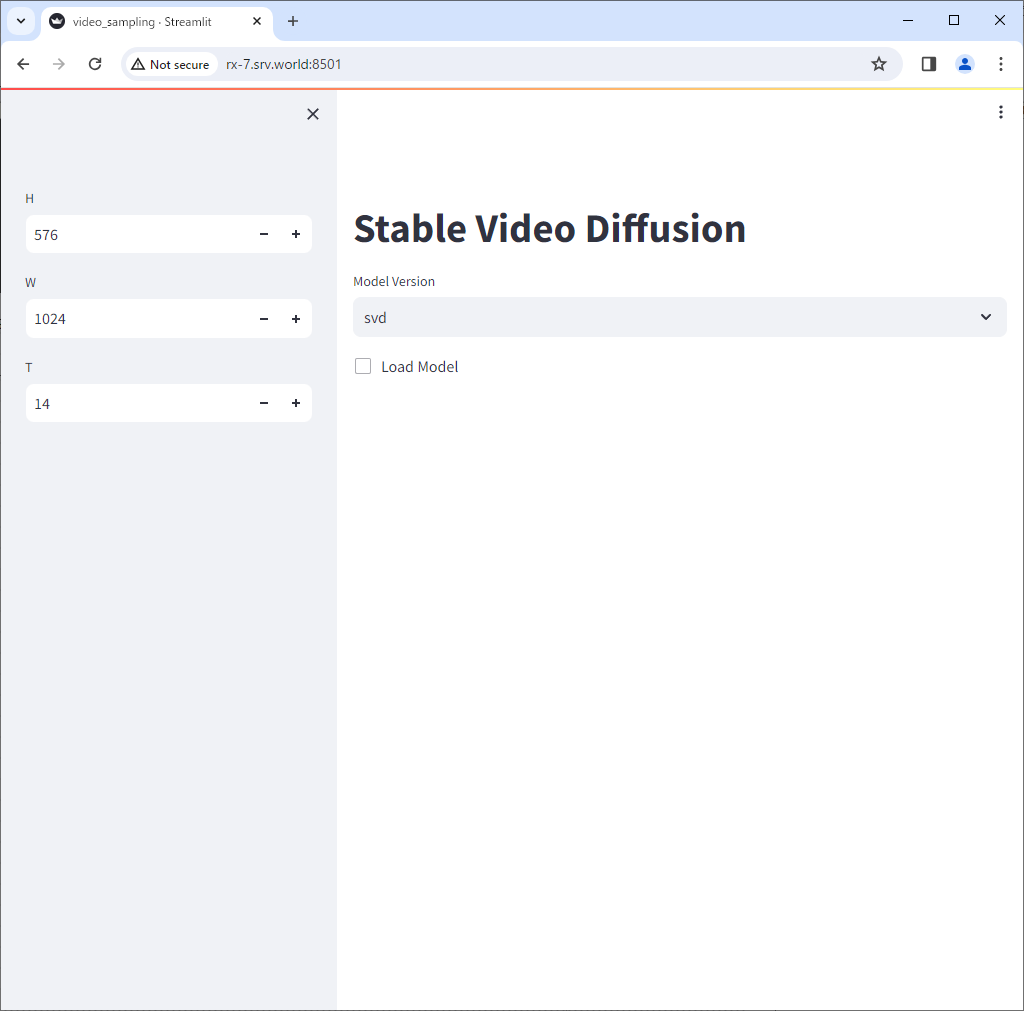
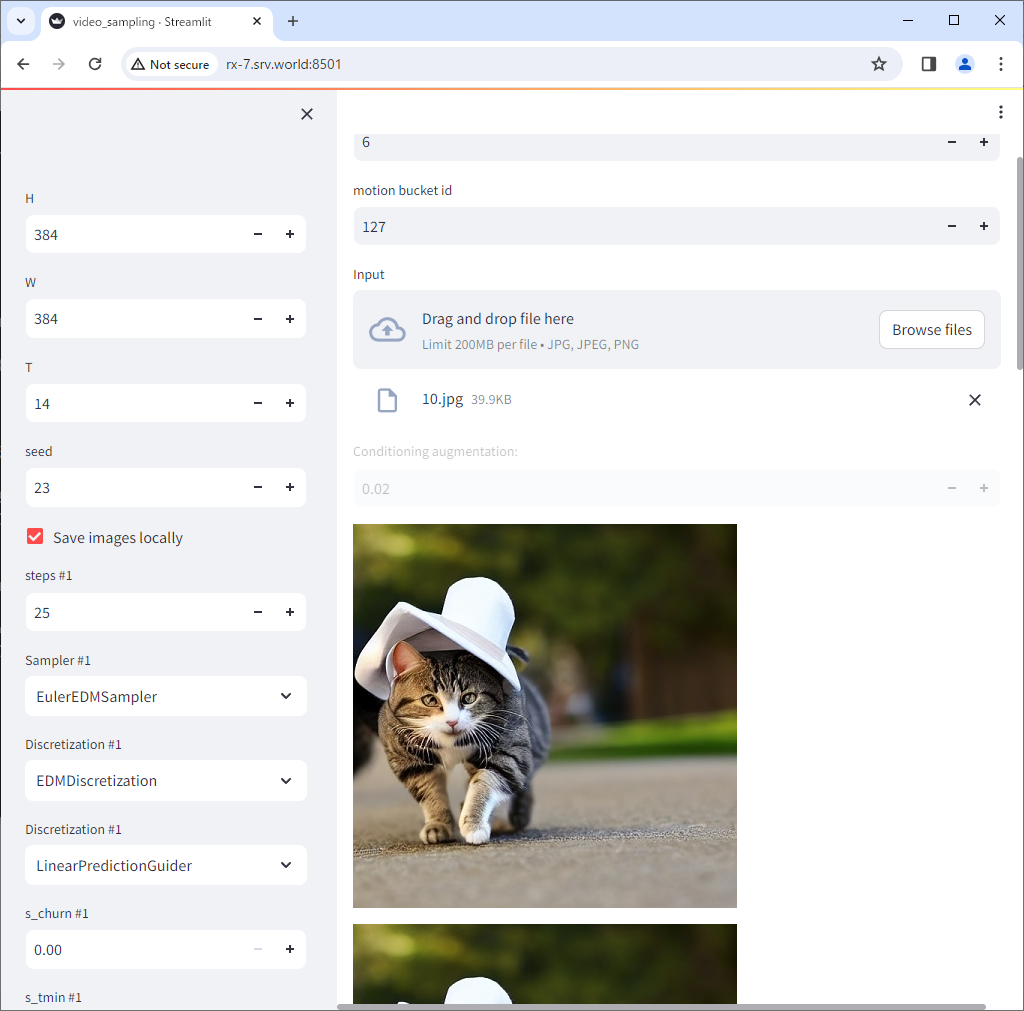
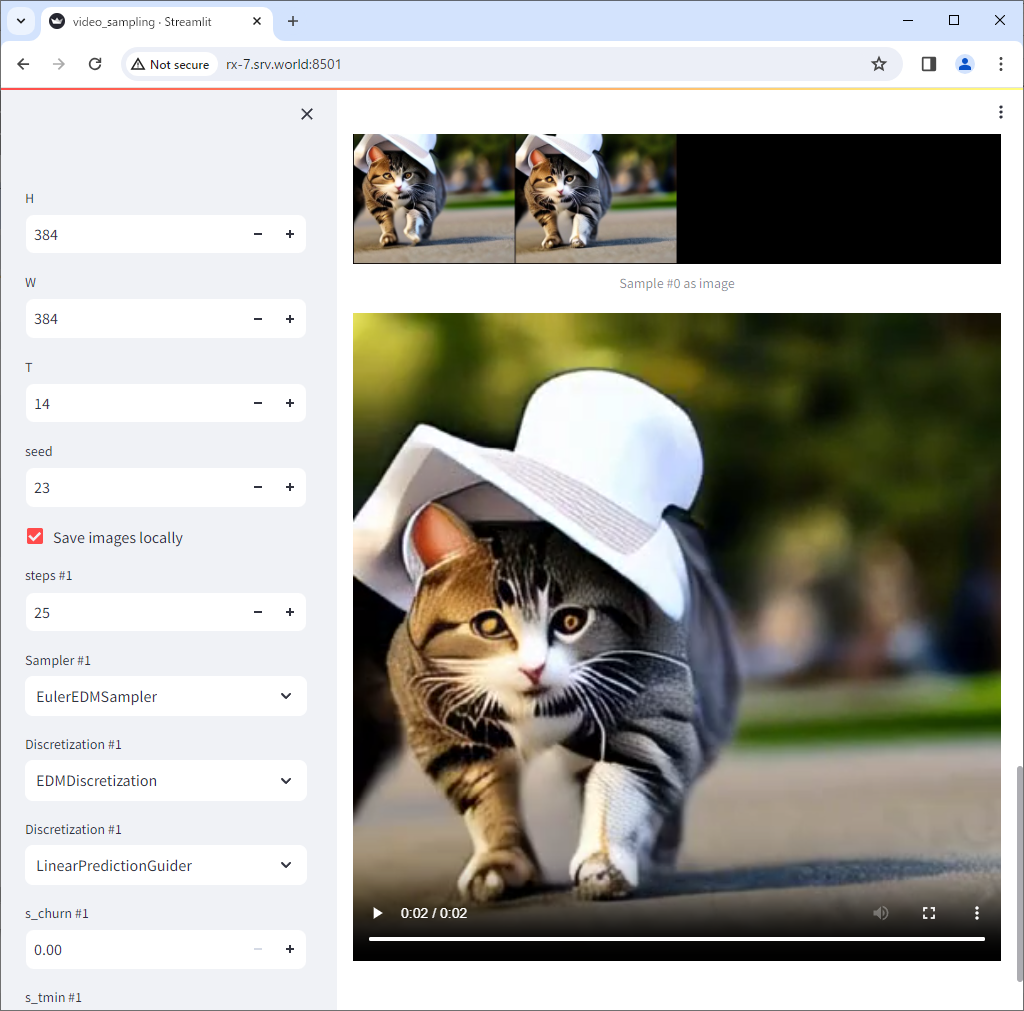
PS C:\Users\Administrator\generative-models> streamlit run video_sampling.py --server.address=0.0.0.0
Welcome to Streamlit!
If you�fd like to receive helpful onboarding emails, news, offers, promotions,
and the occasional swag, please enter your email address below. Otherwise,
leave this field blank.
Email:
You can find our privacy policy at https://streamlit.io/privacy-policy
Summary:
- This open source library collects usage statistics.
- We cannot see and do not store information contained inside Streamlit apps,
such as text, charts, images, etc.
- Telemetry data is stored in servers in the United States.
- If you'd like to opt out, add the following to %userprofile%/.streamlit/config.toml,
creating that file if necessary:
[browser]
gatherUsageStats = false
You can now view your Streamlit app in your browser.
URL: http://0.0.0.0:8501
|