iSCSI : Configure iSCSI Initiator2022/01/12 |
|
Configure iSCSI Initiator.
This example is based on Windows Server 2022, however it's the same procedure on Windows 10/11. |
|
| [1] | On CUI configuration, Run PowerShell with Admin Privilege and Configure iSCSI Initiator. |
Windows PowerShell Copyright (C) Microsoft Corporation. All rights reserved. # start iSCSI Initiator service & set [automatic] for Startup PS C:\Users\Administrator> Start-Service -Name MSiSCSI PS C:\Users\Administrator> Set-Service -Name MSiSCSI -StartupType Automatic # set iSCSI Target to connect to PS C:\Users\Administrator> New-IscsiTargetPortal -TargetPortalAddress "10.0.0.101" InitiatorInstanceName : InitiatorPortalAddress : IsDataDigest : False IsHeaderDigest : False TargetPortalAddress : 10.0.0.101 TargetPortalPortNumber : 3260 PSComputerName : # show iSCSI Target PS C:\Users\Administrator> Get-IscsiTarget IsConnected NodeAddress PSComputerName ----------- ----------- -------------- False iqn.1991-05.com.microsoft:rx-7-iscsitarget01-target # connect to iSCSI Target # [-NodeAddress] : the name confirmed above # [-ChapUsername] : username that you set on iSCSI Target Config # [-ChapUsername] : password of the user above PS C:\Users\Administrator> Connect-IscsiTarget ` -NodeAddress iqn.1991-05.com.microsoft:rx-7-iscsitarget01-target ` -AuthenticationType ONEWAYCHAP ` -ChapUsername "username" ` -ChapSecret "UserP@ssw0rd01" ` -IsPersistent $True AuthenticationType : ONEWAYCHAP InitiatorInstanceName : ROOT\ISCSIPRT\0000_0 InitiatorNodeAddress : iqn.1991-05.com.microsoft:rx-9.srv.world InitiatorPortalAddress : 0.0.0.0 InitiatorSideIdentifier : 400001370000 IsConnected : True IsDataDigest : False IsDiscovered : True IsHeaderDigest : False IsPersistent : True NumberOfConnections : 1 SessionIdentifier : ffff8004375fe010-4000013700000002 TargetNodeAddress : iqn.1991-05.com.microsoft:rx-7-iscsitarget01-target TargetSideIdentifier : 0100 PSComputerName : # show established connection PS C:\Users\Administrator> Get-IscsiConnection ConnectionIdentifier : ffff8004375fe010-1 InitiatorAddress : 0.0.0.0 InitiatorPortNumber : 19411 TargetAddress : 10.0.0.101 TargetPortNumber : 3260 PSComputerName : # show disks # on the example blow, [Number 1] is the iSCSI disk PS C:\Users\Administrator> Get-Disk | Format-Table -AutoSize -Wrap Number Friendly Name Serial Number HealthStatus OperationalStatus Total Size Partition Style ------ ------------- ------------- ------------ ----------------- ---------- --------------- 1 MSFT Virtual HD B4038C72-8C4A-4F4F-9982-966BB22AE41A Healthy Offline 10 GB RAW 0 VMware Virtual NVMe Disk VMWare NVME_0000 Healthy Online 120 GB GPT |
| [2] | To enable to read or write iSCSI disks, set like follows. |
# turn it online PS C:\Users\Administrator> Set-Disk -Number 1 -IsOffline $False # initialize it with GPT partitoon type PS C:\Users\Administrator> Initialize-Disk -Number 1 -PartitionStyle GPT # confirm settings PS C:\Users\Administrator> Get-Disk | Format-Table -AutoSize -Wrap Number Friendly Name Serial Number HealthStatus OperationalStatus Total Size Partition Style ------ ------------- ------------- ------------ ----------------- ---------- --------------- 1 MSFT Virtual HD B4038C72-8C4A-4F4F-9982-966BB22AE41A Healthy Online 10 GB GPT 0 VMware Virtual NVMe Disk VMWare NVME_0000 Healthy Online 120 GB GPT # assign drive letter and create partition PS C:\Users\Administrator> New-Partition -DiskNumber 1 -UseMaximumSize -AssignDriveLetter DiskPath: \\?\scsi#disk&ven_msft&prod_virtual_hd#1&1c121344&0&000000#{53f56307-b6bf-11d0-94f2-00a0c91efb8b} PartitionNumber DriveLetter Offset Size Type --------------- ----------- ------ ---- ---- 2 E 16777216 9.98 GB Basic # format with NTFS PS C:\Users\Administrator> Format-Volume -DriveLetter E -FileSystem NTFS -Force DriveLetter FriendlyName FileSystemType DriveType HealthStatus OperationalStatus SizeRemaining Size ----------- ------------ -------------- --------- ------------ ----------------- ------------- ---- E NTFS Fixed Healthy OK 9.95 GB 9.98 GB # confirm settings PS C:\Users\Administrator> Get-Volume | Format-Table -AutoSize -Wrap DriveLetter FriendlyName FileSystemType DriveType HealthStatus OperationalStatus SizeRemaining Size ----------- ------------ -------------- --------- ------------ ----------------- ------------- ---- NTFS Fixed Healthy OK 85.68 MB 523 MB FAT32 Fixed Healthy OK 67.3 MB 96 MB E NTFS Fixed Healthy OK 9.95 GB 9.98 GB C NTFS Fixed Healthy OK 105.42 GB 119.37 GB D Unknown CD-ROM Healthy Unknown 0 B 0 B |
|
iSCSI : Configure iSCSI Initiator (GUI)
|
|
On GUI configuration, set like follows.
|
|
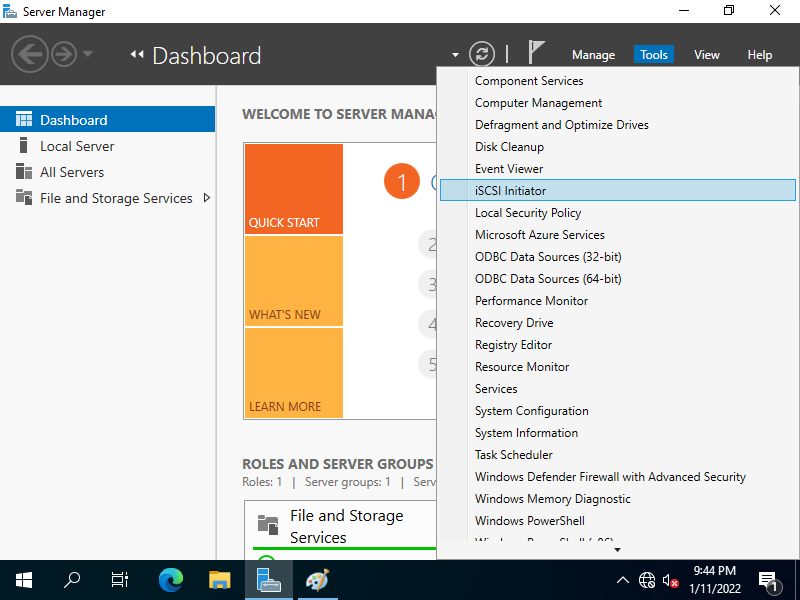
| [3] | Run Server Manager and Open [Tools] - [iSCSI Initiator]. On initial starting, confirmation message is shown because iSCSI Initiator service is not enabled by default. |
|
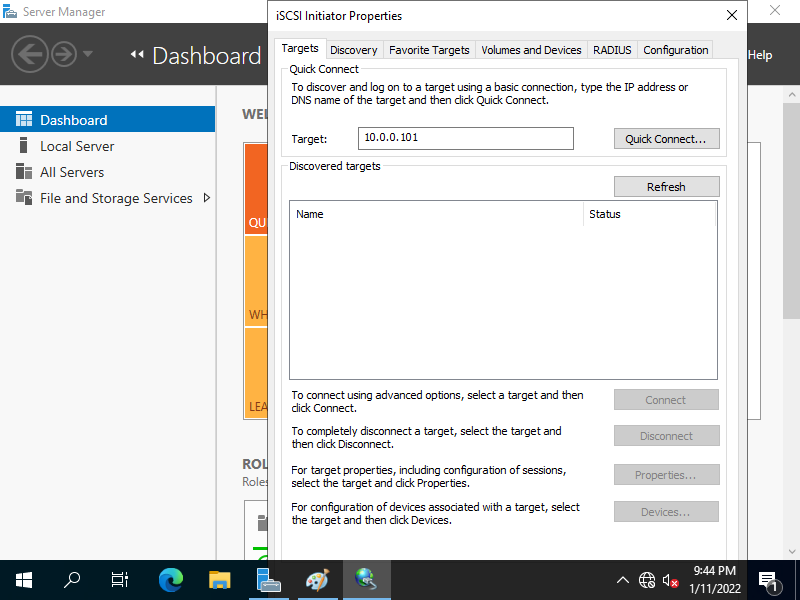
| [4] | Input Target's Hostname or IP address on [Target] field and click [Quick Connect] button. |
|
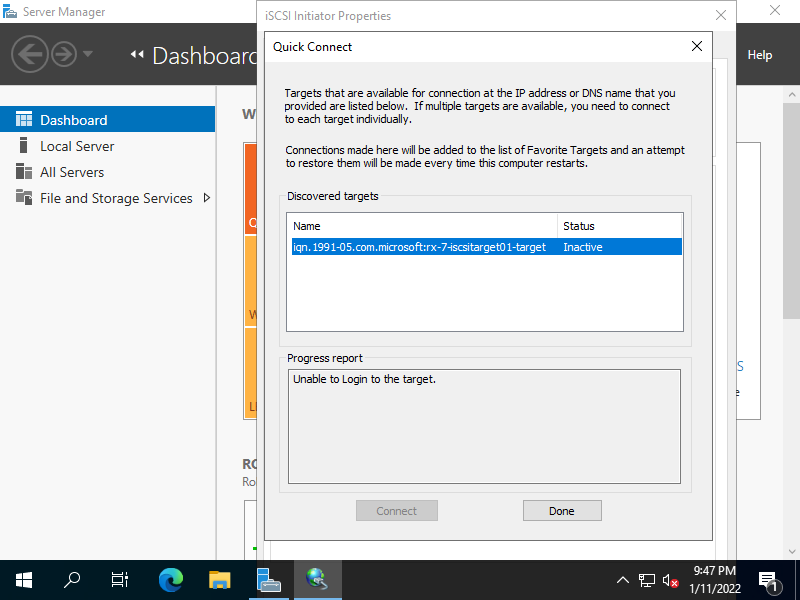
| [5] | iSCSI Target has been detected like follows, click [Done] button. |
|
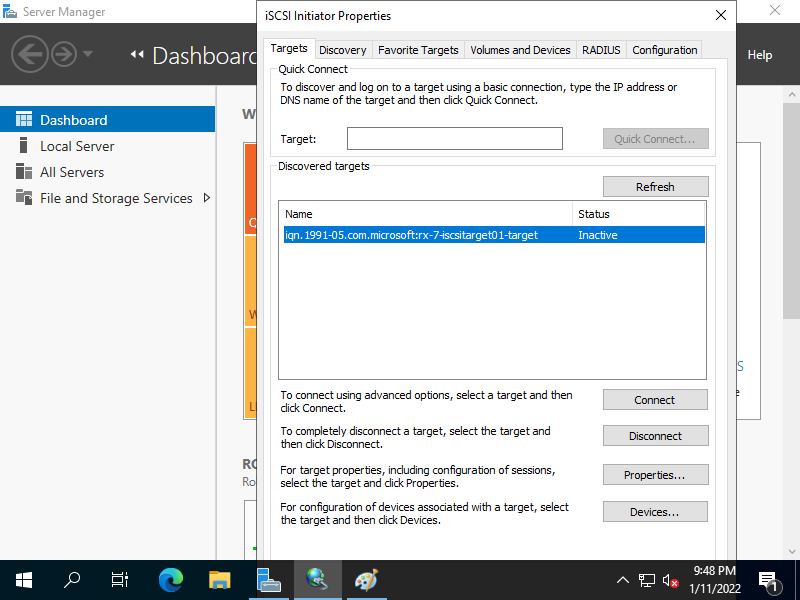
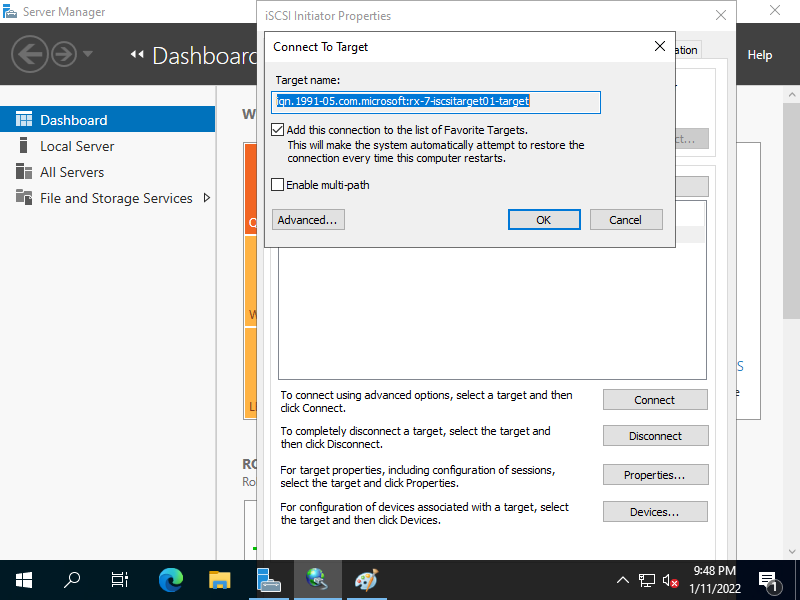
| [6] | Click [Connect] button. |
|
| [7] | Click [Advanced] button. |
|
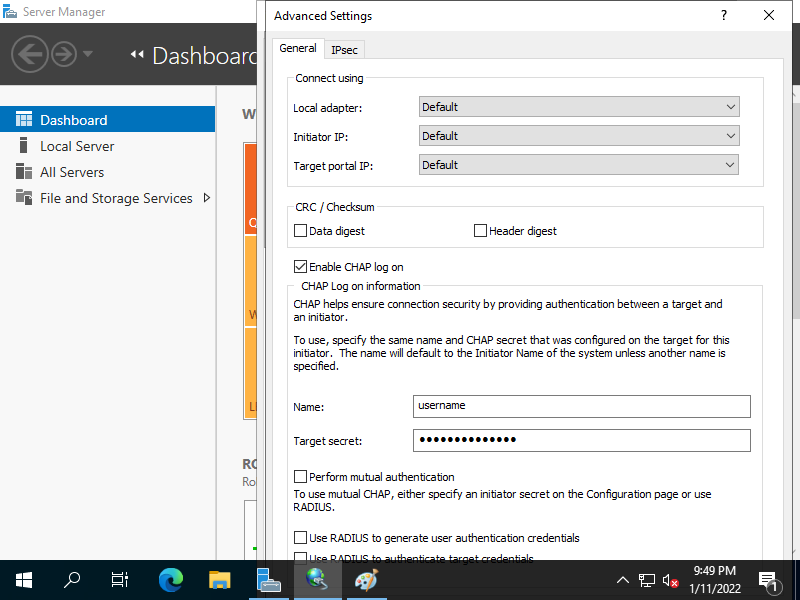
| [8] | Check a box [Enable CHAP log on] and specify username and password on the fileds. They are the one you set on iSCSI Target's configuration. |
|
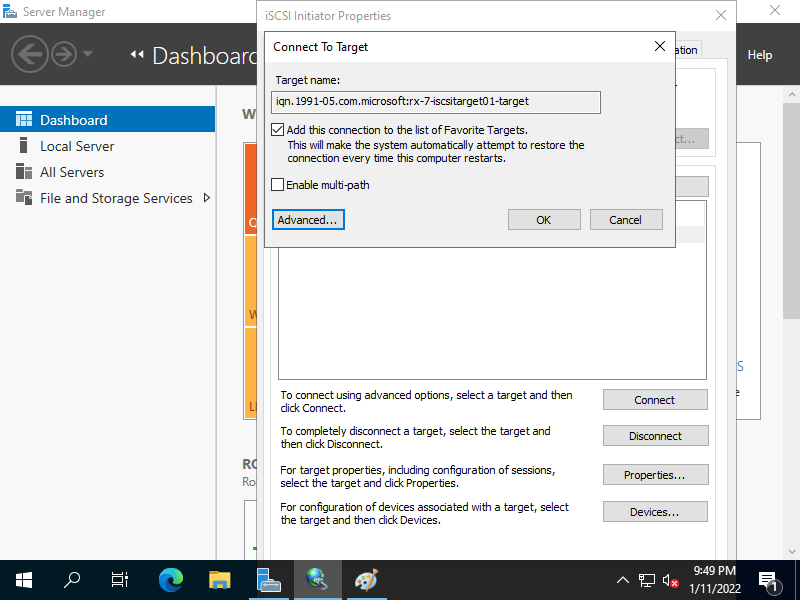
| [9] | Click [OK] button. |
|
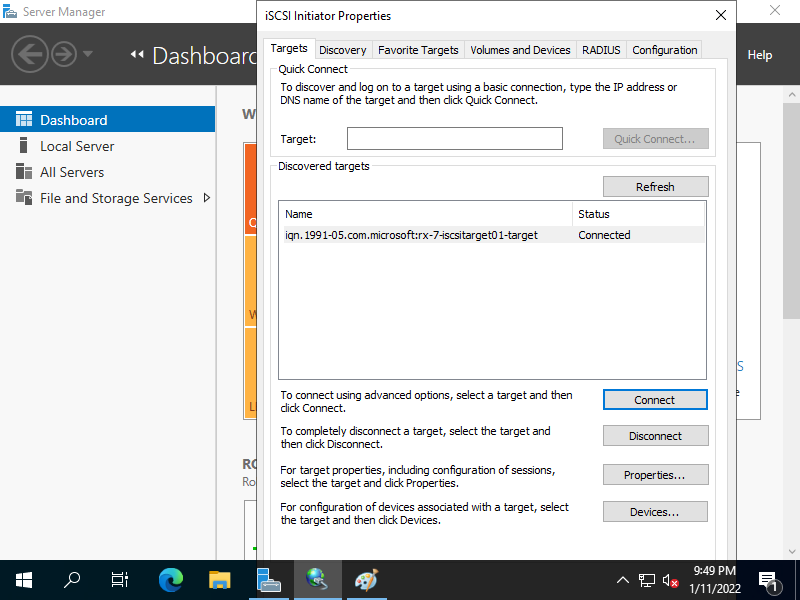
| [10] | If successfully connected, the status turns to [Connected] like follows. That's OK to configure iSCSI initiator settings. |
|
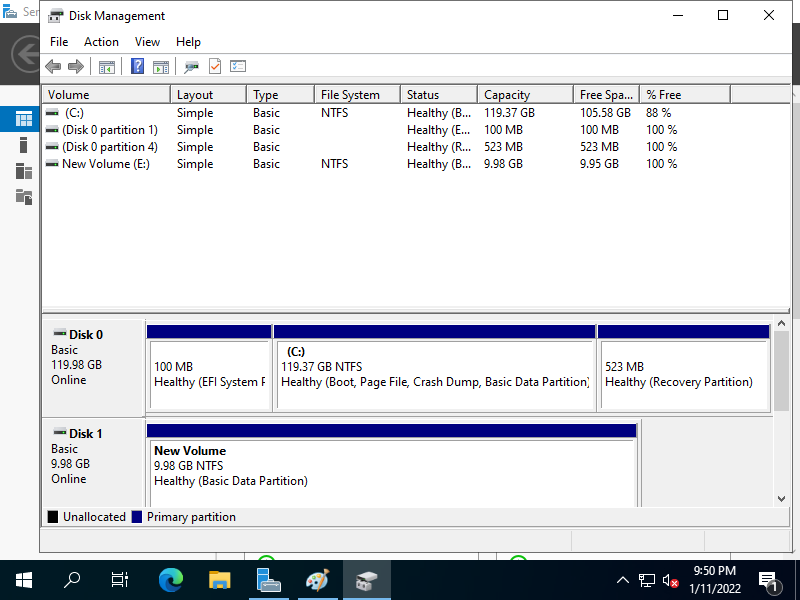
| [11] | On the [Disk Management] tool, the iSCSI Disk has been attached like follows. |
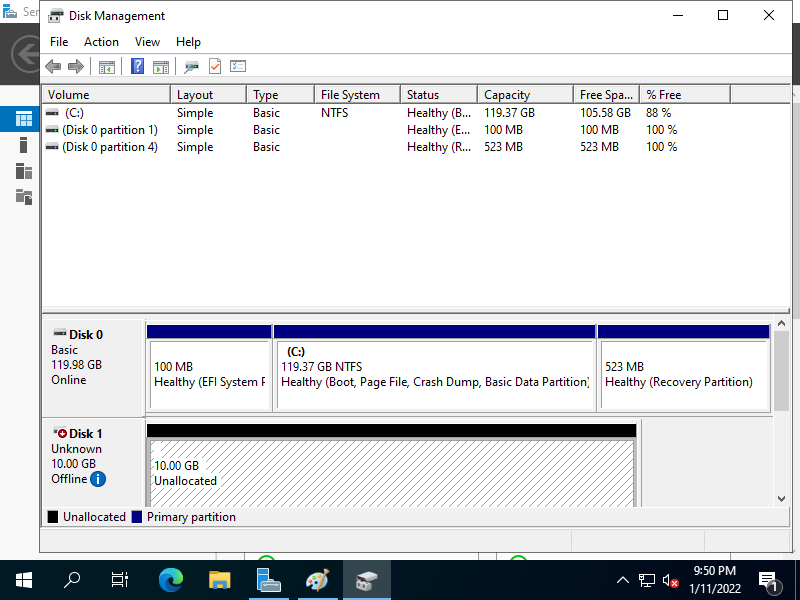
|
| [12] | To use the iSCSI Disk, turn it online and initialize it and then assign drive letter to it. |
|
Matched Content