IIS : IP and Domain Ristrictions2019/09/12 |
|
Set IP and Domain Ristrictions to specific web contents.
|
|
| [1] | Run PowerShell with Admin Privilege and Configure. |
Windows PowerShell Copyright (C) Microsoft Corporation. All rights reserved. # install IP and Domain Ristrictions feature PS C:\Users\Administrator> Install-WindowsFeature Web-IP-Security Success Restart Needed Exit Code Feature Result ------- -------------- --------- -------------- True No Success {IP and Domain Restrictions} # restart IIS PS C:\Users\Administrator> Restart-Service W3SVC PS C:\Users\Administrator> Get-Website Name ID State Physical Path Bindings ---- -- ----- ------------- -------- Default Web Site 1 Started %SystemDrive%\inetpub\wwwroot http *:80: RX-7.srv.world 2 Started C:\inetpub\newsite http *:80:RX-7.srv.world https *:443:rx-7.srv.world sslFlags=0 PS C:\Users\Administrator> Get-ChildItem C:\inetpub\newsite Directory: C:\inetpub\newsite Mode LastWriteTime Length Name ---- ------------- ------ ---- d----- 9/10/2019 1:24 AM auth_basic d----- 9/11/2019 12:23 AM auth_win d----- 9/11/2019 7:09 PM content01 d----- 9/11/2019 7:09 PM content02 -a---- 9/9/2019 1:27 AM 28 index.html # for example, set restriction to [content01] folder on [RX-7.srv.world] site to deny from [10.0.0.128/29] PS C:\Users\Administrator> Add-WebConfiguration -Filter '/system.webServer/security/ipSecurity' -Location "RX-7.srv.world/content01" -Value @{ipAddress="10.0.0.128";subnetMask="29";allowed="false"} # for example, change default setting for [content02] folder on [RX-7.srv.world] site as deny all (default is allow all) PS C:\Users\Administrator> Set-WebConfigurationProperty -Filter '/system.webServer/security/ipSecurity' -Location "RX-7.srv.world/content02" -Name allowUnlisted -Value False # for example, set permission to [content02] folder on [RX-7.srv.world] site to allow from [10.0.0.240/255.255.255.240] PS C:\Users\Administrator> Add-WebConfiguration -Filter '/system.webServer/security/ipSecurity' -Location "RX-7.srv.world/content02" -Value @{ipAddress="10.0.0.240";subnetMask="255.255.255.240";allowed="true"} # restart Web site PS C:\Users\Administrator> Restart-WebItem -PSPath 'IIS:\Sites\RX-7.srv.world' |
|
IIS : IP and Domain Ristrictions (GUI)
|
|
On GUI configuration, set like follows.
|
|
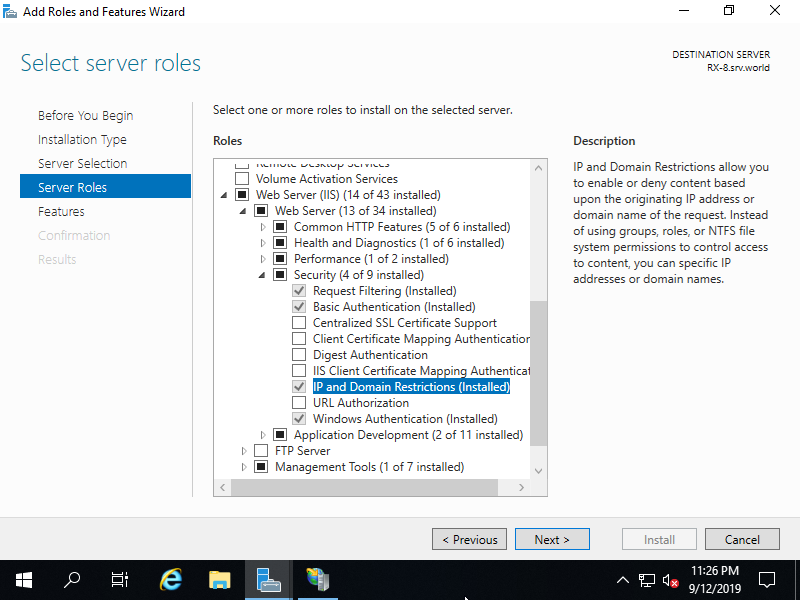
| [2] | Run [Start] - [Server Manager] and enter [Add roles and features], then check a box [IP and Domain Ristrictions] and install it. |
|
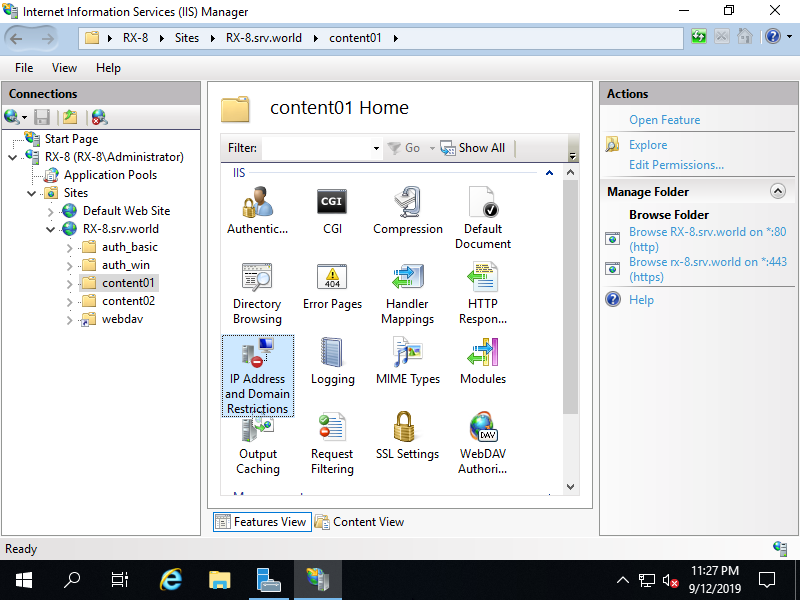
| [3] | On this example, Set restriction to [content01] folder on [RX-8.srv.world] site. Select target folder on the left pane and open [IP Address and Domain Ristrictions] on the center pane. |
|
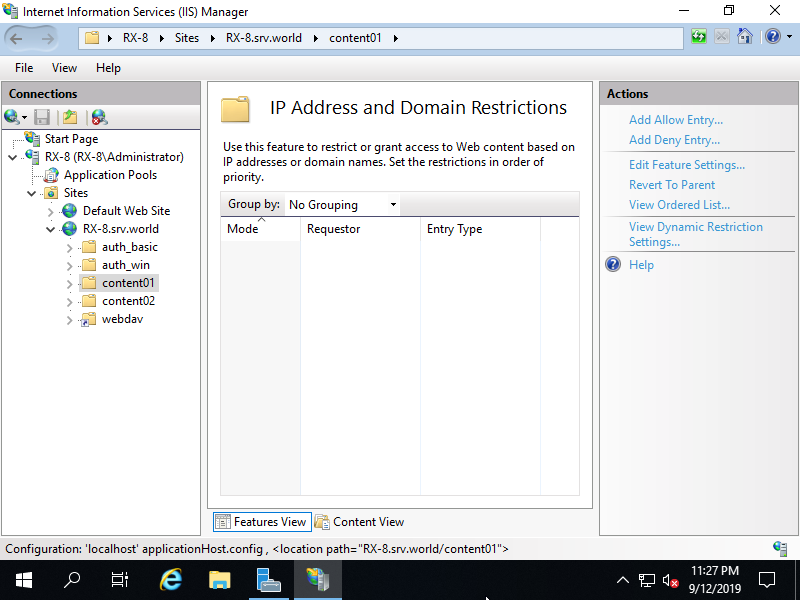
| [4] | By default, setting is allow all, so click [Add Deny Entry] on the right pane to restrict some IP address. |
|
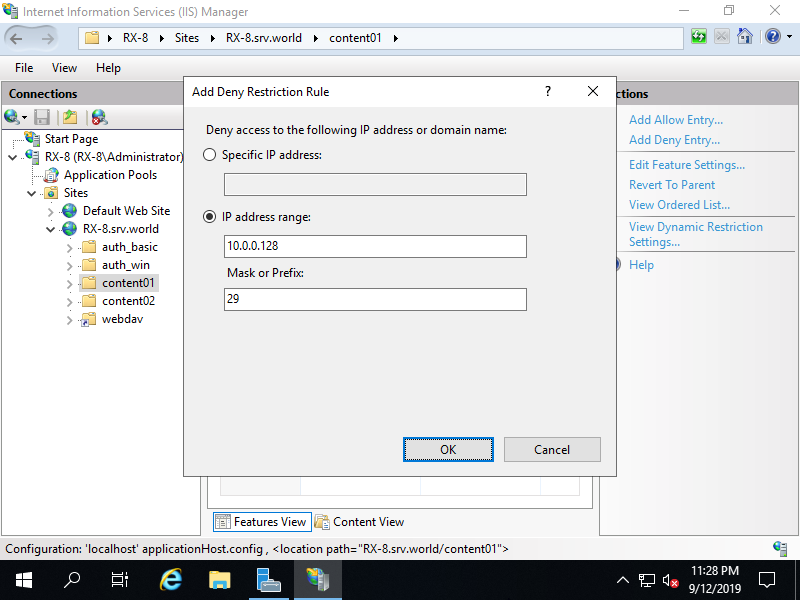
| [5] | Input an IP address on [Specific IP address] field, or IP address range on [IP address range]. On this example, set [10.0.0.128/29] range to deny from them. |
|
| [6] | After setting, entries are displayed. If you'd like to add more, possible to add with the same operation. |

|
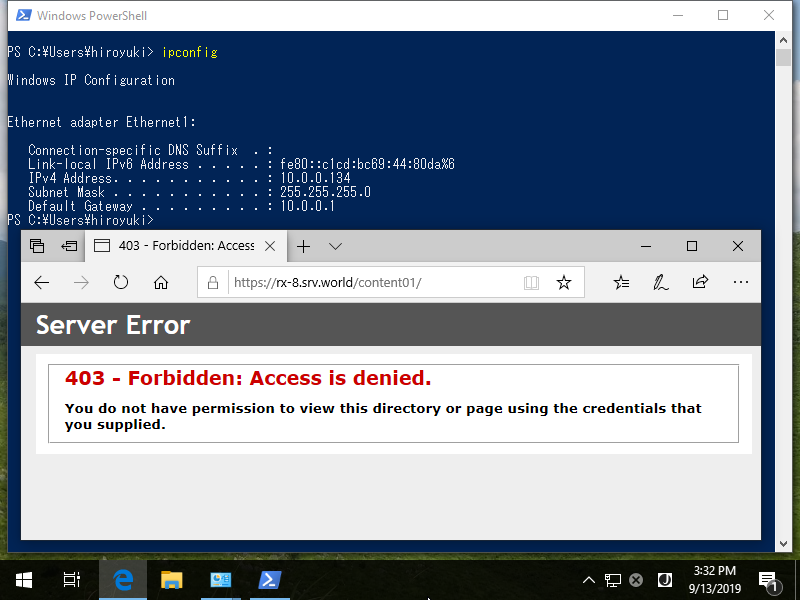
| [7] | After setting, verify working normally to access from denied computer and allowed computer. The example below shows that source computer that has [10.0.0.134] accessed to IIS site but he was denied as restricted settings. |
|
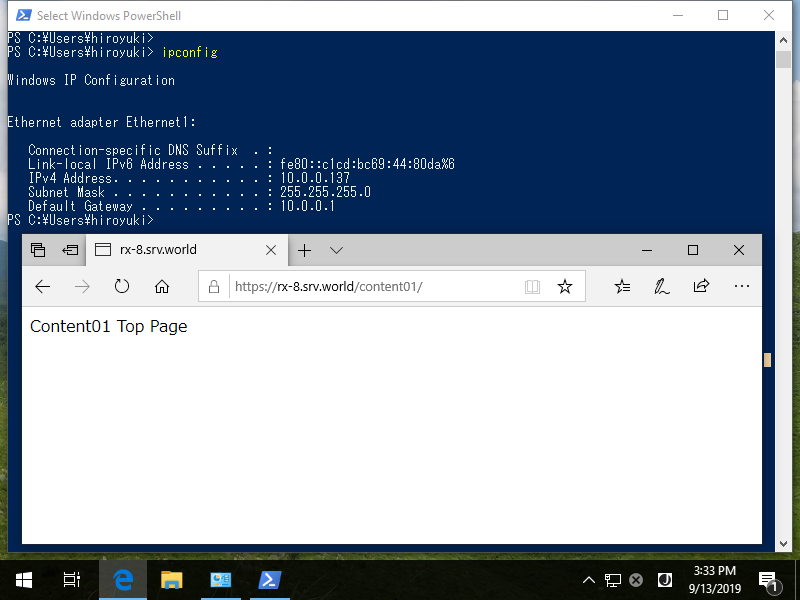
| [8] | The example below shows that source computer that has [10.0.0.137] accessed to IIS site and he could access to it as settings. |
|
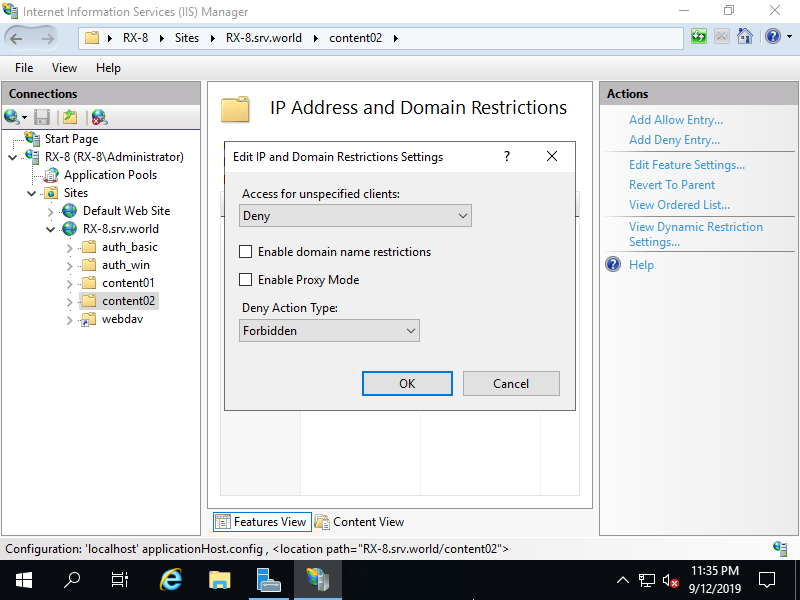
| [9] | For more example, Set config to [content02] folder on [RX-8.srv.world] site. Select target folder on the left pane and click to open [IP Address and Domain Ristrictions] on the center pane, then following windows is shown. Change default [allow all] setting on here, Click [Edit feature setting] on the right pane. |

|
| [10] | Change to [Deny] on [Access for unspecified clients] field. By this change, default setting turns to [deny all]. |
|
| [11] | Click [Add Allow Entry] on the right pane. |

|
| [12] | Input an IP address on [Specific IP address] field, or IP address range on [IP address range]. On this example, set [10.0.0.240/255.255.255.240] range to allow from them. |

|
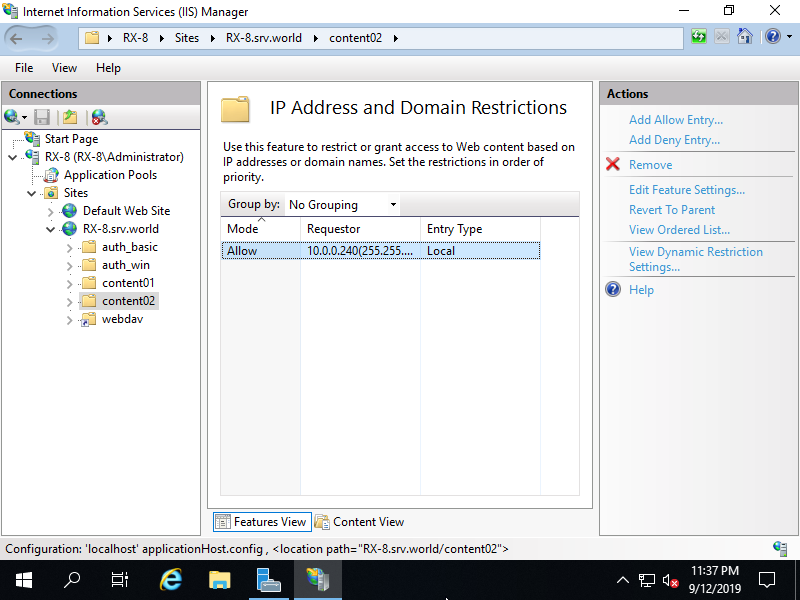
| [13] | After setting, entries are displayed. If you'd like to add more, possible to add with the same operation. |
|
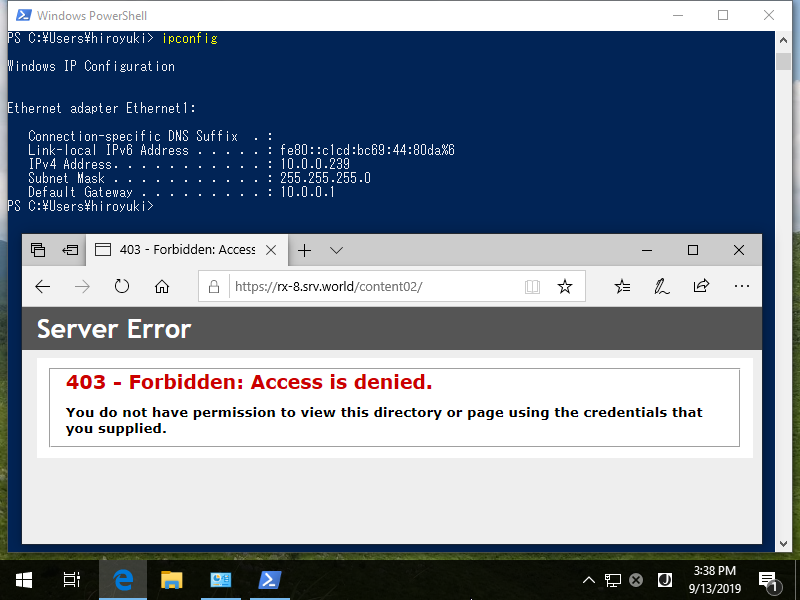
| [14] | After setting, verify working normally to access from denied computer and allowed computer. The example below shows that source computer that has [10.0.0.239] accessed to IIS site and he was denied as settings. |
|
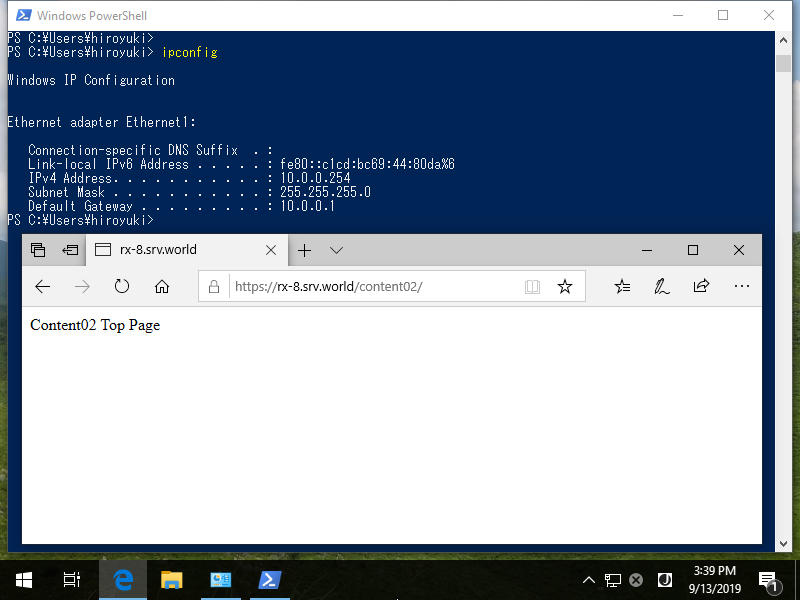
| [15] | The example below shows that source computer that has [10.0.0.254] accessed to IIS site and he could access to it as allow settings. |
|
| [16] | By the way, it's possbile to set domain name based restrictions, too. However, for the screen like below, it is not recommended. |

|
Matched Content