DHCP Server : Configure DHCP Server2019/03/22 |
|
Configure installed DHCP Server.
On this example, it shows only the case for IPv4 configuration.
On CUI configuration, set like follows.
By the way, if your Server to install DHCP is stand-alone Server, it's OK to logon to configure with local Administrator account,
but if your Server is in Active Directory Domain, Authorization from AD is required to configure DHCP Server as valid Server,
so logon to configure with a user that is AD Domain user in Domain Admin group.
|
|
| [1] | Run PowerShell with Admin Privilege and Configure. |
Windows PowerShell Copyright (C) Microsoft Corporation. All rights reserved. # add security group for DHCP PS C:\Users\Serverworld> Add-DhcpServerSecurityGroup -ComputerName "RX-7.srv.world" # if computer is in AD domain, run the command below to get authorization from AD PS C:\Users\Serverworld> Add-DhcpServerInDC -DnsName "RX-7.srv.world" -IPAddress 10.0.0.101 -PassThru IPAddress DnsName --------- ------- 10.0.0.101 rx-7.srv.world # add a Scope for IPv4 # [-Name] ⇒ any name you like # [-StartRange] ⇒ start IP address for lease # [-EndRange] ⇒ end IP address for lease # [-LeaseDuration] ⇒ lease period [day.hrs:mins:secs] (if not specified, default is 8 days) PS C:\Users\Serverworld> Add-DhcpServerv4Scope -Name "Internal Network" ` -StartRange 10.0.0.200 ` -EndRange 10.0.0.254 ` -SubnetMask 255.255.255.0 ` -LeaseDuration 8.00:00:00 ` -State Active ` -PassThru ScopeId SubnetMask Name State StartRange EndRange LeaseDuration ------- ---------- ---- ----- ---------- -------- ------------- 10.0.0.0 255.255.255.0 Internal Ne... Active 10.0.0.200 10.0.0.254 8.00:00:00 # set Domain Name, DNS Server, Gateway(Router) to the Scope PS C:\Users\Serverworld> Set-DhcpServerv4OptionValue -DnsDomain "srv.world" ` -DnsServer "10.0.0.100" ` -Router "10.0.0.1" ` -ScopeId "10.0.0.0" ` -PassThru OptionId Name Type Value VendorClass UserClass PolicyName -------- ---- ---- ----- ----------- --------- ---------- 15 DNS Domain Name String {srv.world} 3 Router IPv4Add... {10.0.0.1} 6 DNS Server IPv4Add... {10.0.0.100} PS C:\Users\Serverworld> Restart-Service DHCPServer WARNING: Waiting for service 'DHCP Server (DHCPServer)' to start... |
|
DHCP Server : Configure DHCP Server (GUI)
|
|
On GUI installation, set like follows.
|
|
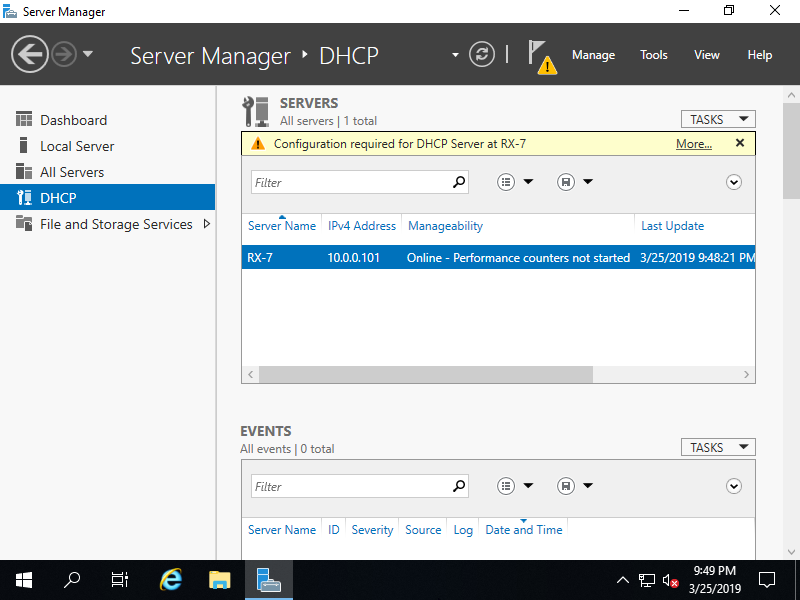
| [2] | Run Server Manager and Click [DHCP] on the left menu and next, Click [More...] link which is upper-right. |
|
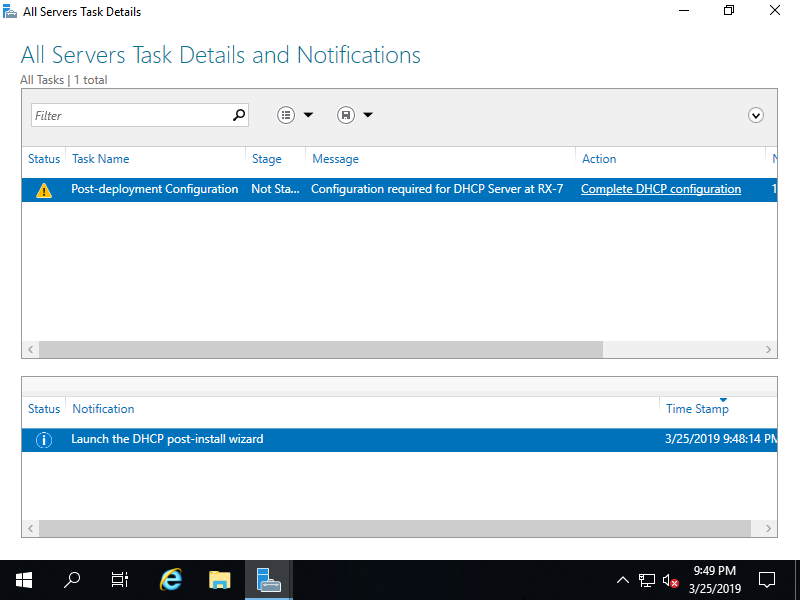
| [3] | Click [Complete DHCP configuration] link which is upper-right. |
|
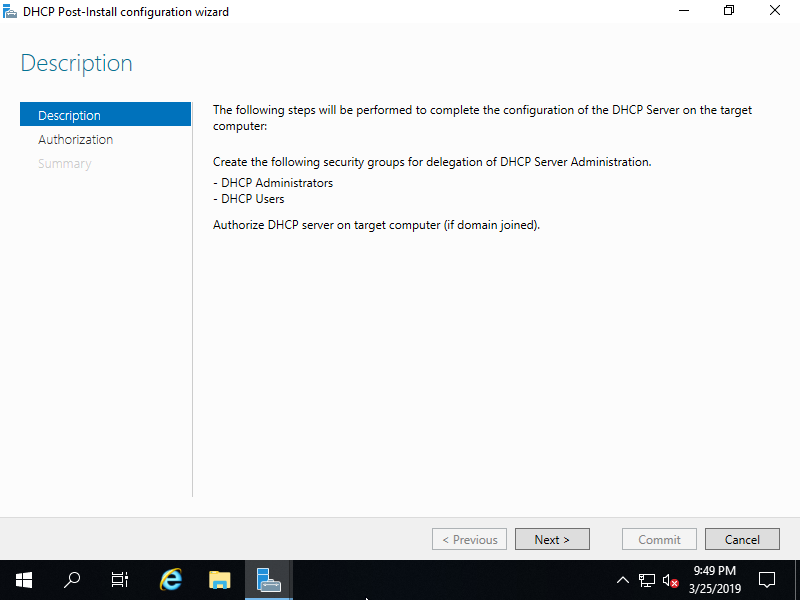
| [4] | Click [Next] button. |
|
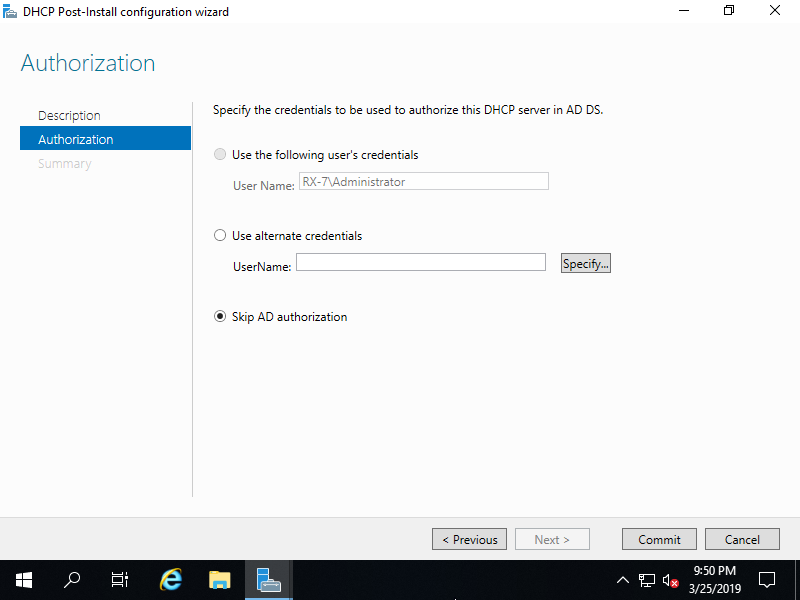
| [5] | If your Server is Stand-Alone Server, select [Skip AD authorization] and Click [Commit] button. If your Server is in AD Domain, though current user is set automatically for AD authorization but if you'd like to change it, set a user for AD authorization and Click [Commit] button. |
|
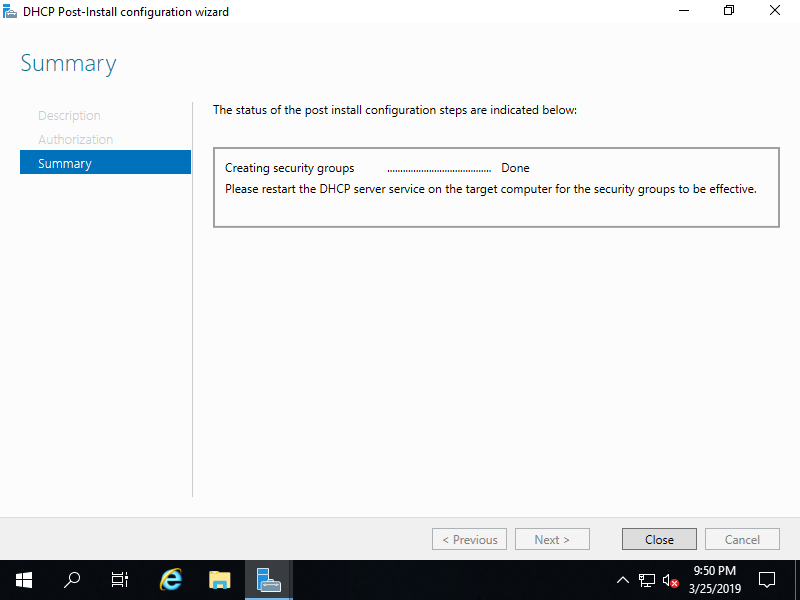
| [6] | After successing authorization normally, click [Close] button. |
|
| [7] | Back to Server Manager and open [Tools] - [DHCP]. |

|
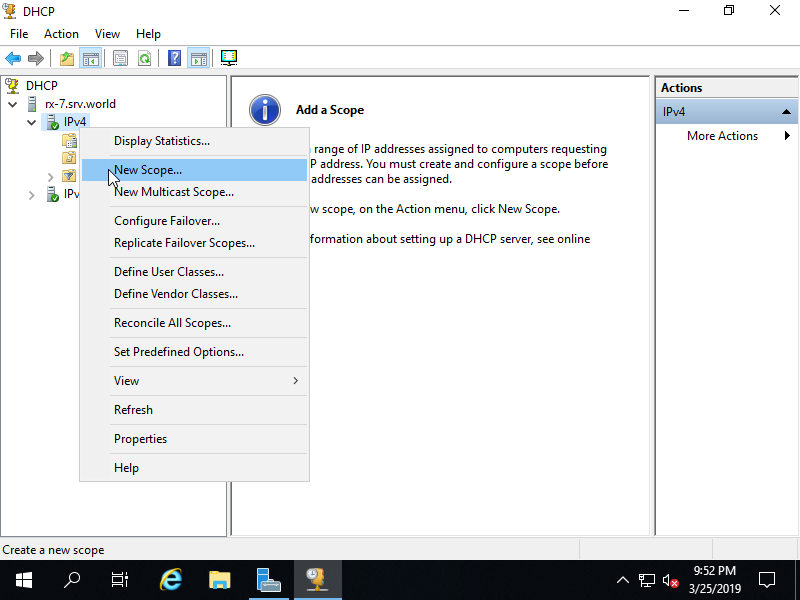
| [8] | Right-Click [IPv4] on the left pane and select [New Scope...]. |
|
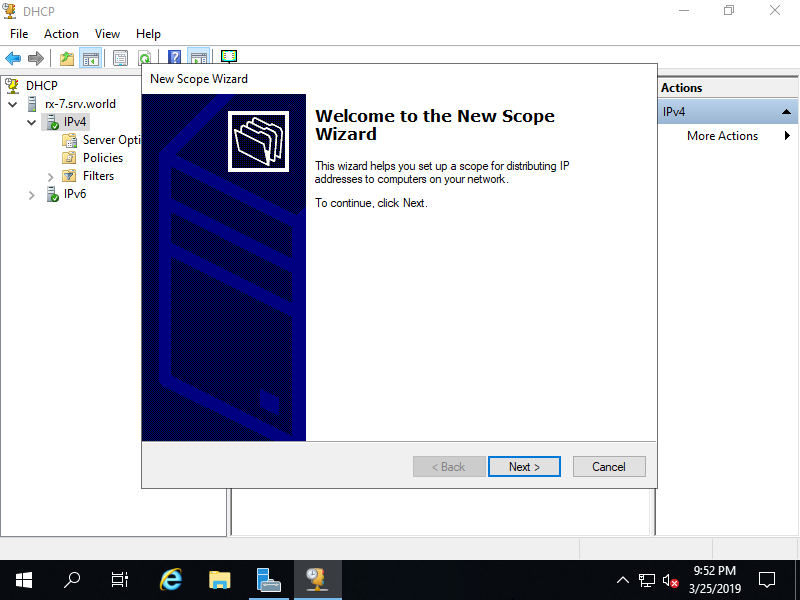
| [9] | Click [Next] button. |
|
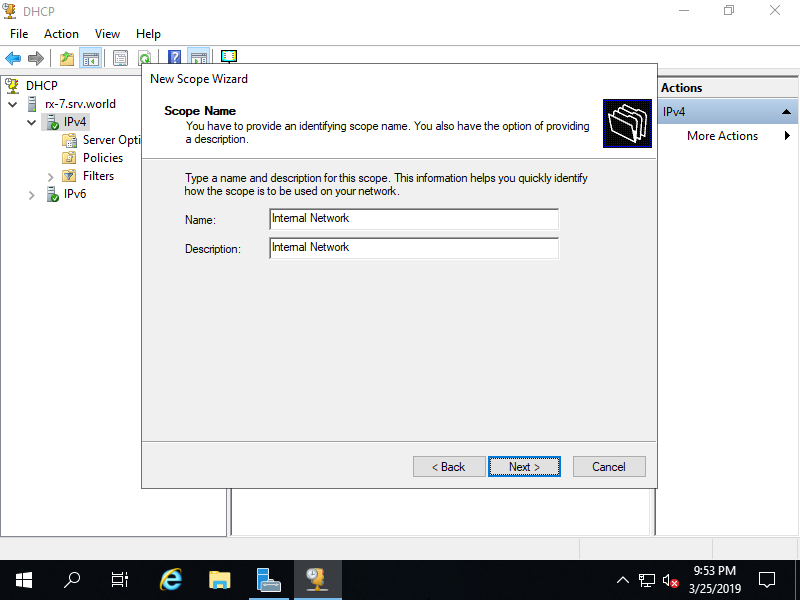
| [10] | Input any name and decsription for this scope. |
|
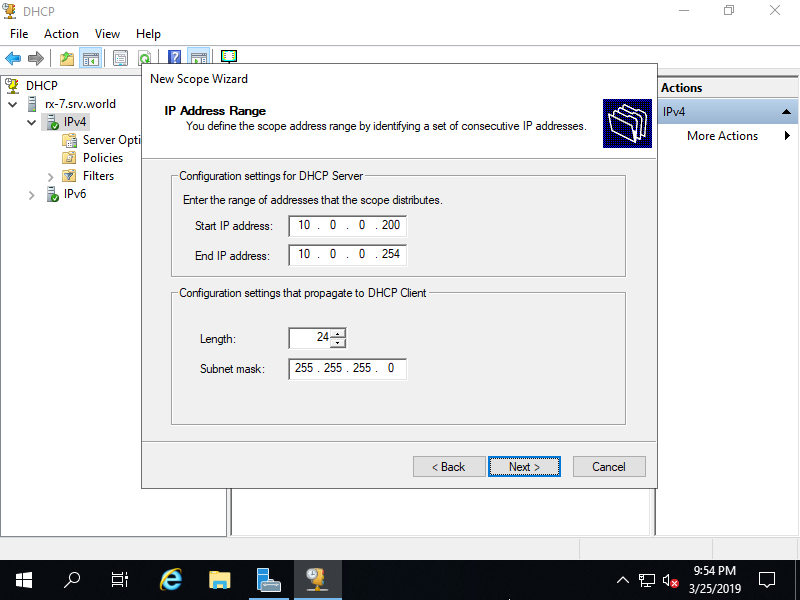
| [11] | Input IP address range for lease and subnet mask. |
|
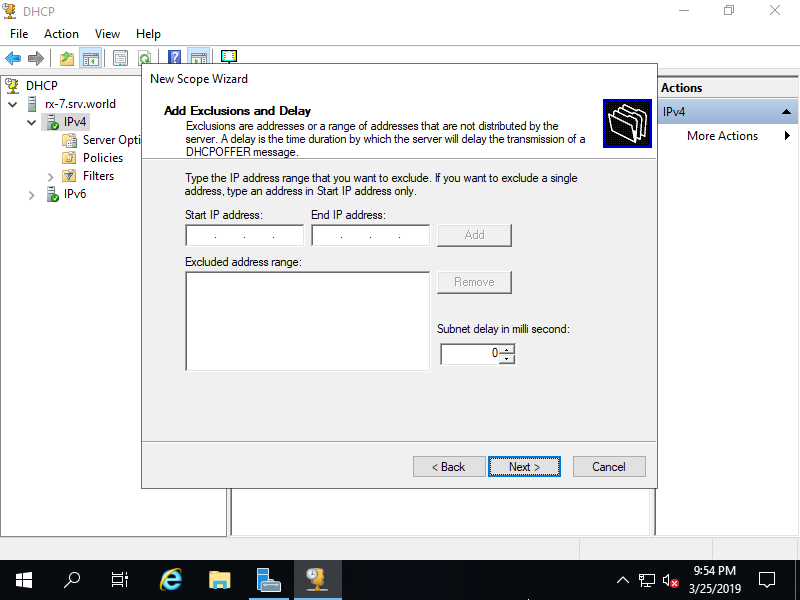
| [12] | If you'd like to exclude specific IP addresses from the range set in previous section, Configure it on here. |
|
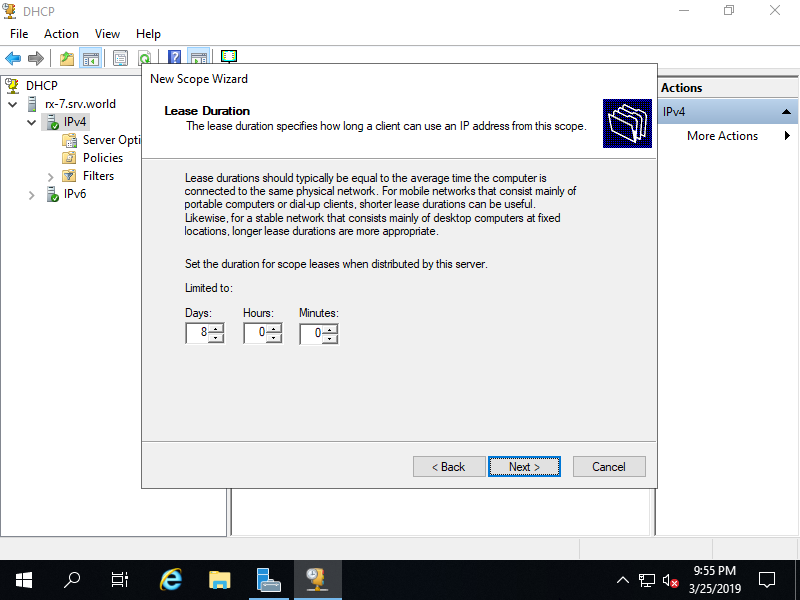
| [13] | Input lease duration. |
|
| [14] | Click [Next] button. |

|
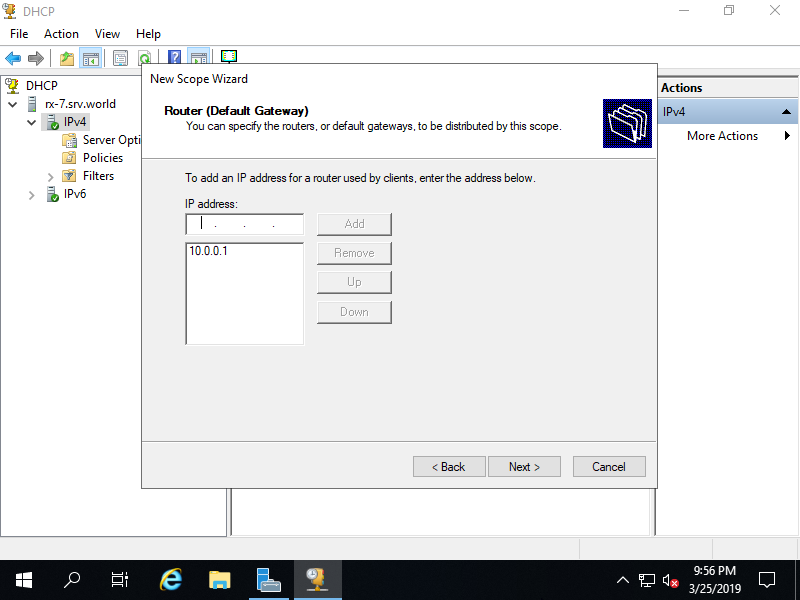
| [15] | Input default gateway of your network. |
|
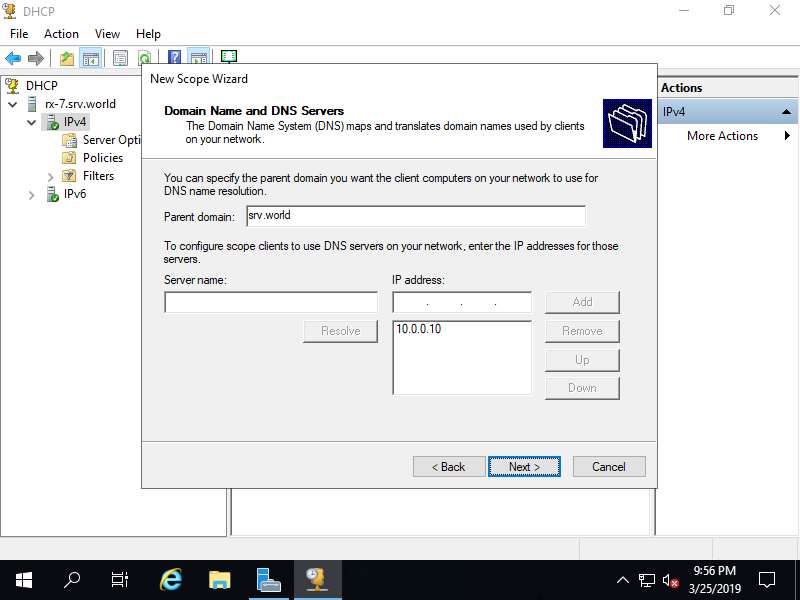
| [16] | Input Domain name and DNS server of your network. If your Server is in AD Domain, it set automatically, make sure it and proceed next. |
|
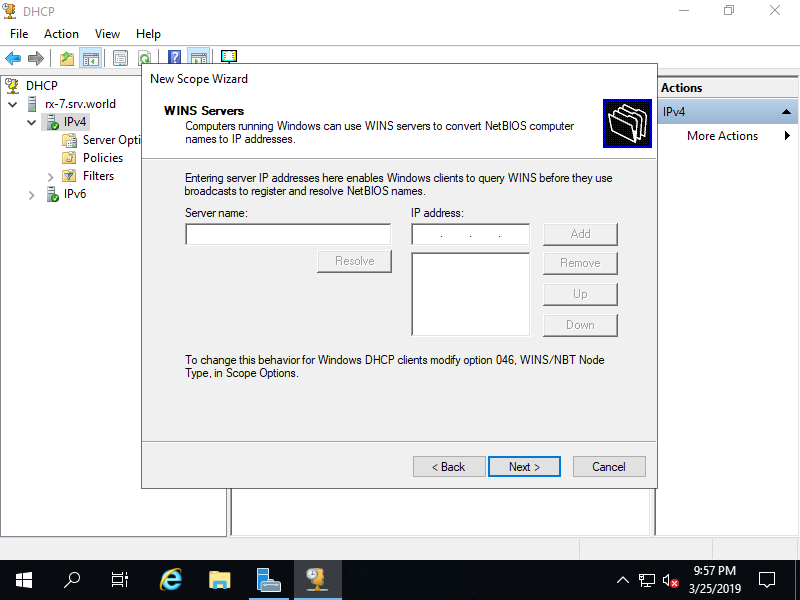
| [17] | Input WINS Server. It's OK to keep empty here if you don't need it. |
|
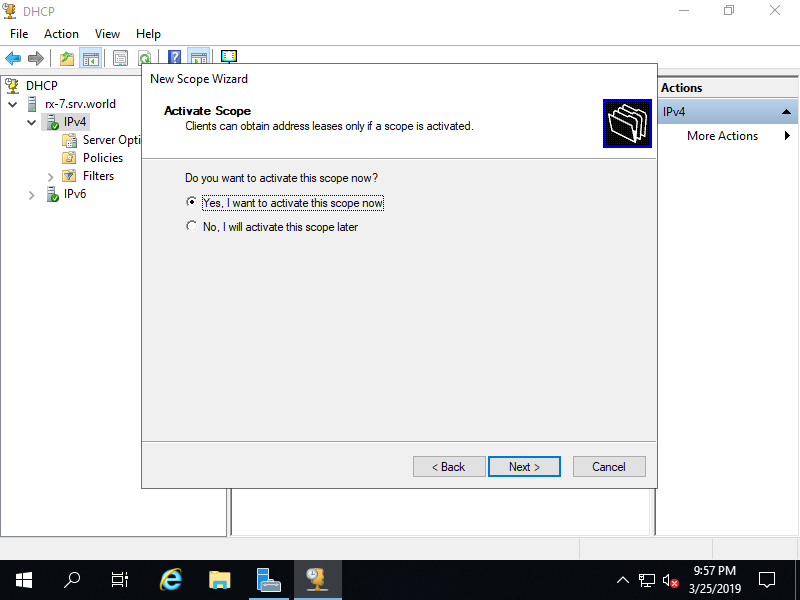
| [18] | Click [Next] button. |
|
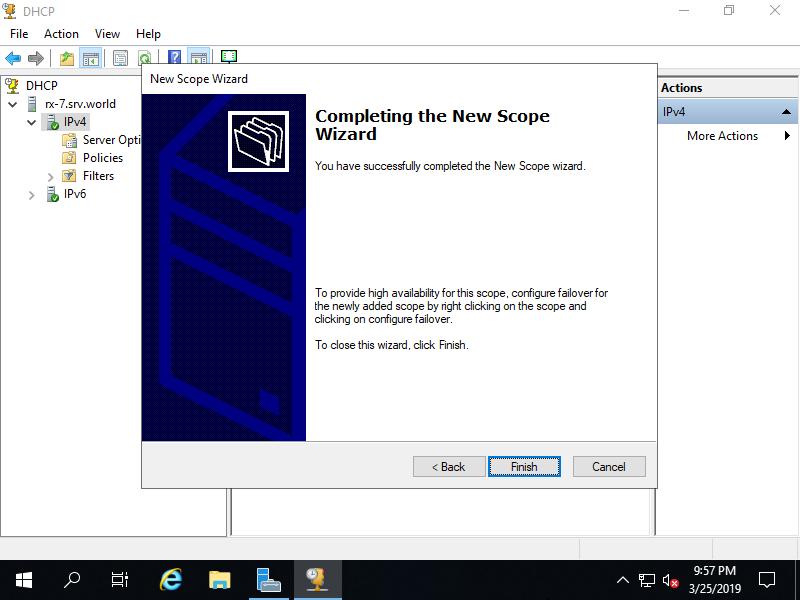
| [19] | Click [Finish] button to complete configuration. |
|
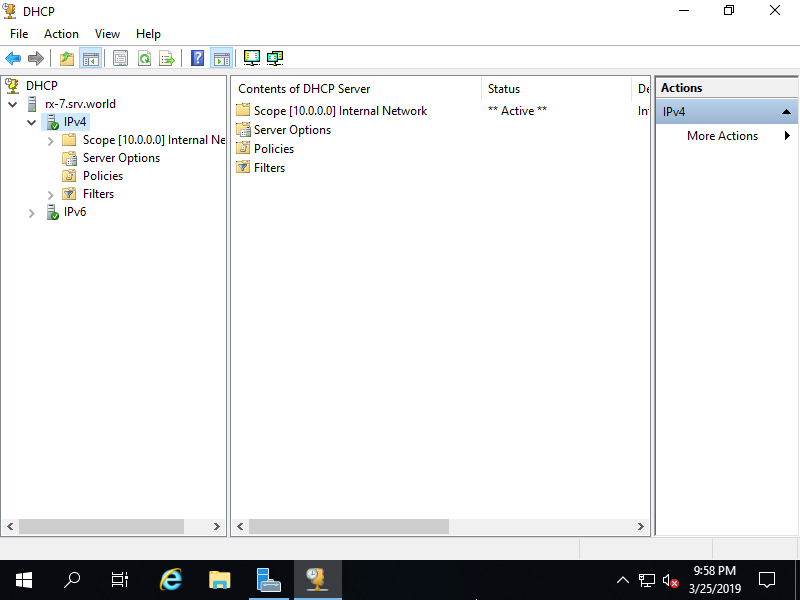
| [20] | New DHCP Scope has been added. |
|
Matched Content