iSCSI : Configure iSCSI Initiator (Client OS)2017/01/20 |
|
Configure iSCSI Initiator (Windows Client OS). This example is based on Windows 10 Pro.
This example is based on the environment below.
FD3S.srv.world [10.0.0.100] - iSCSI Target RX-7.srv.world [10.0.0.101] - iSCSI initiator
|
|
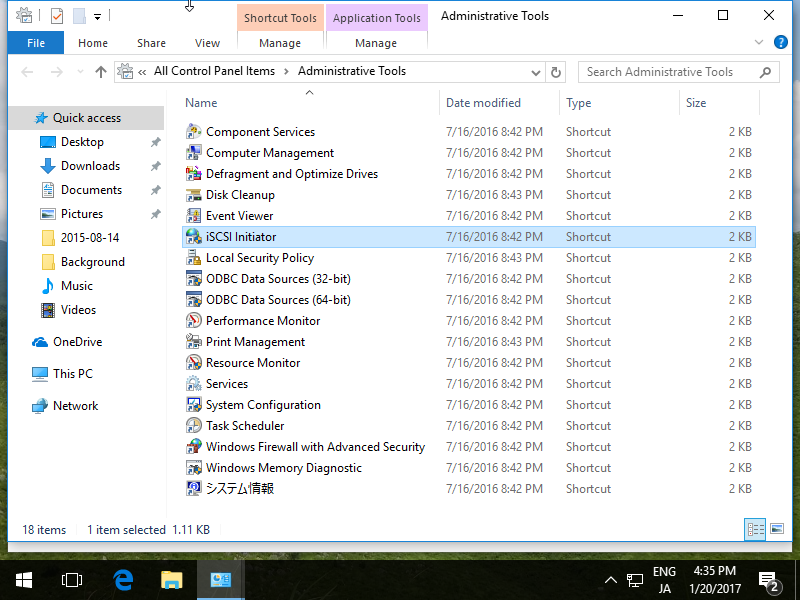
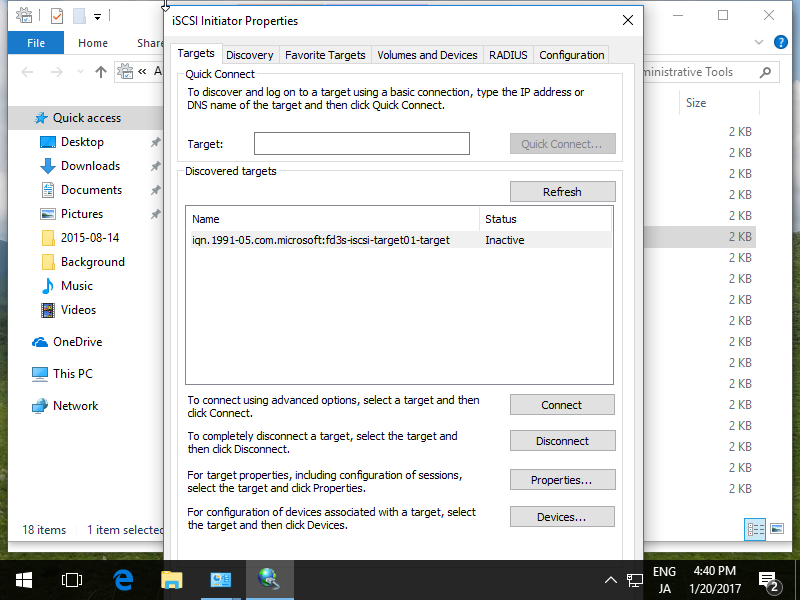
| [1] | Open [Control Panel] - [Administrative Tools] - [iSCSI Initiator]. |
|
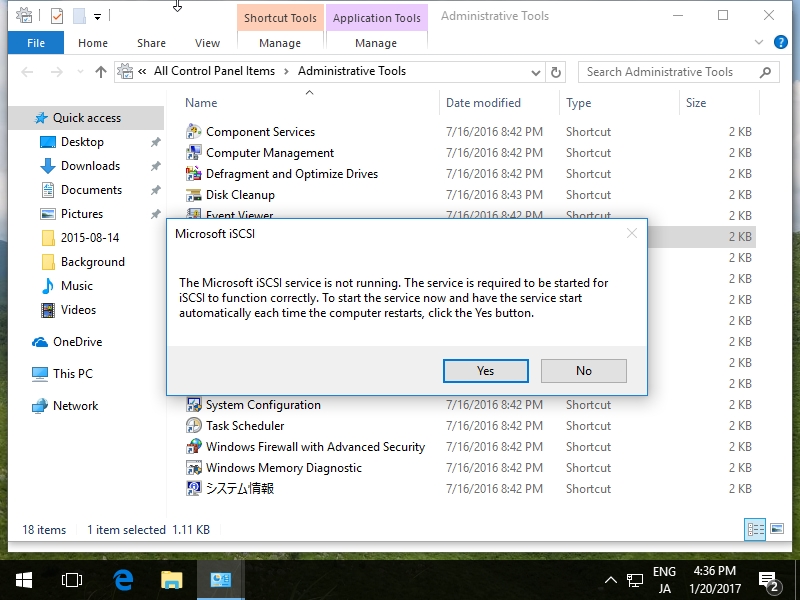
| [2] | Click [Yes] button to proceed. |
|
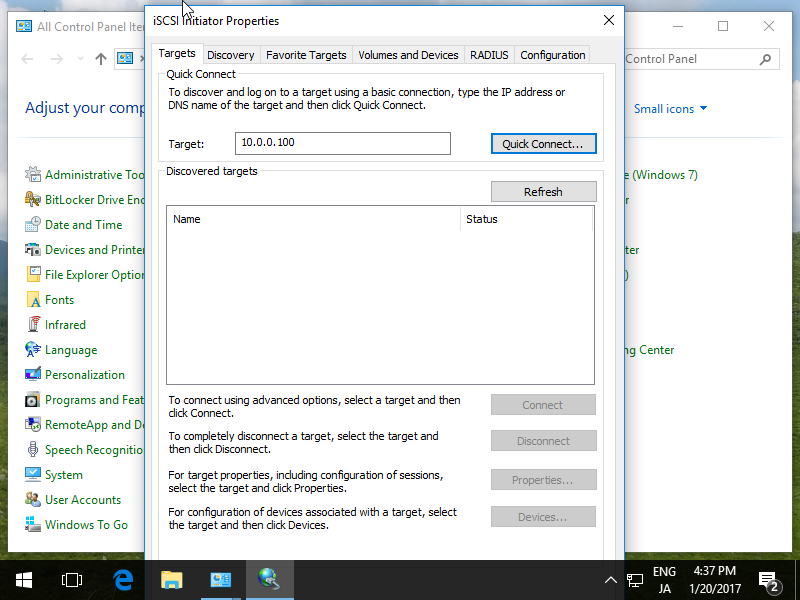
| [3] | Input Target's Hostname or IP address on [Target] field and click [Quick Connect] button. |
|
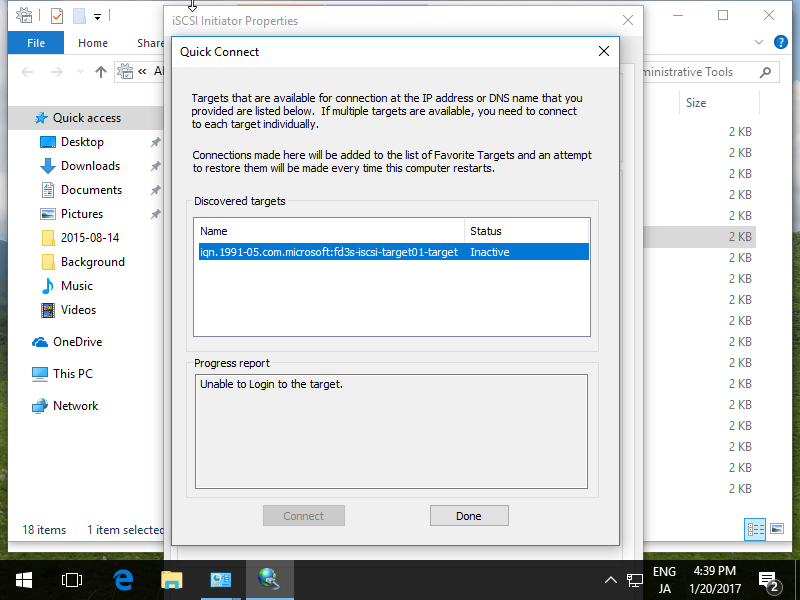
| [4] | iSCSI Target has been detected like follows, click [Done] button. |
|
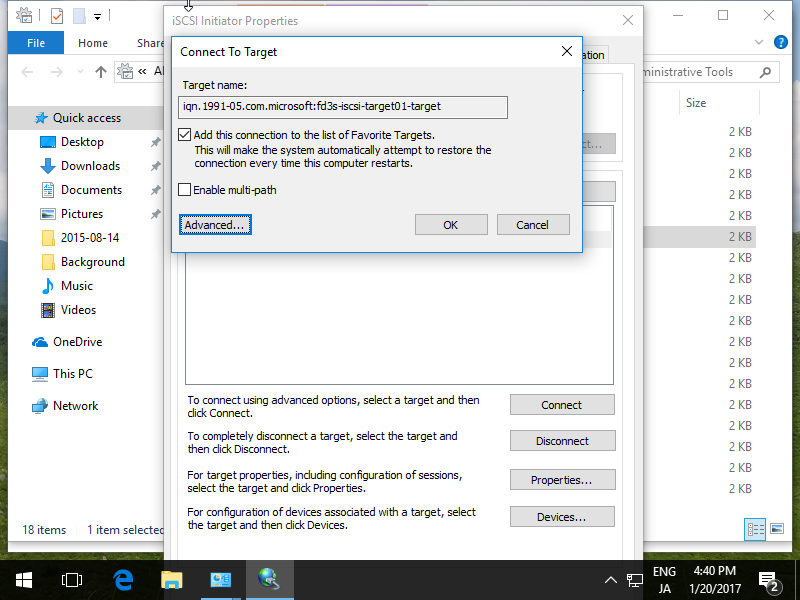
| [5] | Click [Connect] button. |
|
| [6] | Click [Advanced] button. |
|
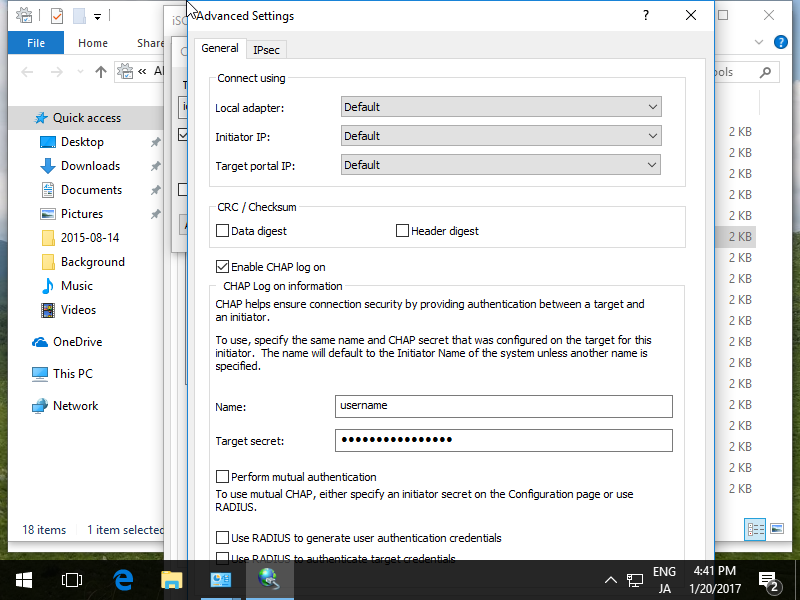
| [7] | Check a box [Enable CHAP log on] and specify username and password on the fileds. They are the just one you set on iSCSI Target's configuration. |
|
| [8] | Click [OK] button. |

|
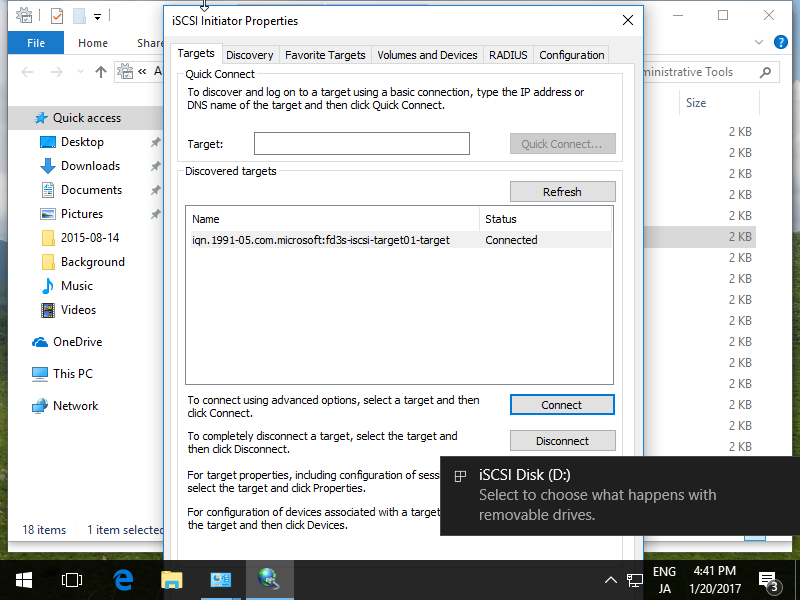
| [9] | If it's no ploblem, the status turns to [Connected] like follows. It's OK to configure iSCSI initiator settings. |
|
| [10] | On the [Disk Management] tool, the iSCSI Disk has been attached like follows. |
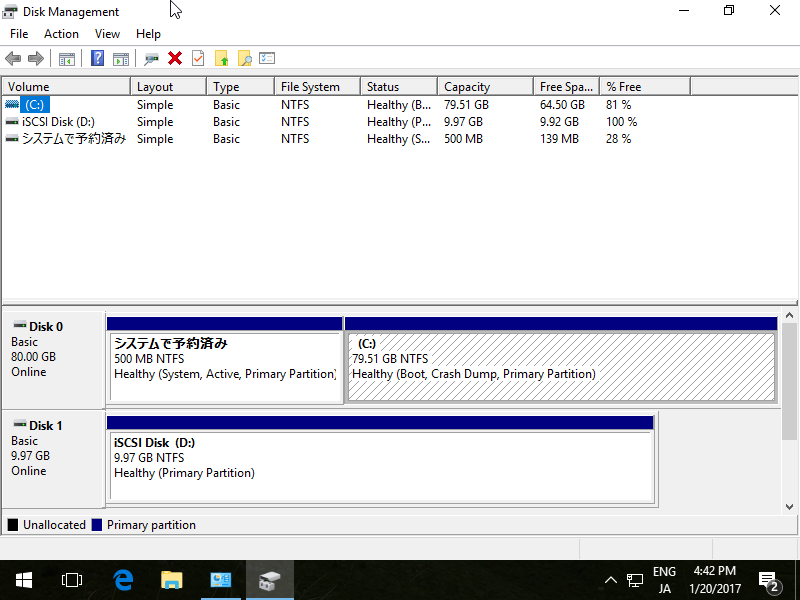
|
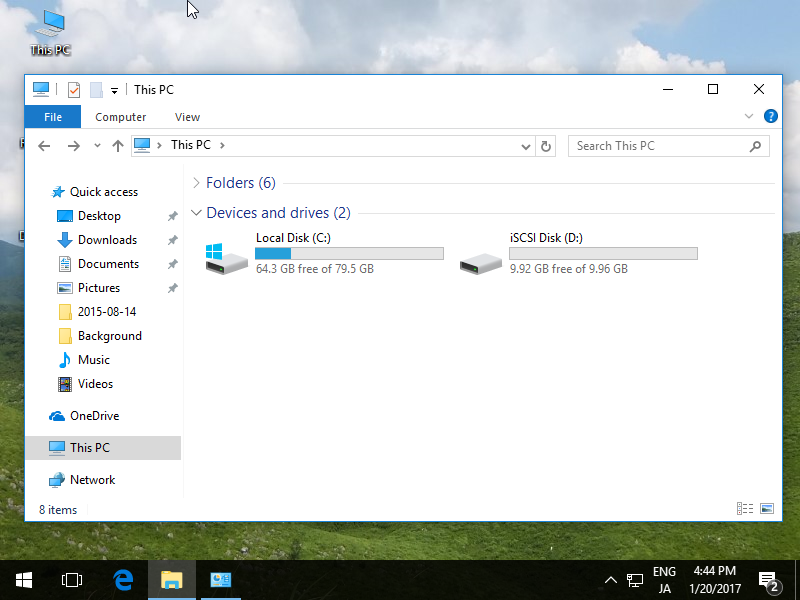
| [11] | After changing online and initializing iSCSI disk, it's possible to use it lie follows. |
|
Matched Content