Jitsi Meet : Install2022/12/02 |
|
Install Jitsi Meet that is the Online Video Conferencing System.
|
|
| [1] | |
| [2] | Install Jitsi Meet. |
|
root@dlp:~# curl -fsSL https://download.jitsi.org/jitsi-key.gpg.key -o /etc/apt/keyrings/jitsi-key.gpg.key root@dlp:~# echo "deb [signed-by=/etc/apt/keyrings/jitsi-key.gpg.key] https://download.jitsi.org stable/" | tee /etc/apt/sources.list.d/jitsi.list root@dlp:~# apt update root@dlp:~# apt -y install jitsi-meet # input your hostname Jitsi Meet is installed +---------------+ Configuring jitsi-videobridge2 +---------------+ | The value of the domain that is set in the Jitsi Videobridge | | installation. | | | | The domain of the current installation (e.g. meet.jitsi.com): | | | | dlp.srv.world_________________________________________________ | | | | <Ok> | | | +----------------------------------------------------------------+ # select the way to get certificate # it chooses [I want to use my own certificate] on this example +------+ Configuring jitsi-meet-web-config +------+ | SSL certificate | | | | Let's Encrypt certificates | | I want to use my own certificate | | Generate a new self-signed certificate | | | | | | <Ok> | | | +-------------------------------------------------+ # specify the path of certificate key file +-----------------+ Configuring jitsi-meet-web-config +-----------------+ | The full path to the SSL key file on the server. If it has not been | | uploaded, now is a good time to do so. | | | | Full local server path to the SSL key file: | | | | /etc/letsencrypt/live/dlp.srv.world/privkey.pem______________________ | | | | <Ok> | | | +-----------------------------------------------------------------------+ # specify the path of certificate file +-------------------+ Configuring jitsi-meet-web-config +-------------------+ | The full path to the SSL certificate file on the server. If you haven't | | uploaded it, now is a good time to upload it in another console. | | | | Full local server path to the SSL certificate file: | | | | /etc/letsencrypt/live/dlp.srv.world/fullchain.pem________________________ | | | | <Ok> | | | +---------------------------------------------------------------------------+ # enable or not dial-in support # it chooses [no] on this example +------------------+ Configuring jitsi-meet-web-config +------------------+ | | | You can easily add dial-in support to your meetings. To allow this we | | would need your permission to create a free JaaS (Jitsi as a Service) | | account for you. | | | | Add telephony to your Jitsi meetings? | | | | <Yes> <No> | | | +-------------------------------------------------------------------------+ |
| [3] | Configure Jitsi Meet to enable authentication feature. |
|
root@dlp:~#
vi /etc/prosody/conf.avail/dlp.srv.world.cfg.lua # line 39 : change to enable authentication VirtualHost "dlp.srv.world" authentication = "internal_hashed" -- do not delete me ..... ..... # add the block below under the [VirtualHost] block above # for [guest.(your hostname)], it is used in Jitsi internal, so it does not need to create DNS record VirtualHost "guest.dlp.srv.world" authentication = "anonymous" c2s_require_encryption = false
root@dlp:~#
vi /etc/jitsi/meet/dlp.srv.world-config.js
var config = {
    // Connection
    //

    hosts: {
        // XMPP domain.
        domain: 'www.server.education',

        // When using authentication, domain for guest users.
        // line 36 : uncomment and change to your hostname after [guest] word
        anonymousdomain: 'guest.dlp.srv.world',
root@dlp:~#
vi /etc/jitsi/jicofo/jicofo.conf
jicofo {
  # add [authentication] block
  authentication: {
    enabled: true
    type: XMPP
    login-url: "dlp.srv.world"
  }
  xmpp: {
    client: {
.....
.....
# add users # prosodyctl register (username) (hostname) (password) root@dlp:~# prosodyctl register serverworld dlp.srv.world mypassword |
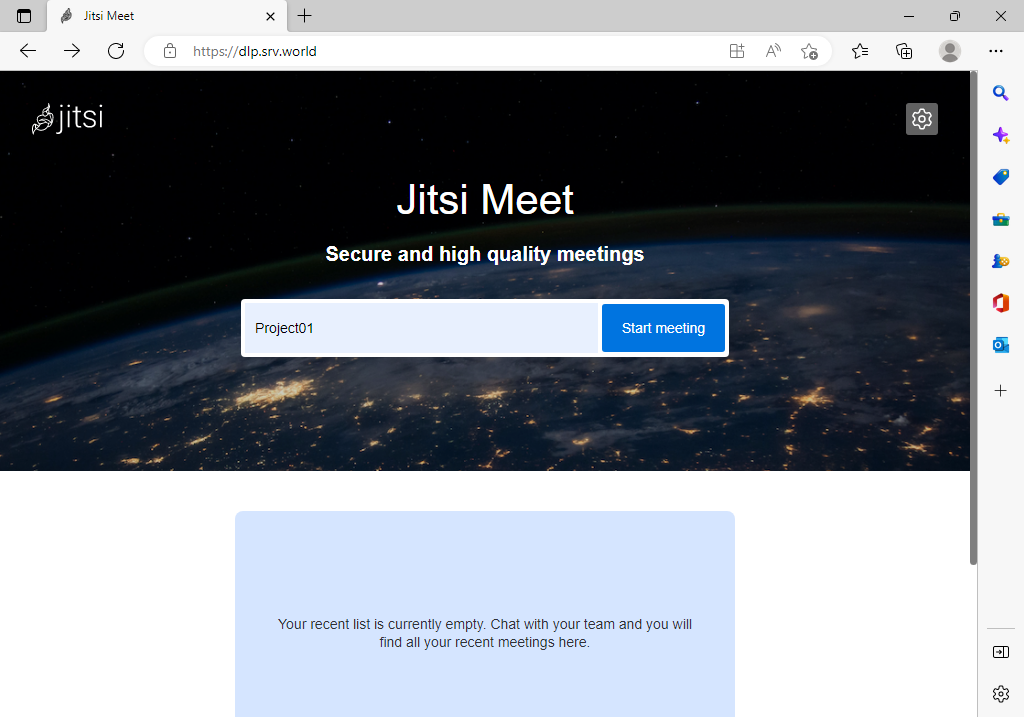
| [4] | Access to the URL of the hostname you did input during the installation with an web browser from any client computer, then Jitsi Meet site is shown. Input any conference name and click [Start meeting] button. |
|
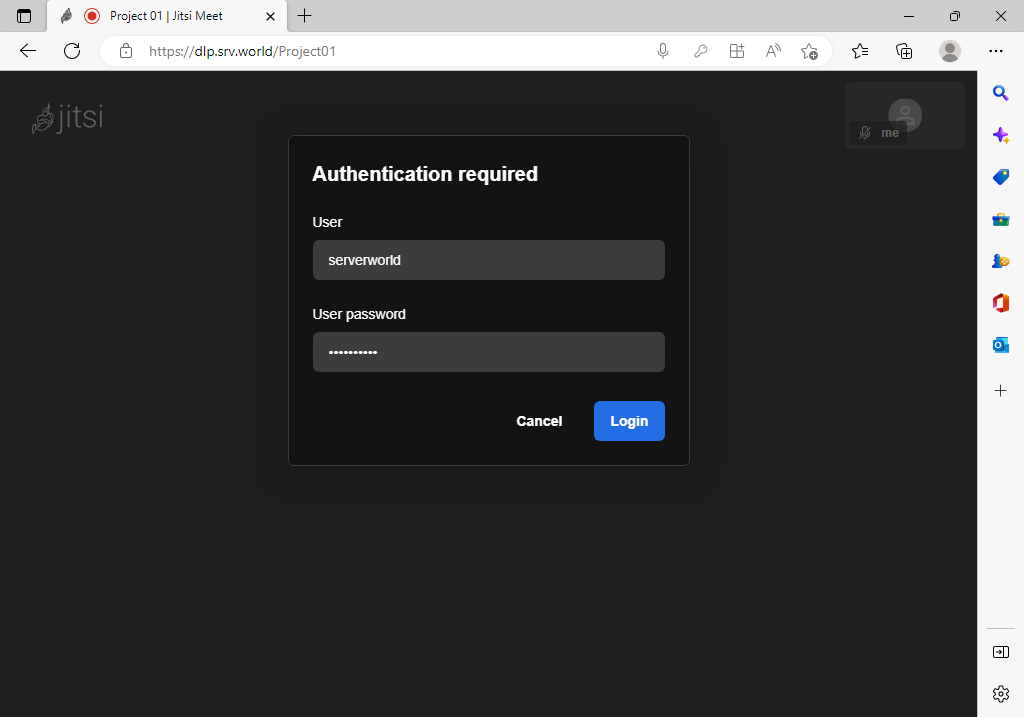
| [5] | Input an username and password you added. |
|
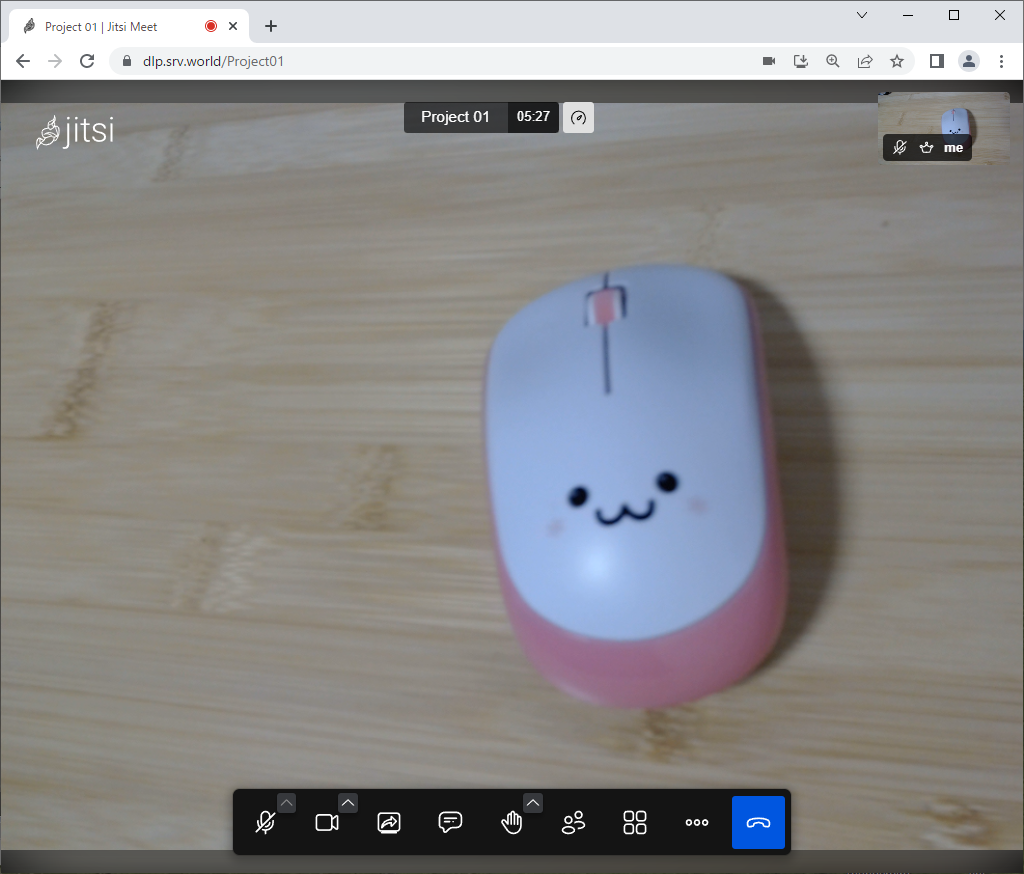
| [6] | After successfully authentication, you can join on the meeting. |
|
Matched Content