Proxmox VE 9 : Install2026/01/15 |
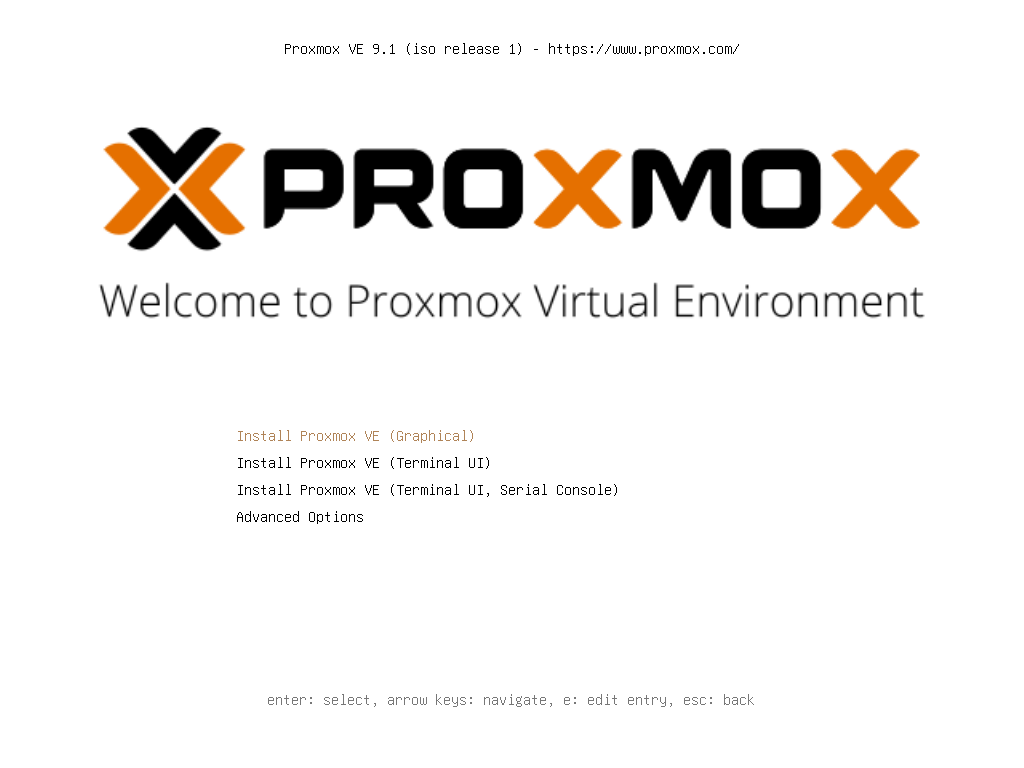
| [1] | Insert the installation USB memory stick or DVD you created into your computer and start it up. The Proxmox VE 9 installer will then launch. Press Enter to proceed with the GUI installation. |
|
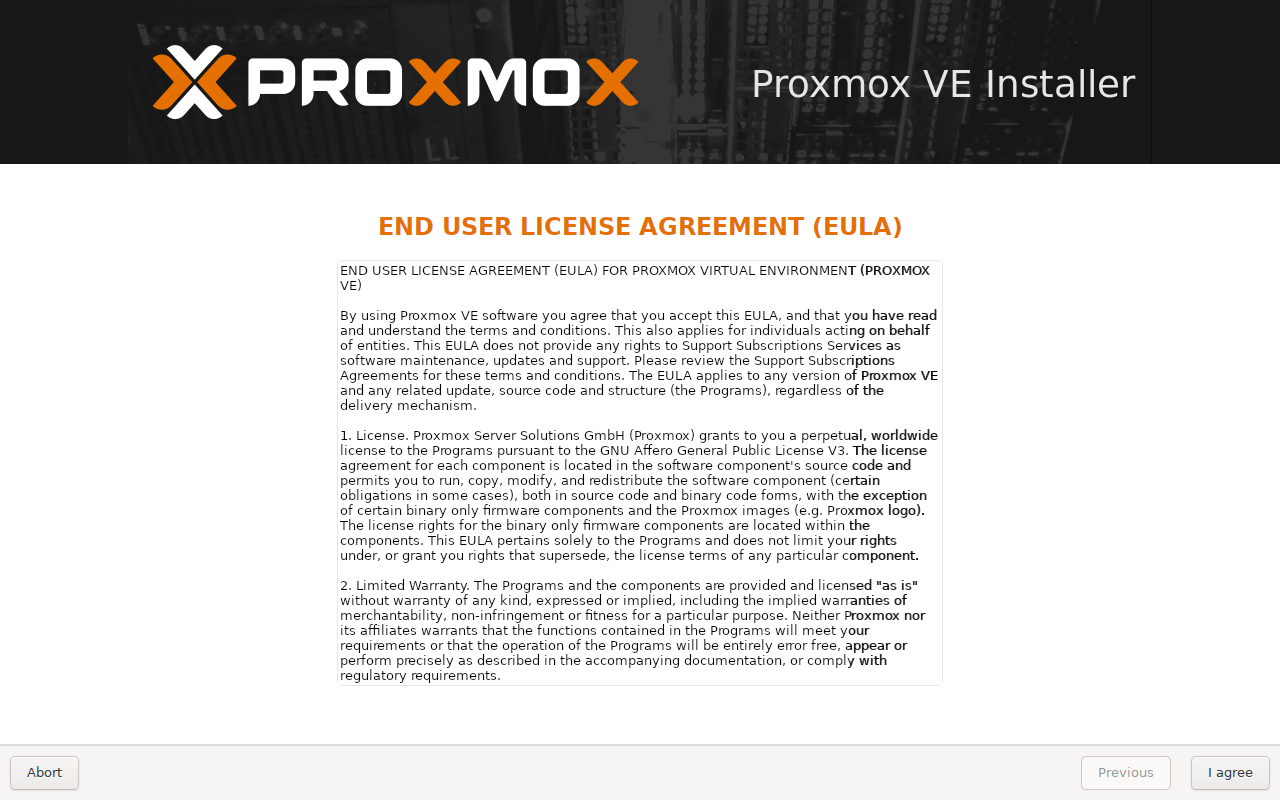
| [2] | Click the [I agree] button to proceed. |
|
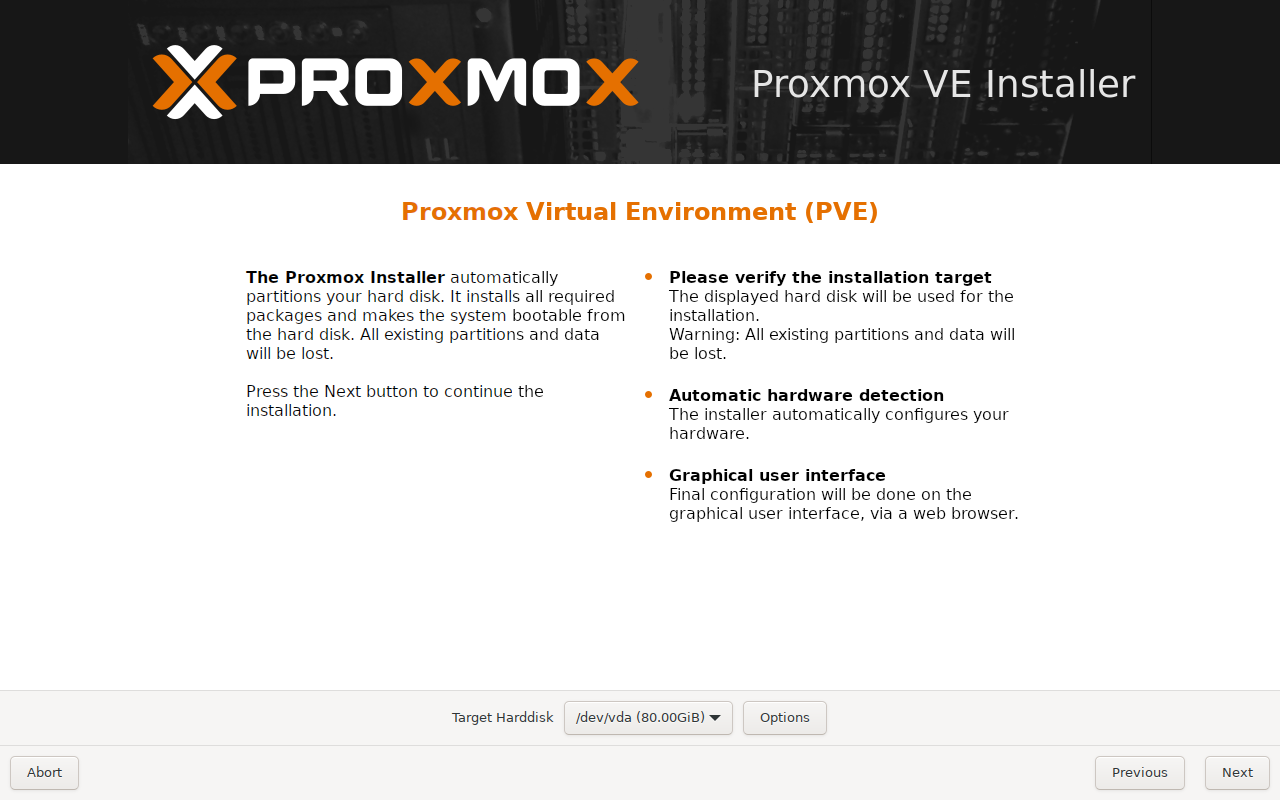
| [3] | Select the disk to install to and proceed to next step. |
|
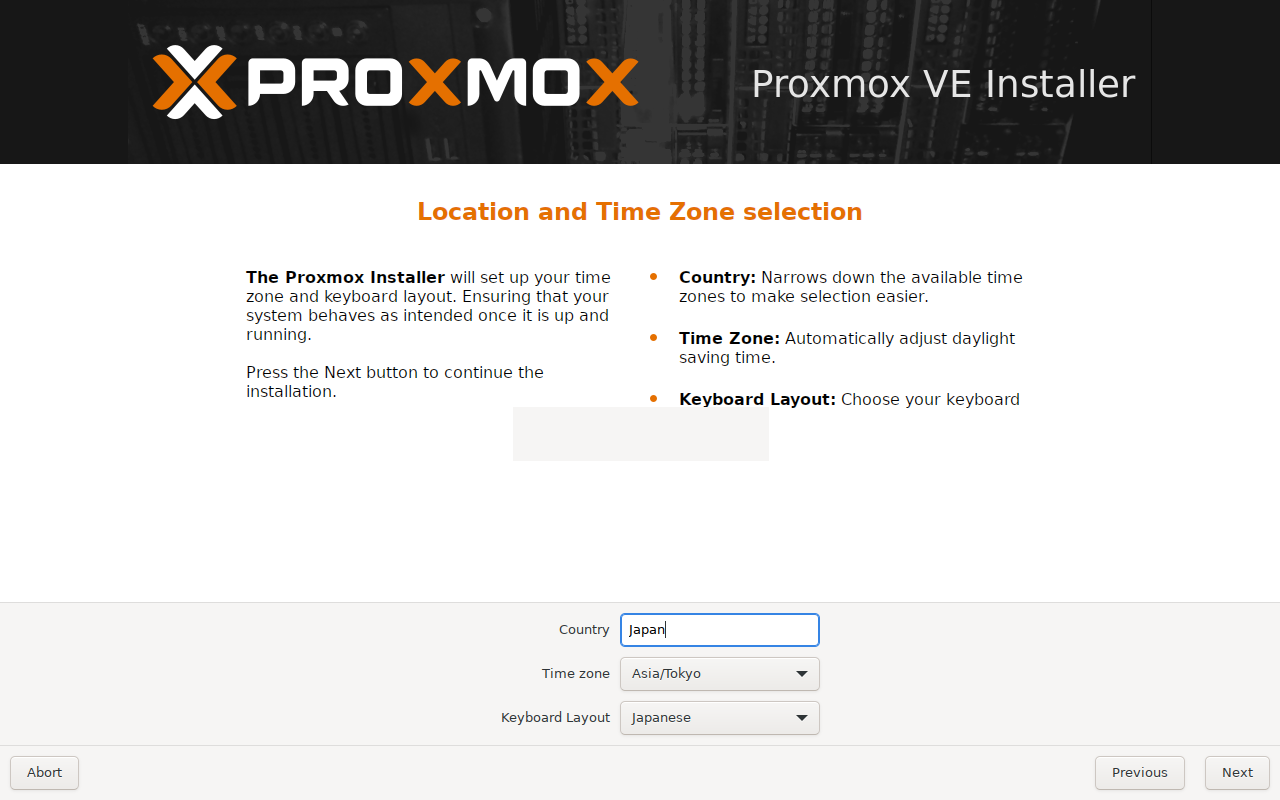
| [4] | Select your region, time zone, and keyboard layout and proceed. |
|
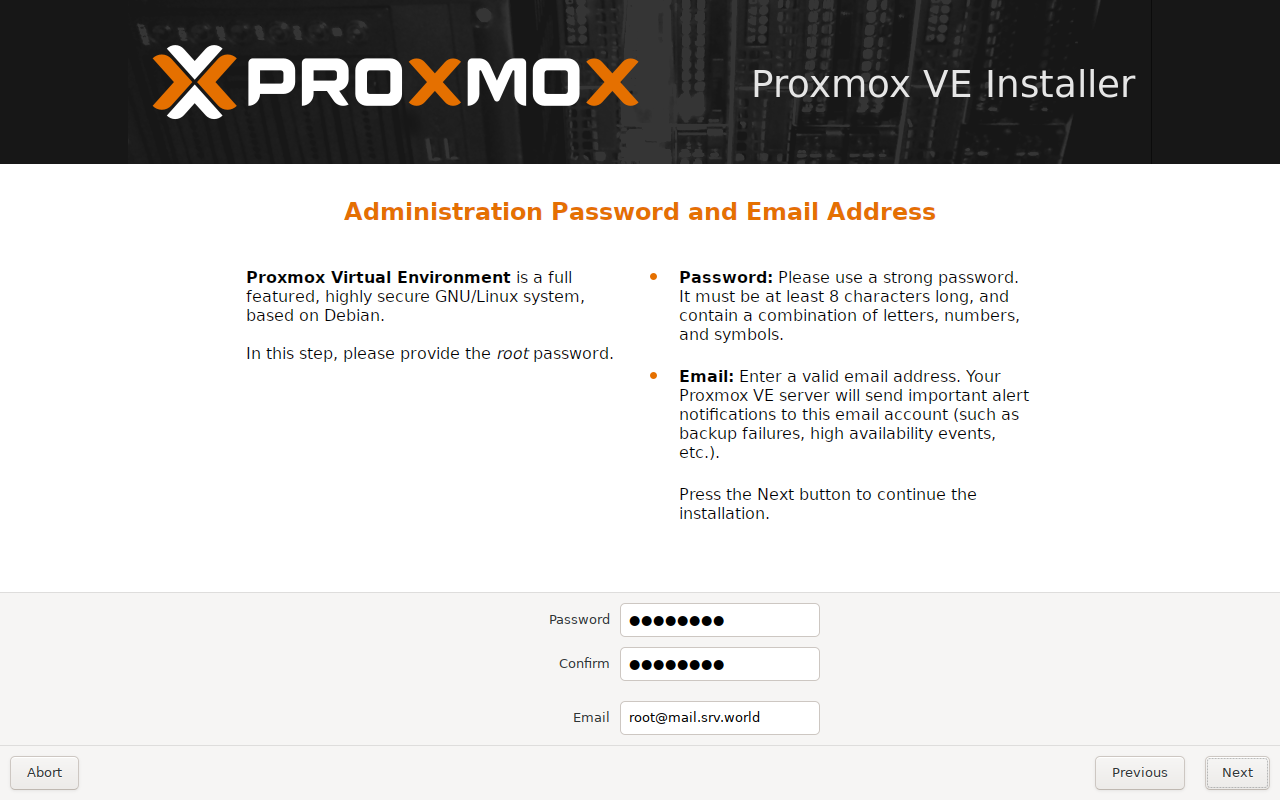
| [5] | Enter the password for the administrator account and the email address to receive notifications of any issues, then proceed to the next step. |
|
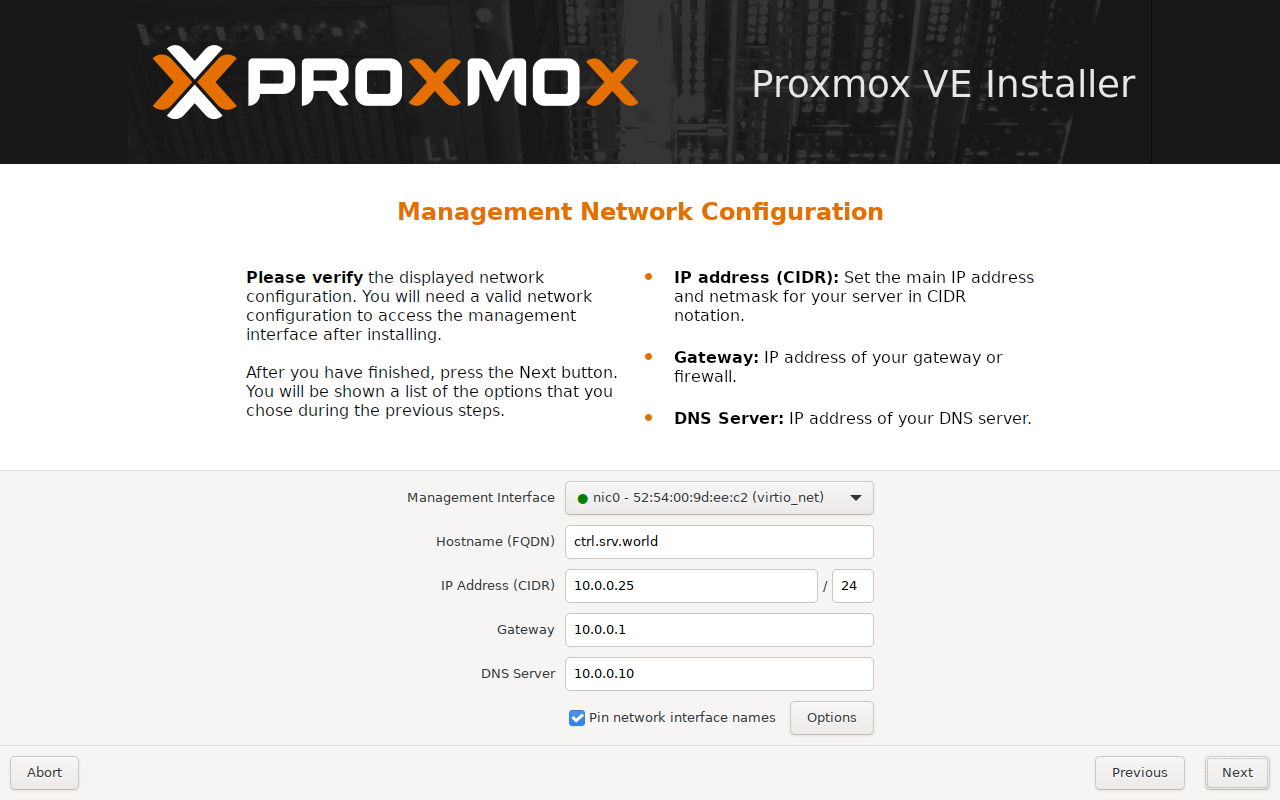
| [6] | Set the hostname, IP address, etc. and proceed to the next step. |
|
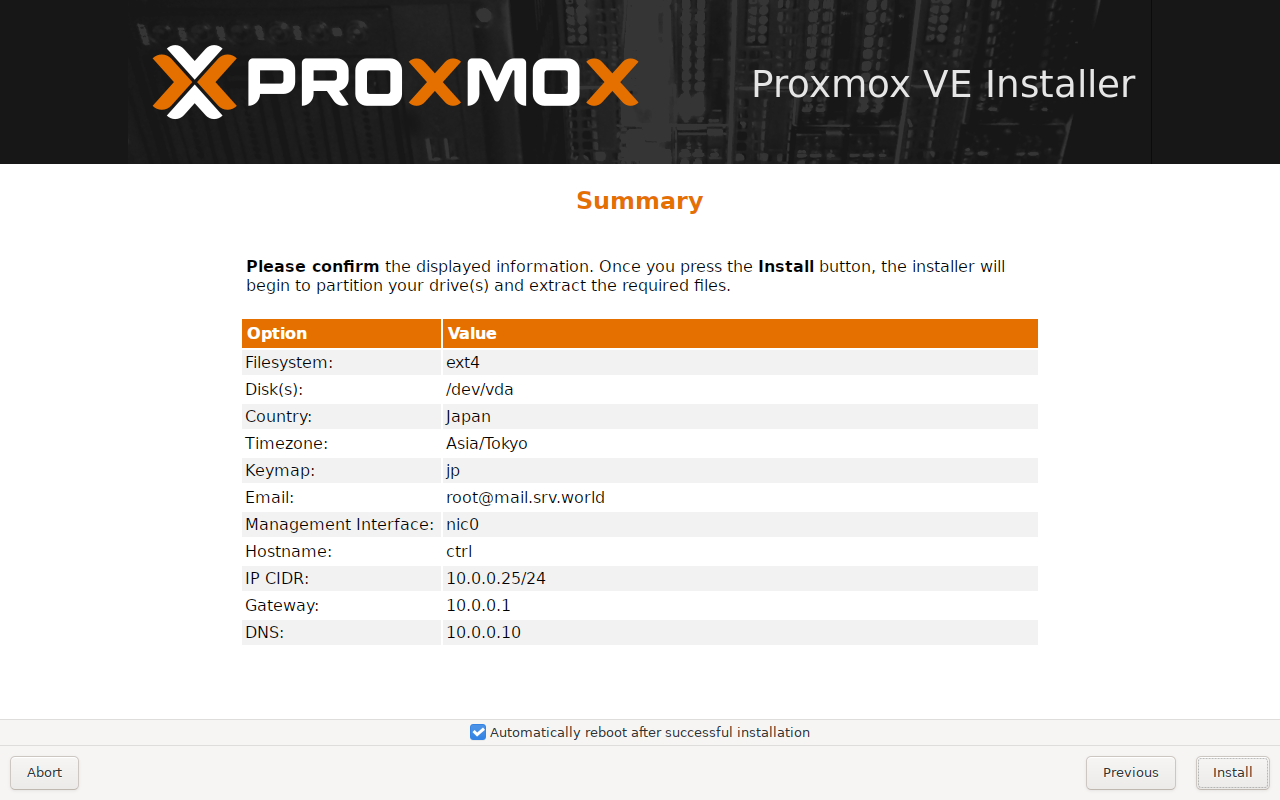
| [7] | Confirm your selections. If there are no problems, click the [Install] button to begin the installation. |
|
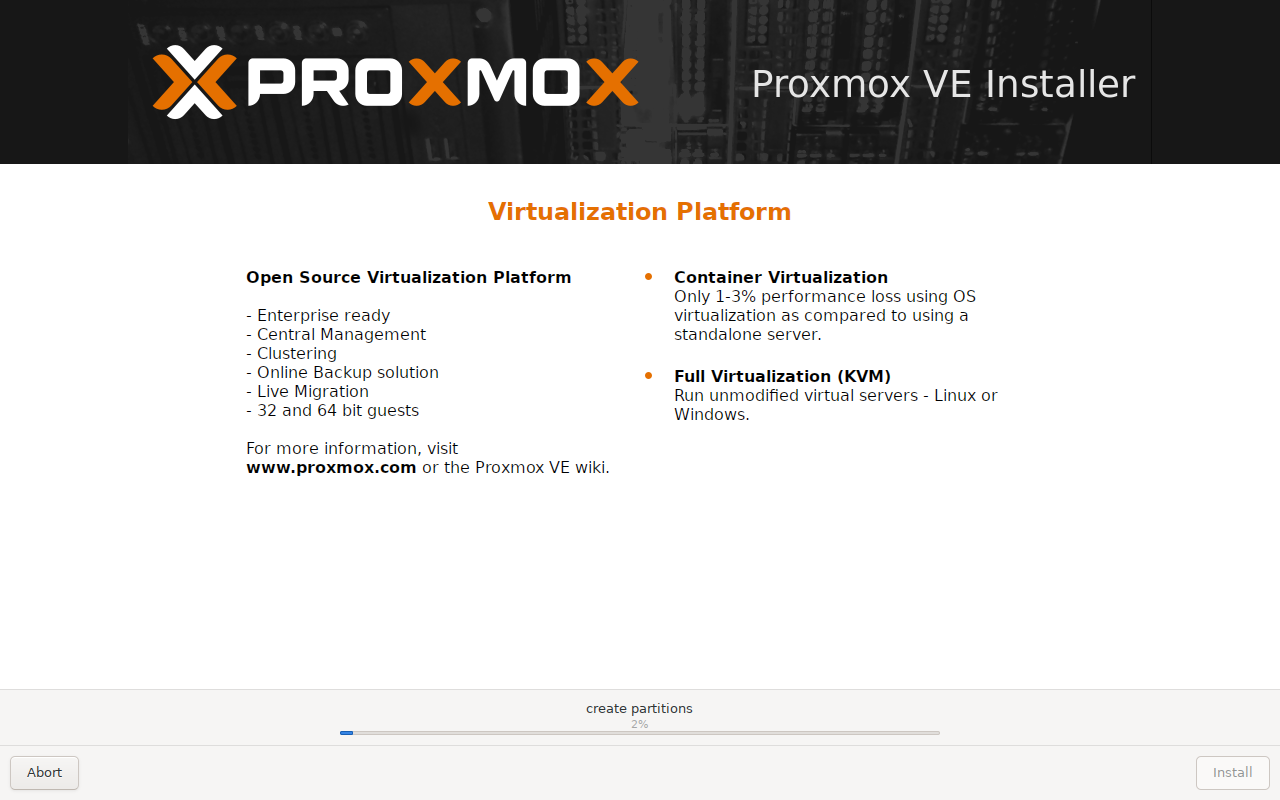
| [8] | The installation will proceed and the system will automatically reboot once it is complete. |
|
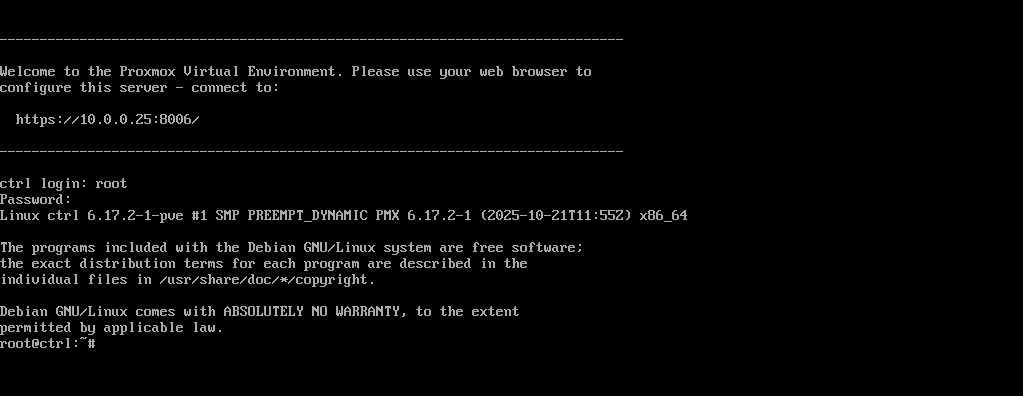
| [9] | After restarting the system, if it boots successfully, the following screen will appear. You can log in to the system using the administrator account name [root] and the password set in [5]. If you can log in successfully, the installation is complete. |
|
Matched Content