oVirt 4.4 : Add ISO Domains2020/07/13 |
|
Add ISO Domains that ISO images are located for VM installation and so on.
This example is based on the environment like follows.
+-----------------------+          |          +-----------------------+
|   [   Admin Node   ]  |10.0.0.30 | 10.0.0.25| [    oVirt Engine   ] |
|    dlp.srv.world      +----------+----------+     ctrl.srv.world    |
|                       |          |          |                       |
+-----------------------+          |          +-----------------------+
                                   |
+-----------------------+          |          +-----------------------+
| [   Shared Storage  ] |10.0.0.35 | 10.0.0.51|  [   oVirt Node    ]  |
|     nfs.srv.world     +----------+----------+   node01.srv.world    |
|                       |                     |                       |
+-----------------------+                     +-----------------------+
|
| [1] | Configure share for an ISO Domain on NFS server. Set [/var/lib/ovirt-share/iso] for it on this example. |
|
[root@nfs ~]# mkdir -p /var/lib/ovirt-share/iso [root@nfs ~]# chown vdsm:kvm /var/lib/ovirt-share/iso
[root@nfs ~]#
vi /etc/exports.d/ovirt-engine-iso-domain.exports # set share for ISO Domain (replace for your environment)
/var/lib/ovirt-share/iso 10.0.0.0/24(rw)
[root@nfs ~]# systemctl restart nfs-server |
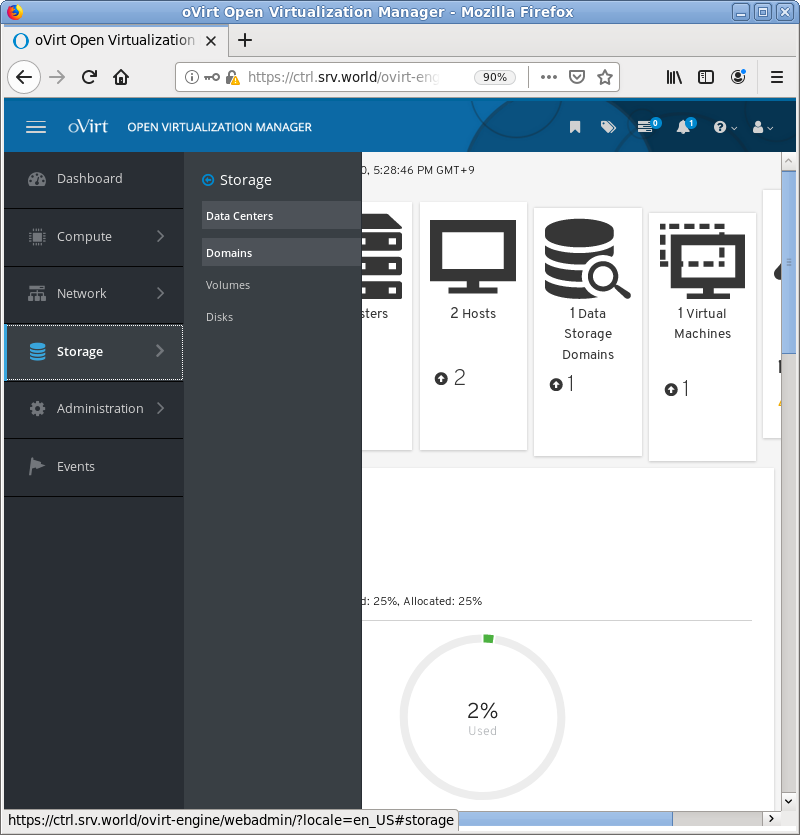
| [3] | Login to oVirt Web Admin Portal and Click [Storage] - [Domains] on the left pane. |
|
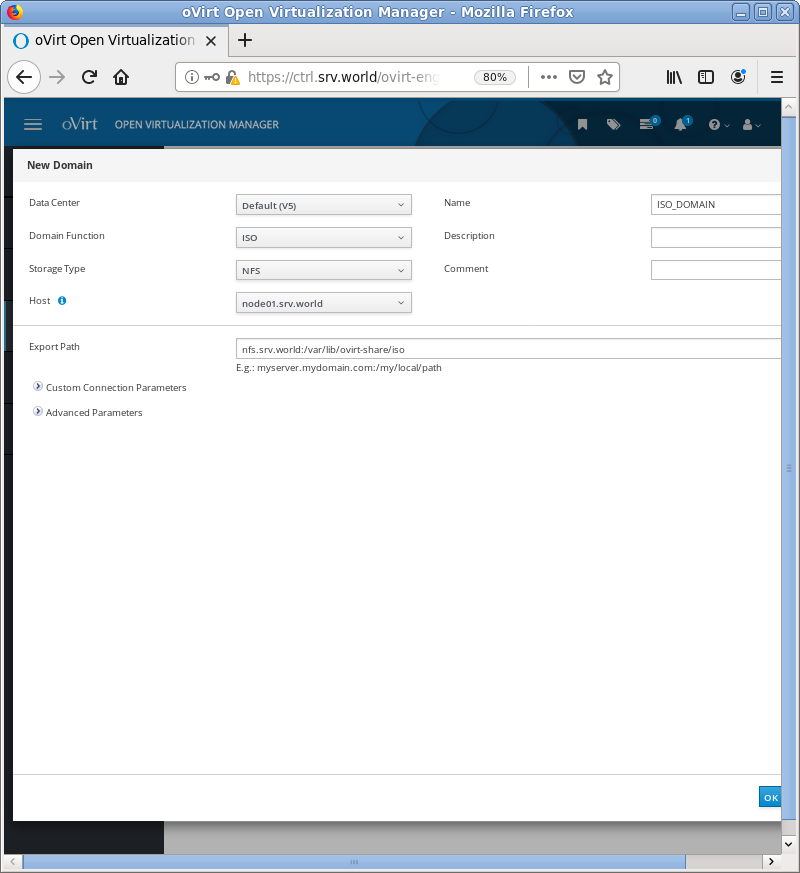
| [4] | Click [New Domain] button on the top of right pane. |

|
| [5] | Input any name for [Name] field, select [ISO] for [Domain Function] field, input the share path on NFS Server for [Export Path] field. For other items, they are optional. |
|
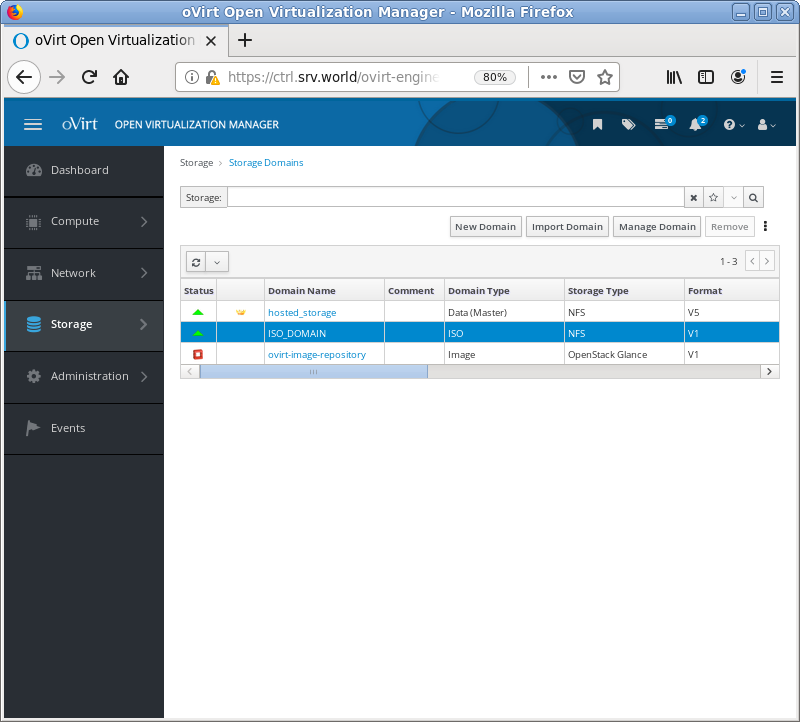
| [6] | If succeccfully configured, new ISO Domain is attached to selected [Data Center] and activated. |
|
Matched Content