Postfix 設定ツール - PostfixAdmin2014/08/23 |
|
Postfix を Web ベース GUI で設定できる PostfixAdmin をインストールします。
|
|
| [1] | |
| [2] |
こちらを参考に PHP をインストールしておきます。
|
| [3] | |
| [4] | PostfixAdmin 用のユーザーとデータベースを作成します。 |
|
[root@mail ~]# mysql -u root -p Enter password: Welcome to the MySQL monitor. Commands end with ; or \g. Your MySQL connection id is 10 Server version: 5.1.73 Source distribution Copyright (c) 2000, 2013, Oracle and/or its affiliates. All rights reserved. Oracle is a registered trademark of Oracle Corporation and/or its affiliates. Other names may be trademarks of their respective owners. Type 'help;' or '\h' for help. Type '\c' to clear the current input statement. # 「postfixadmin」データベース作成 ( 'password'の箇所は設定するパスワードを入力 )
mysql>
create database postfixadmin; Query OK, 1 row affected (0.00 sec)
mysql>
grant all privileges on postfixadmin.* to postfixadmin@'localhost' identified by 'password'; Query OK, 0 rows affected (0.00 sec)
mysql>
mysql> flush privileges; Query OK, 0 rows affected (0.00 sec) exit Bye |
| [5] | PostfixAdmin をインストールします。PostfixAdmin は最新のものを確認してダウンロードしてください) |
|
[root@mail ~]#
yum -y install php-mysql php-imap
[root@mail ~]#
[root@mail ~]# wget http://ftp.jaist.ac.jp/pub/sourceforge/p/po/postfixadmin/postfixadmin/postfixadmin-2.91/postfixadmin-2.91.tar.gz tar zxvf postfixadmin-2.91.tar.gz [root@mail ~]# mv postfixadmin-2.91 /var/www/html/postfixadmin
[root@mail ~]#
vi /var/www/html/postfixadmin/config.inc.php # 25行目:変更 $CONF['configured'] = true ;
# 30行目:後から変更(後ほどのWebセットアップ[5]で生成されるハッシュ値を入力する) $CONF['setup_password'] = ' xxxxxxxxxx ';
# 34行目:変更 $CONF['default_language'] = ' ja ';
# 85-87行目:PostfixAdmin用に作成したDBの情報に変更 $CONF['database_user'] = ' postfixadmin ';$CONF['database_password'] = ' password ';$CONF['database_name'] = ' postfixadmin ';
[root@mail ~]#
vi /etc/httpd/conf.d/postfixadmin.conf # 新規作成 <Directory /var/www/html/postfixadmin/> Order Deny,Allow Deny from all # アクセス許可IP Allow from 127.0.0.1 10.0.0.0/24 </Directory> chgrp -R apache /var/www/html/postfixadmin/templates_c [root@mail ~]# /etc/rc.d/init.d/httpd restart Stopping httpd: [ OK ] Starting httpd: [ OK ] |
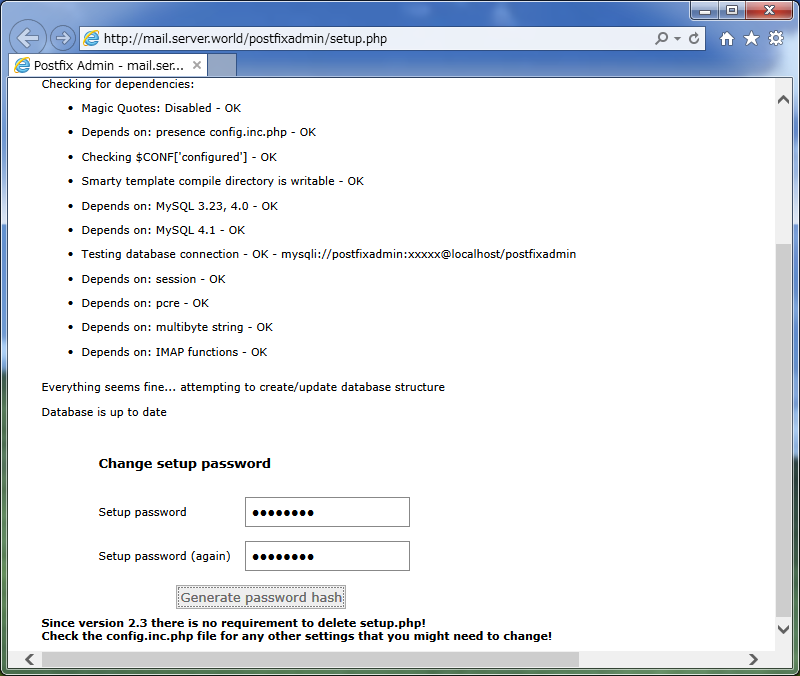
| [6] | クライアントPC で Web ブラウザを起動し、「http://(サーバーのホスト名またはIPアドレス)/postfixadmin/setup.php」にアクセスして、表示された画面を下までスクロールさせます。 ここで任意のパスワードを設定します。パスワードを入力して「Generate password hash」をクリックしてください。 |
|
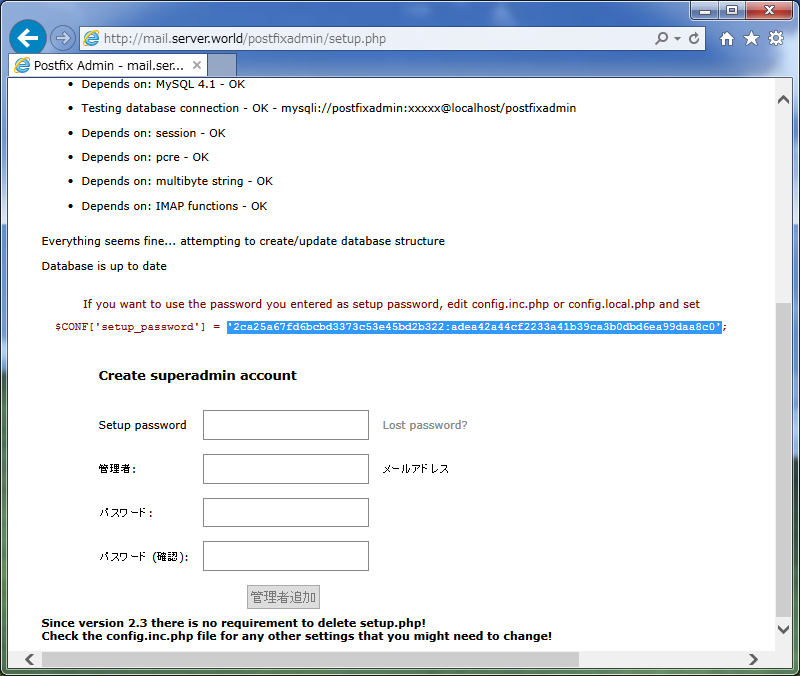
| [7] | 以下のように入力したパスワードのハッシュが生成されます。このハッシュを [5] の [config.inc.php] に戻って、設定ファイルに入力します。 |
|
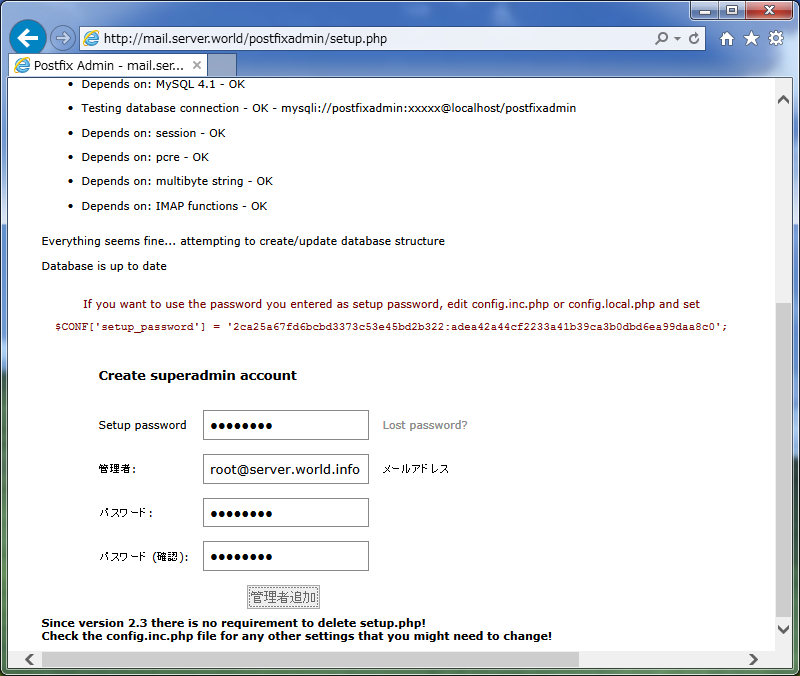
| [8] | 引き続き管理者アカウントの設定をします。[Setup password] には上で設定したパスワードを、[管理者] には任意の管理者アドレスを、 [パスワード] には管理者のパスワードを設定します。すべて入力後、「管理者追加」ボタンをクリックします。 |
|
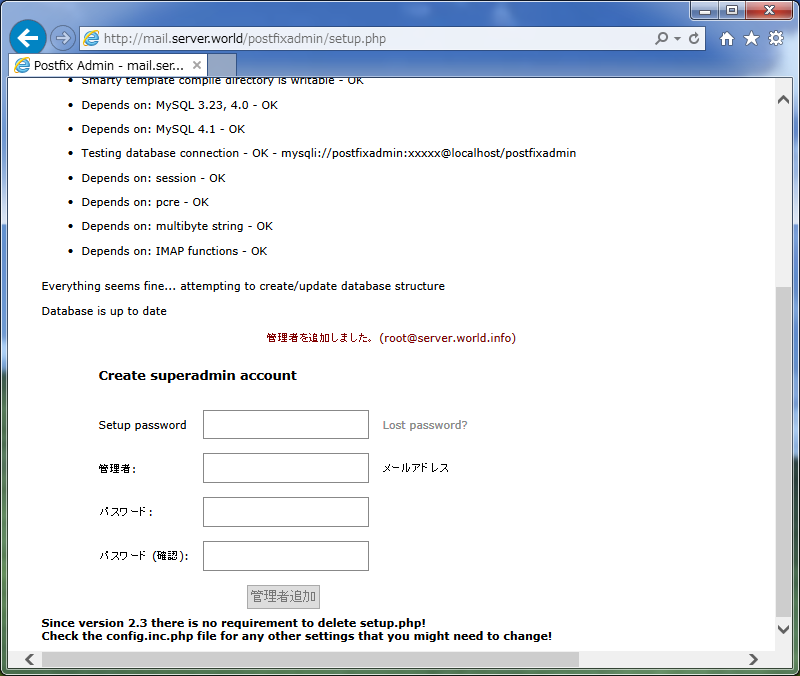
| [9] | 管理者が追加されました。これでセットアップは完了です。 |
|
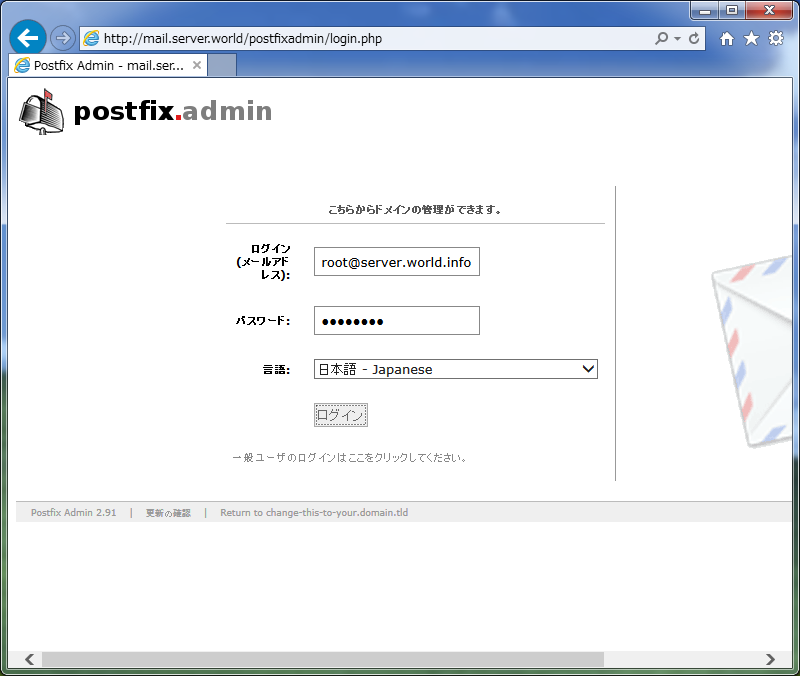
| [10] | 「http://(サーバーのホスト名またはIPアドレス)/postfixadmin/login.php」にアクセスします。 ログイン画面が表示されるので、追加した管理者情報を入力してログインします。 |
|
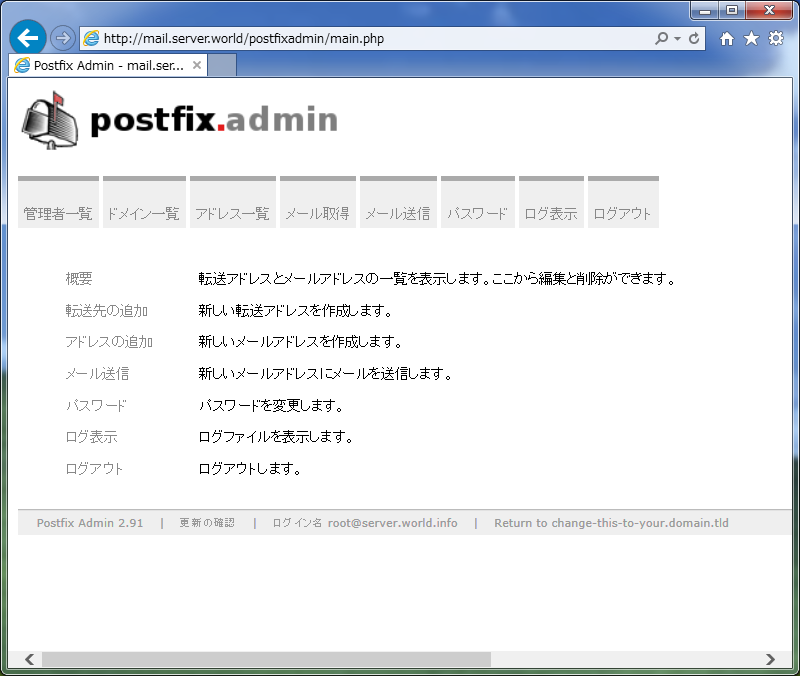
| [11] | ログインできました。ここで Postfix の設定を視覚的に行うことができます。 |
|
関連コンテンツ