Add Datastore (NFS)2024/01/15 |
|
Add Datastore (NFS) to ESXi Host.
On this example, it adds NFS datastore.
ESXi 8 supports NFS v3 and v4.1, this example shows v4.1 mounting. For NFS share, it uses share directory provided from Linux server like here. |
|
| [1] | To configure on shell access, set like follows. |
|
# --hosts=(NFS server's hostname or IP address) # --share=(share directory) # --volume-name=(any datastore name) [root@ctrl:~] esxcli storage nfs41 add --hosts=nfs.srv.world --share=/home/nfsshare --volume-name=NFS-Share [root@ctrl:~] esxcli storage nfs41 list Volume Name Host(s) Share Accessible Mounted Read-Only Security isPE Hardware Acceleration ----------- ------------- -------------- ---------- ------- --------- -------- ----- --------------------- NFS-Share nfs.srv.world /home/nfsshare true true false AUTH_SYS false Not Supported[root@ctrl:~] vim-cmd hostsvc/datastore/info NFS-Share
(vim.host.NasDatastoreInfo) {
name = "NFS-Share",
url = "/vmfs/volumes/21b01854-3302ef65-0000-000000000000",
freeSpace = 167964827648,
maxFileSize = 17592186040320,
maxVirtualDiskCapacity = 17418005980514,
maxMemoryFileSize = 17592186040320,
timestamp = "2024-01-15T07:20:21.014287Z",
containerId =
[root@ctrl:~] esxcli storage filesystem list Mount Point Volume Name UUID Mounted Type Size Free ------------------------------------------------- ------------------------------------------ ----------------------------------- ------- ------ ------------ ------------ /vmfs/volumes/21b01854-3302ef65-0000-000000000000 NFS-Share 21b01854-3302ef65-0000-000000000000 true NFS41 167964856320 167964827648 /vmfs/volumes/65a4d8f4-5bbdd866-c7e6-5254003acc4c VM-Data 65a4d8f4-5bbdd866-c7e6-5254003acc4c true VMFS-6 171530256384 170019258368 /vmfs/volumes/65a4da79-81043fb4-8353-5254003acc4c ISO-DATA 65a4da79-81043fb4-8353-5254003acc4c true VMFS-6 171530256384 170019258368 /vmfs/volumes/658296fd-86bd1530-6a78-5254003acc4c OSDATA-658296fd-86bd1530-6a78-5254003acc4c 658296fd-86bd1530-6a78-5254003acc4c true VMFSOS 77040975872 73569140736 /vmfs/volumes/0df11024-834cb32d-0dac-c488aa9626f7 BOOTBANK1 0df11024-834cb32d-0dac-c488aa9626f7 true vfat 4293591040 4000382976 /vmfs/volumes/e704ddac-404e317b-7284-6597e86d9b29 BOOTBANK2 e704ddac-404e317b-7284-6597e86d9b29 true vfat 4293591040 4293525504 # for unmounting, run like follows [root@ctrl:~] esxcli storage nfs41 remove --volume-name=NFS-Share |
|
To add Datastore on VMware Host Client, Configure like follows.
|
|
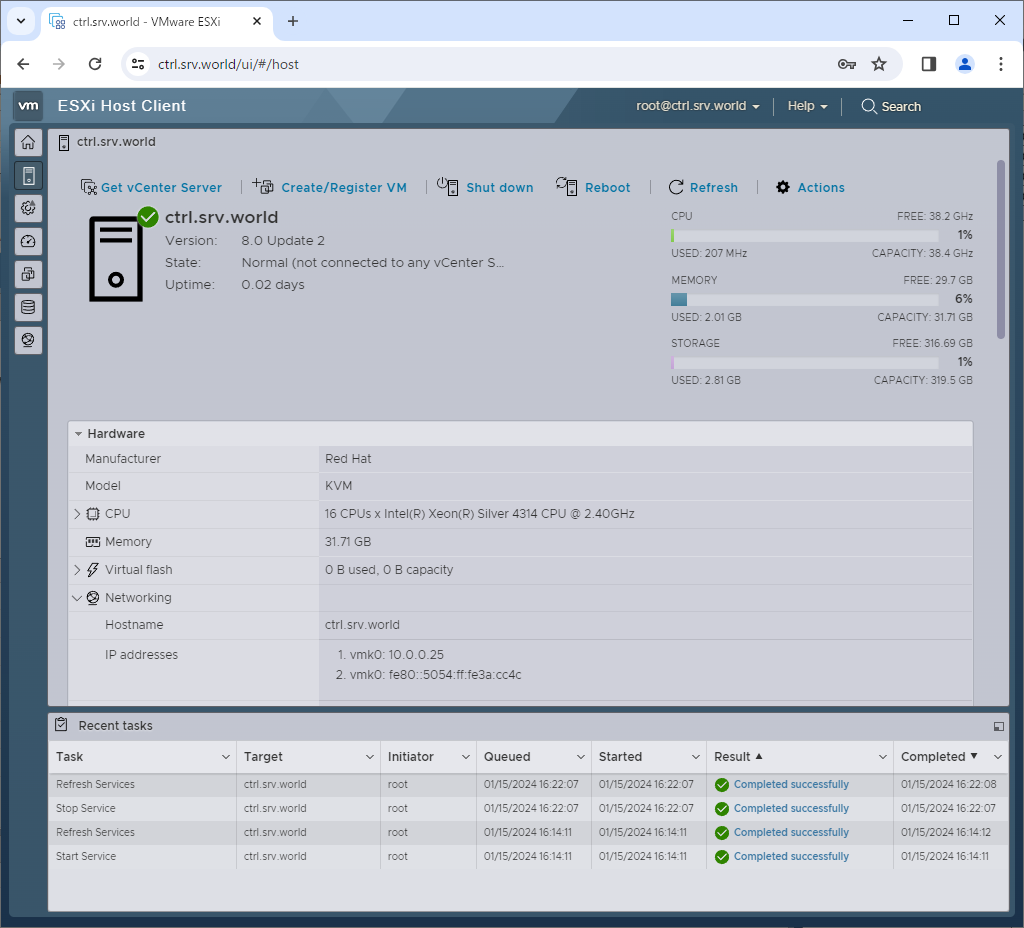
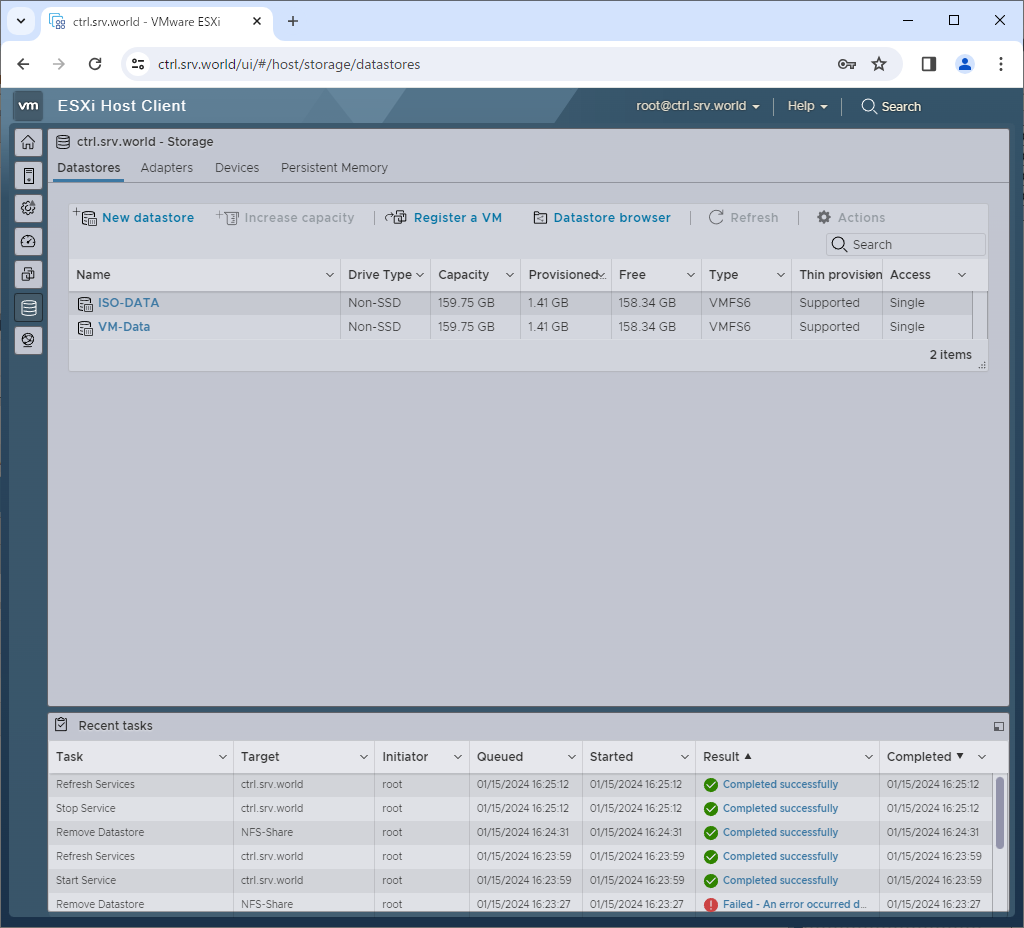
| [2] | Login to VMware Host Client with root user account and click [Storage] icon that is under [Navigator] menu. |
|
| [3] | Click [New datastore] button. |
|
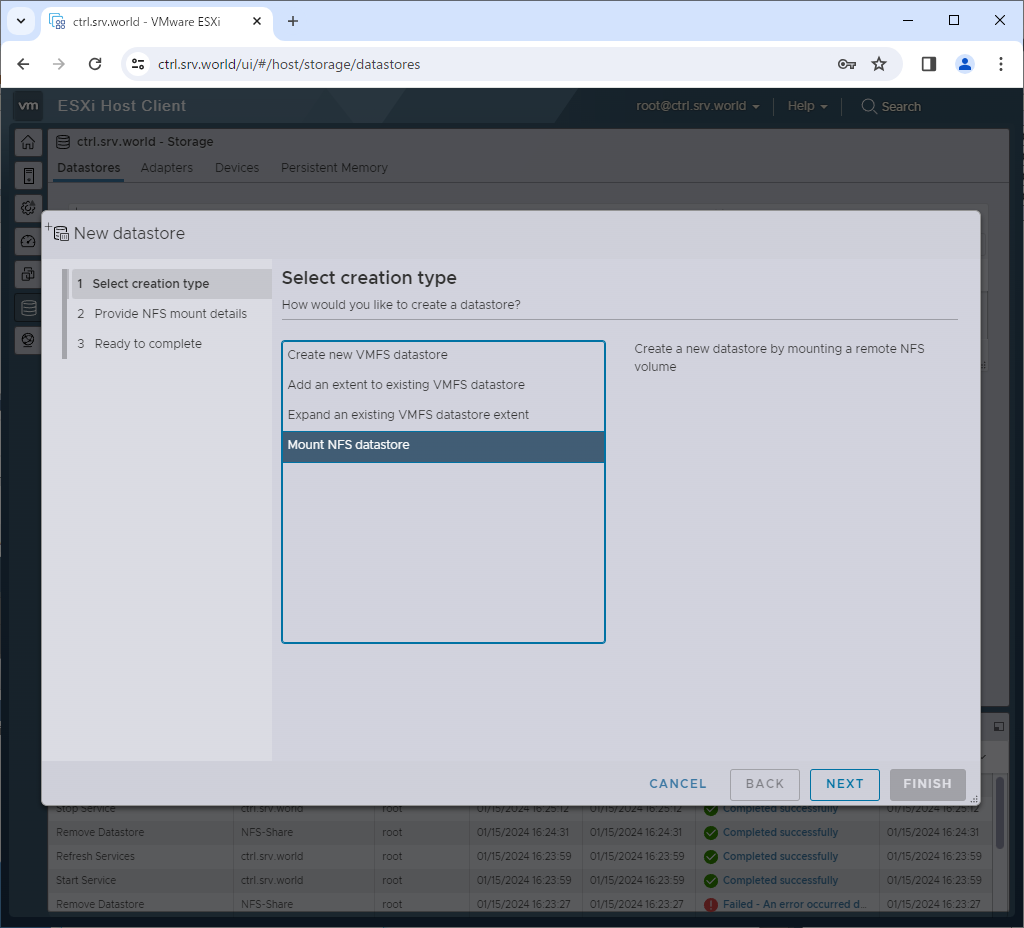
| [4] | Select [Mount NFS datastore]. |
|
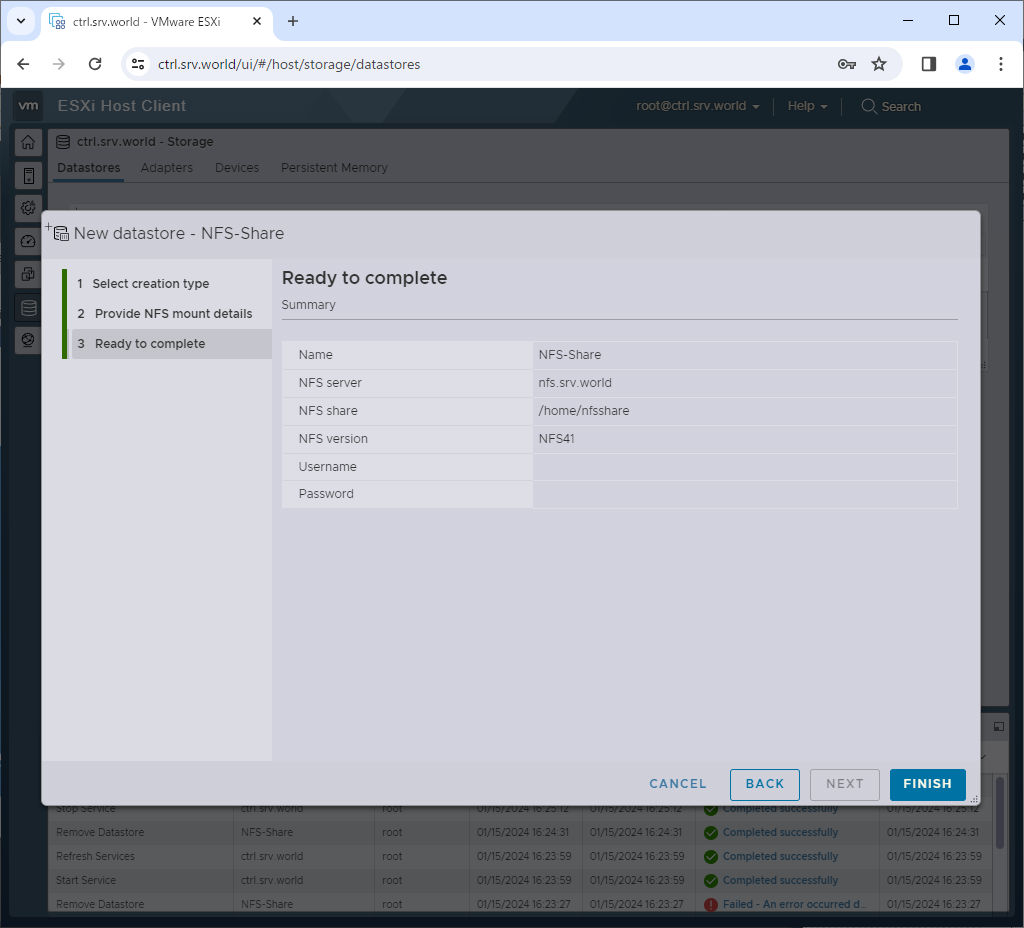
| [5] | Input NFS share information to mount. For Username/Password, it's optional, OK to keep blank if you have not configured NFS server to require authentication. |

|
| [6] | Click [Finish] button. |
|
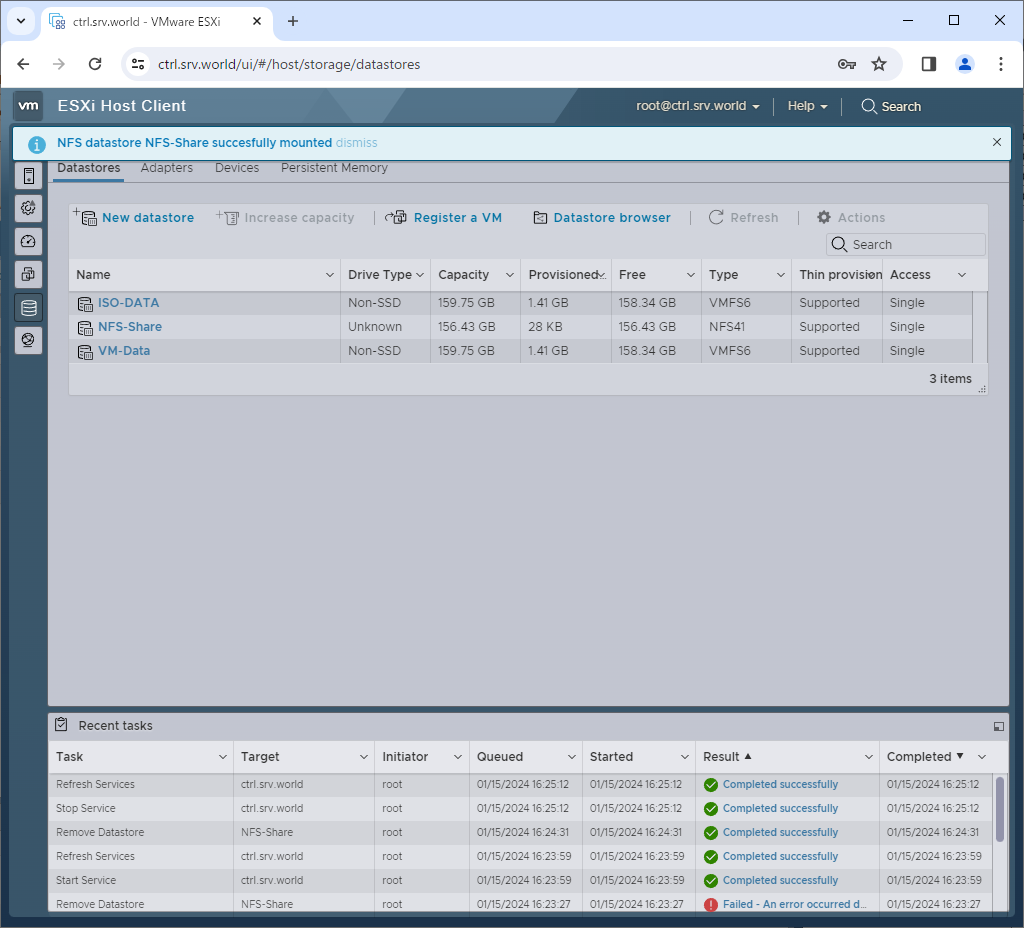
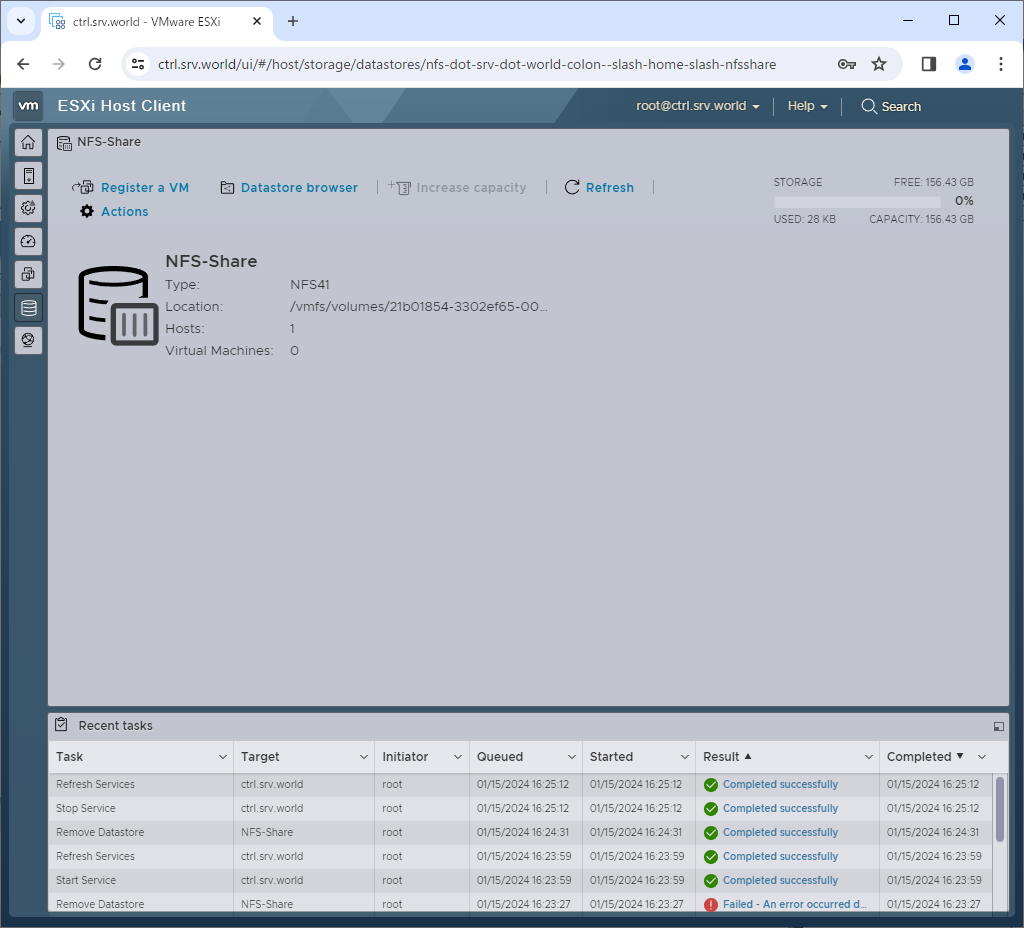
| [7] | After new NFS Datastore successfully added, it is listed on Datastores table like follows. |
|
|
Matched Content