ZABBIX - Add Hosts for Monitored #12010/05/03 |
| It's possible to monitor other Hosts to install ZABBIX Agent in them.
|
|
| [1] | Install ZABBIX Agent in a Host you'd like to monitor. This example shows to install it in CentOS 5, the procedure is almost the same to ZABBIX Server. |
|
[root@dlp ~]# rpm -Uvh http://www.zabbix.jp/rpms/rhel5/i386/zabbix-jp-release-5-1.noarch.rpm Preparing... ################################ [100%] 1:zabbix-jp-release ################################ [100%] [root@dlp ~]# vi /etc/yum.repos.d/zabbix-jp.repo [zabbix-jp] name=ZABBIX-JP - $basearch baseurl=http://www.zabbix.jp/rpms/rhel5/$basearch/ enabled= 0 # change gpgcheck=1 gpgkey=file:///etc/pki/rpm-gpg/RPM-GPG-KEY-ZABBIX-JP [root@dlp ~]# yum --enablerepo=zabbix-jp -y install zabbix-agent [root@dlp ~]# vi /etc/zabbix/zabbix_agentd.conf # line 11: change to ZABBIX server's IP address Server= 192.168.0.9 # line 28: change to own IP address ListenIP= 192.168.0.250 [root@dlp ~]# /etc/rc.d/init.d/zabbix-agent start Starting zabbix agent: [ OK ]
|
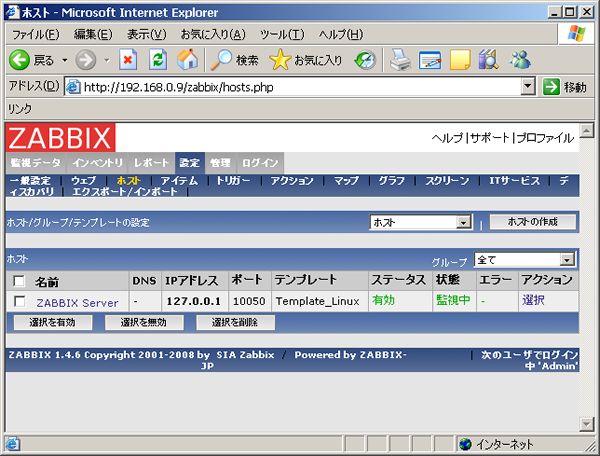
| [2] | Login to ZABBIX server's site and Open "Config" - "Host" and Click 'Create a Host' in it. |
|
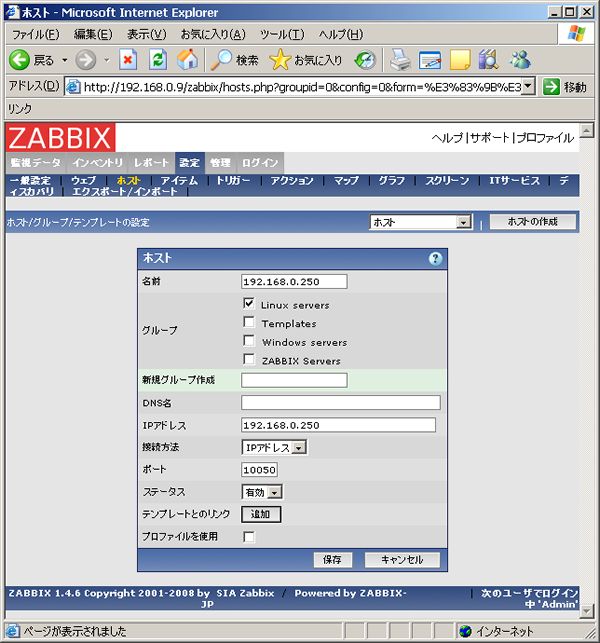
| [3] | Input any name you like in Name field and also input the DNS name in DNS field. (this example keeps DNS empty) Furthermore, input IP address of a Host you's like to monitor. The way of connection is IP address because this example keeps DNS name empty. Next, Click 'Add' button. |
|
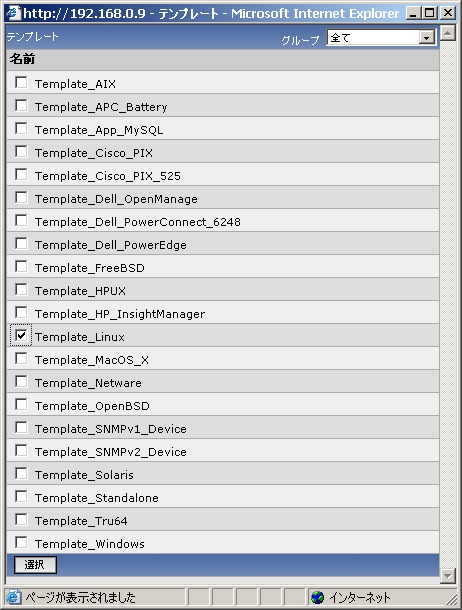
| [4] | Select all in 'group' field that is at right head. Next, check a box in 'Template_Linux' and Click 'Select' button that is at the bottom. |
|
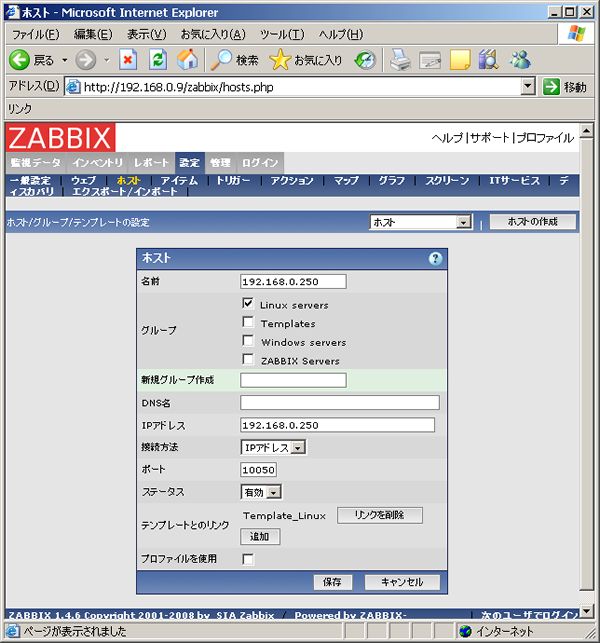
| [5] | Click 'Save' button taht is at the bottom. |
|
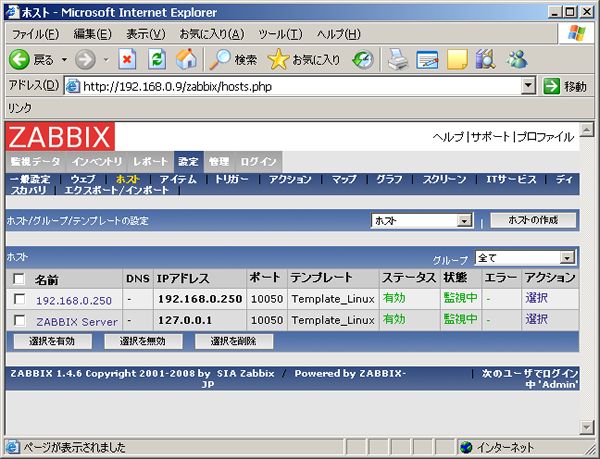
| [6] | New Host has been just added. |
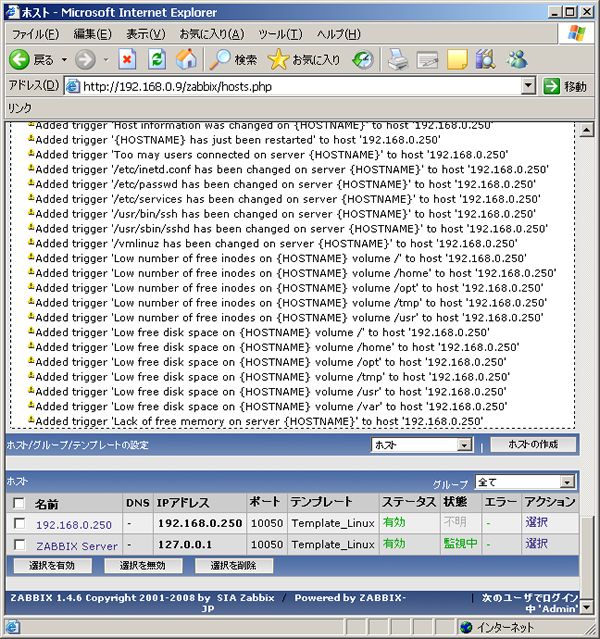
|
| [7] | After adding, the status is "unknown" but it will turn "monitoring" a few minites later. |
|
Matched Content